Data Upload
Last update:2026-01-27 11:03:56
The data upload feature allows users to transfer log data to specified target endpoints via multiple protocols.
You can configure the target Domain (only applicable to platform native data), select log fields, define log formats, and other parameters to enable accurate data delivery.
The system supports the following target types: Custom HTTPS, S3-Compatible, FTP/SFTP, Splunk, Syslog, Kafka, Aliyun SLS, and Rsync. For more details, please refer to Create an Upload Target.
This article describes how to perform the data upload operation.
Operation Steps
-
Go to the Log Service Platform.
-
Click Log Library in the navigation bar.
-
On the Log Library List page, locate the required log and click the
 button on the right to enter the data consumption page.

-
On the Create Data Consumption page, select the Data Upload consumption type.
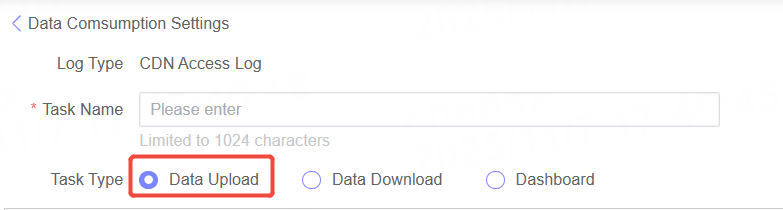
Data Upload
Step 1: Select Product/Domain

This step is required only for platform-native data.
| Name | Description |
|---|---|
| Activation Granularity | Supports selection of the required domains by product or domain. When product is selected, all domains under the selected product are enabled by default. When enabling by domain, you need to specify the domain, and you can filter domains by selecting a product. |
| Select Product/Domain | Choose the product or domain that needs to be enabled. |
| Domain List | Displays all domains under the selected product or the domains you have already selected. |
Step 2: Select Fields and File Configuration
Select Fields
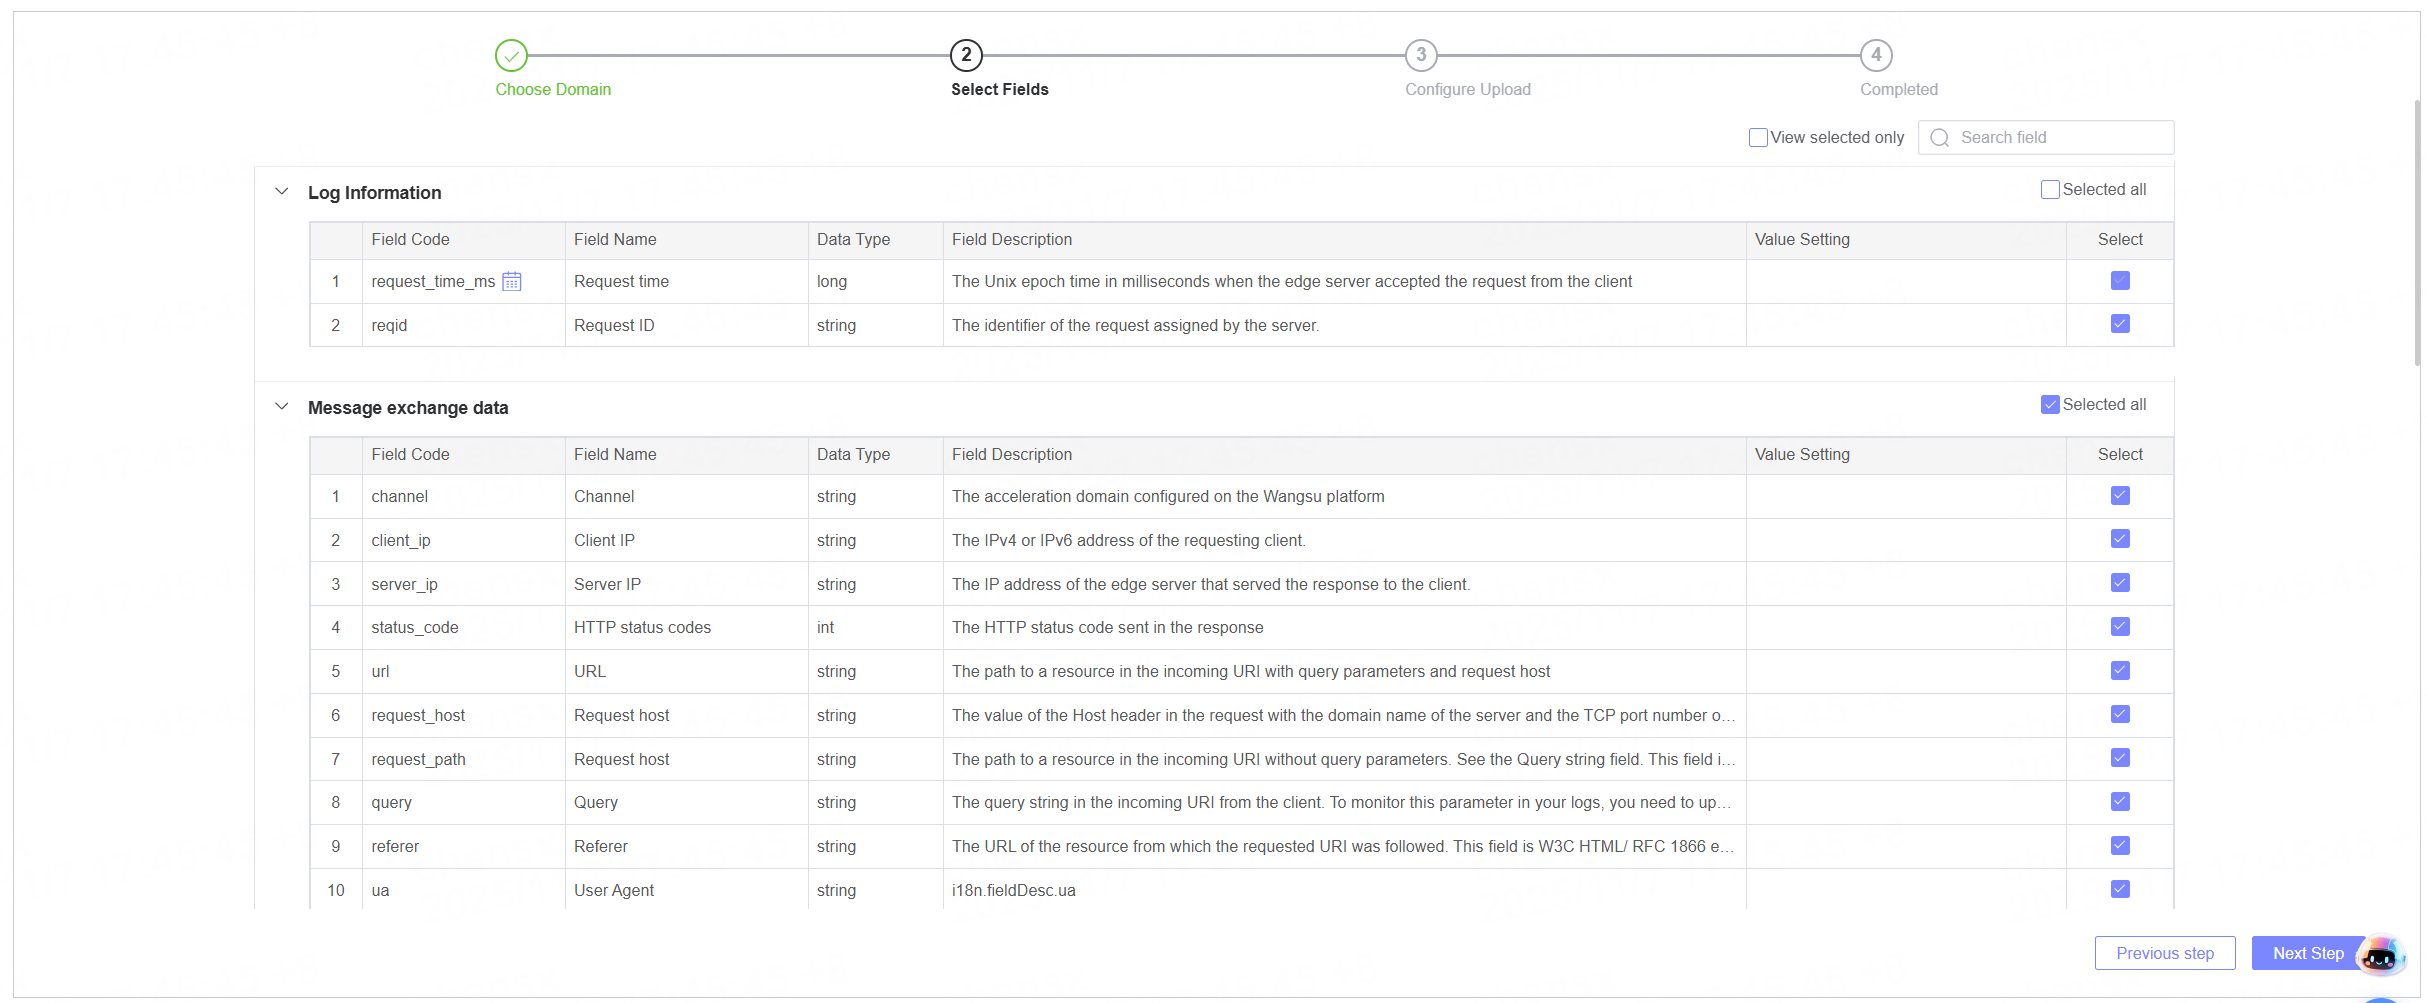
- The system displays field categories for the selected logs (limited to native platform data), field codes, field names, data types, and descriptions. Users can select fields according to their requirements.
- The Time Field is a mandatory option. It is selected by default and cannot be deselected.
File Configuration
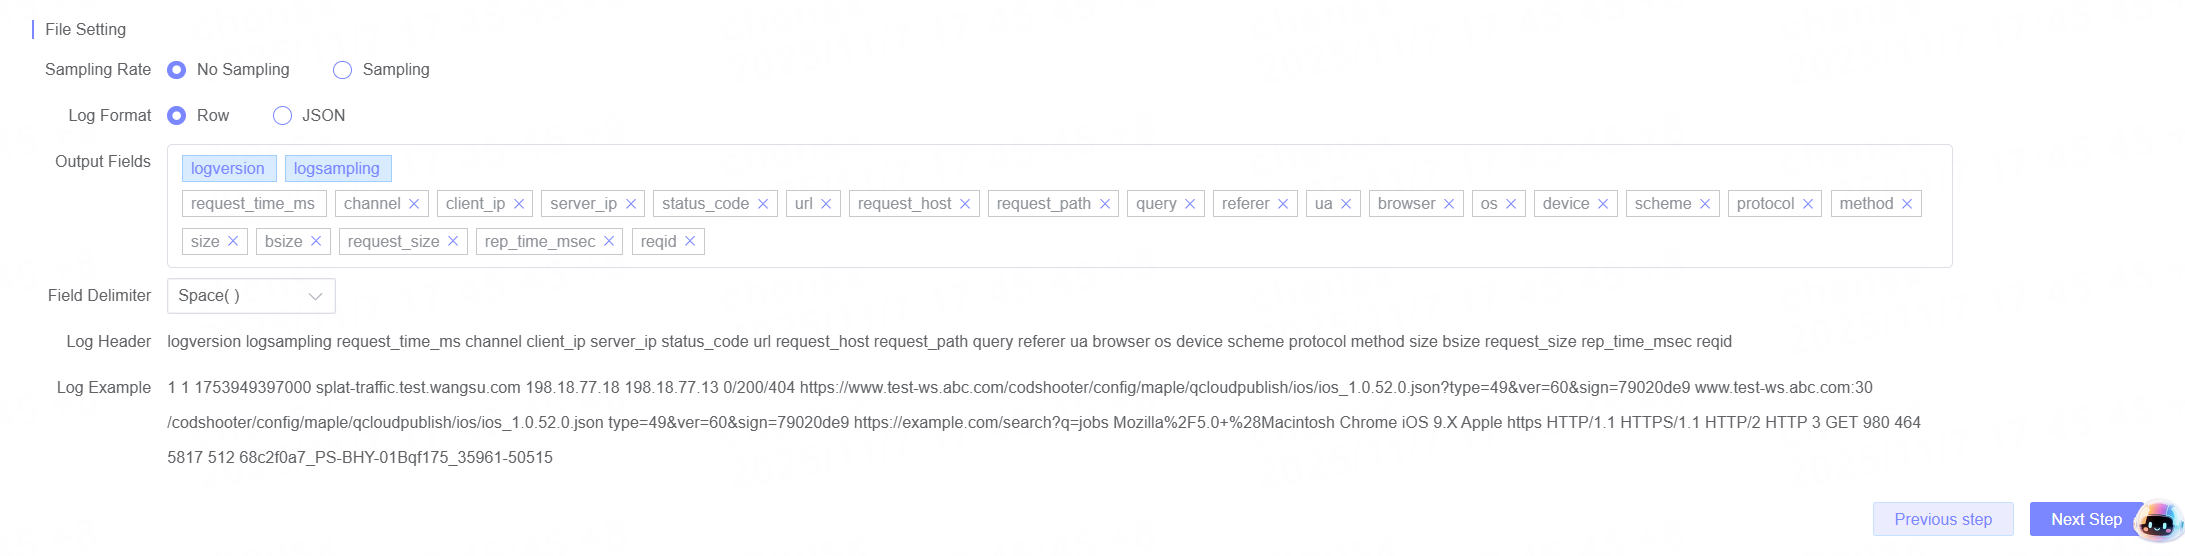
Configure the relevant format of the uploaded file.
| Name | Description |
|---|---|
| Sampling Rate | Configure the sampling rate for file uploads. By default, all data is uploaded, but you can customize the sampling rate. |
| Log Format | Select the log upload format. Log line and JSON formats are supported. |
| Output Fields | When the log format is set to log line, you can adjust the order of the selected fields or remove fields. System fields such as logversion and logsampling cannot be removed or reordered. Required fields like the time field cannot be deleted. |
| Field Separator | Displayed when the log format is Log Line; allows you to specify the field separator. |
| Log Header | Displayed when the log format is Log Line; shows a preview of the adjusted log header format. |
| Log Sample | Displays the final output log sample. |
Step 3: Select Upload Target

| Name | Description |
|---|---|
| Upload Target | Select a pre-configured upload target. If no suitable target is available, click the  button on the right to create a new one. For details, see Create Upload Target. button on the right to create a new one. For details, see Create Upload Target.After creation, click  to refresh the target list. to refresh the target list. |
| File path, file name | Different upload targets require different information. Please fill in the details according to your selected target and the page prompts. |
Step 4: Submit Task

After the configuration is complete, click Submit to submit the consumption task.
After the task is submitted successfully, you will be redirected to the Log Library page, where you can view the upload task report.
Next Steps
You can go to the corresponding upload target to view the received logs and operate the logs on the target platform.
Consumer Task Management
In the Task Management list, you can view all created consumer tasks. It supports operations such as Edit, Pause, Monitor, and View Modification History.
For more details, please refer to Task Management.