CDNetworks Documentation Console Guide Console Guide Configure Event Alerts to Monitor Account Activity
Configure Event Alerts to Monitor Account Activity
Last update:2025-07-15 14:33:04
Setting up event alerts allows you to track key operations within your account in real-time. For example, you can create a rule that sends an immediate email notification whenever a sub-account deletes a domain.
This guide will walk you through creating and managing event alerts to enhance your account’s security and operational compliance. Unlike metric-based alerts, event alerts focus on the actions themselves (e.g., “Create Domain,” “Update Configuration,” etc.).
1. Creating an Event Alert Rule
Steps
- Log in to the Cloud Monitor console.
- In the left navigation menu, select Event Monitor > Alert Rules.
- On the “Alert Rule Management” page, click Add Alert Rule.
- Follow the prompts to complete the configuration as detailed below.
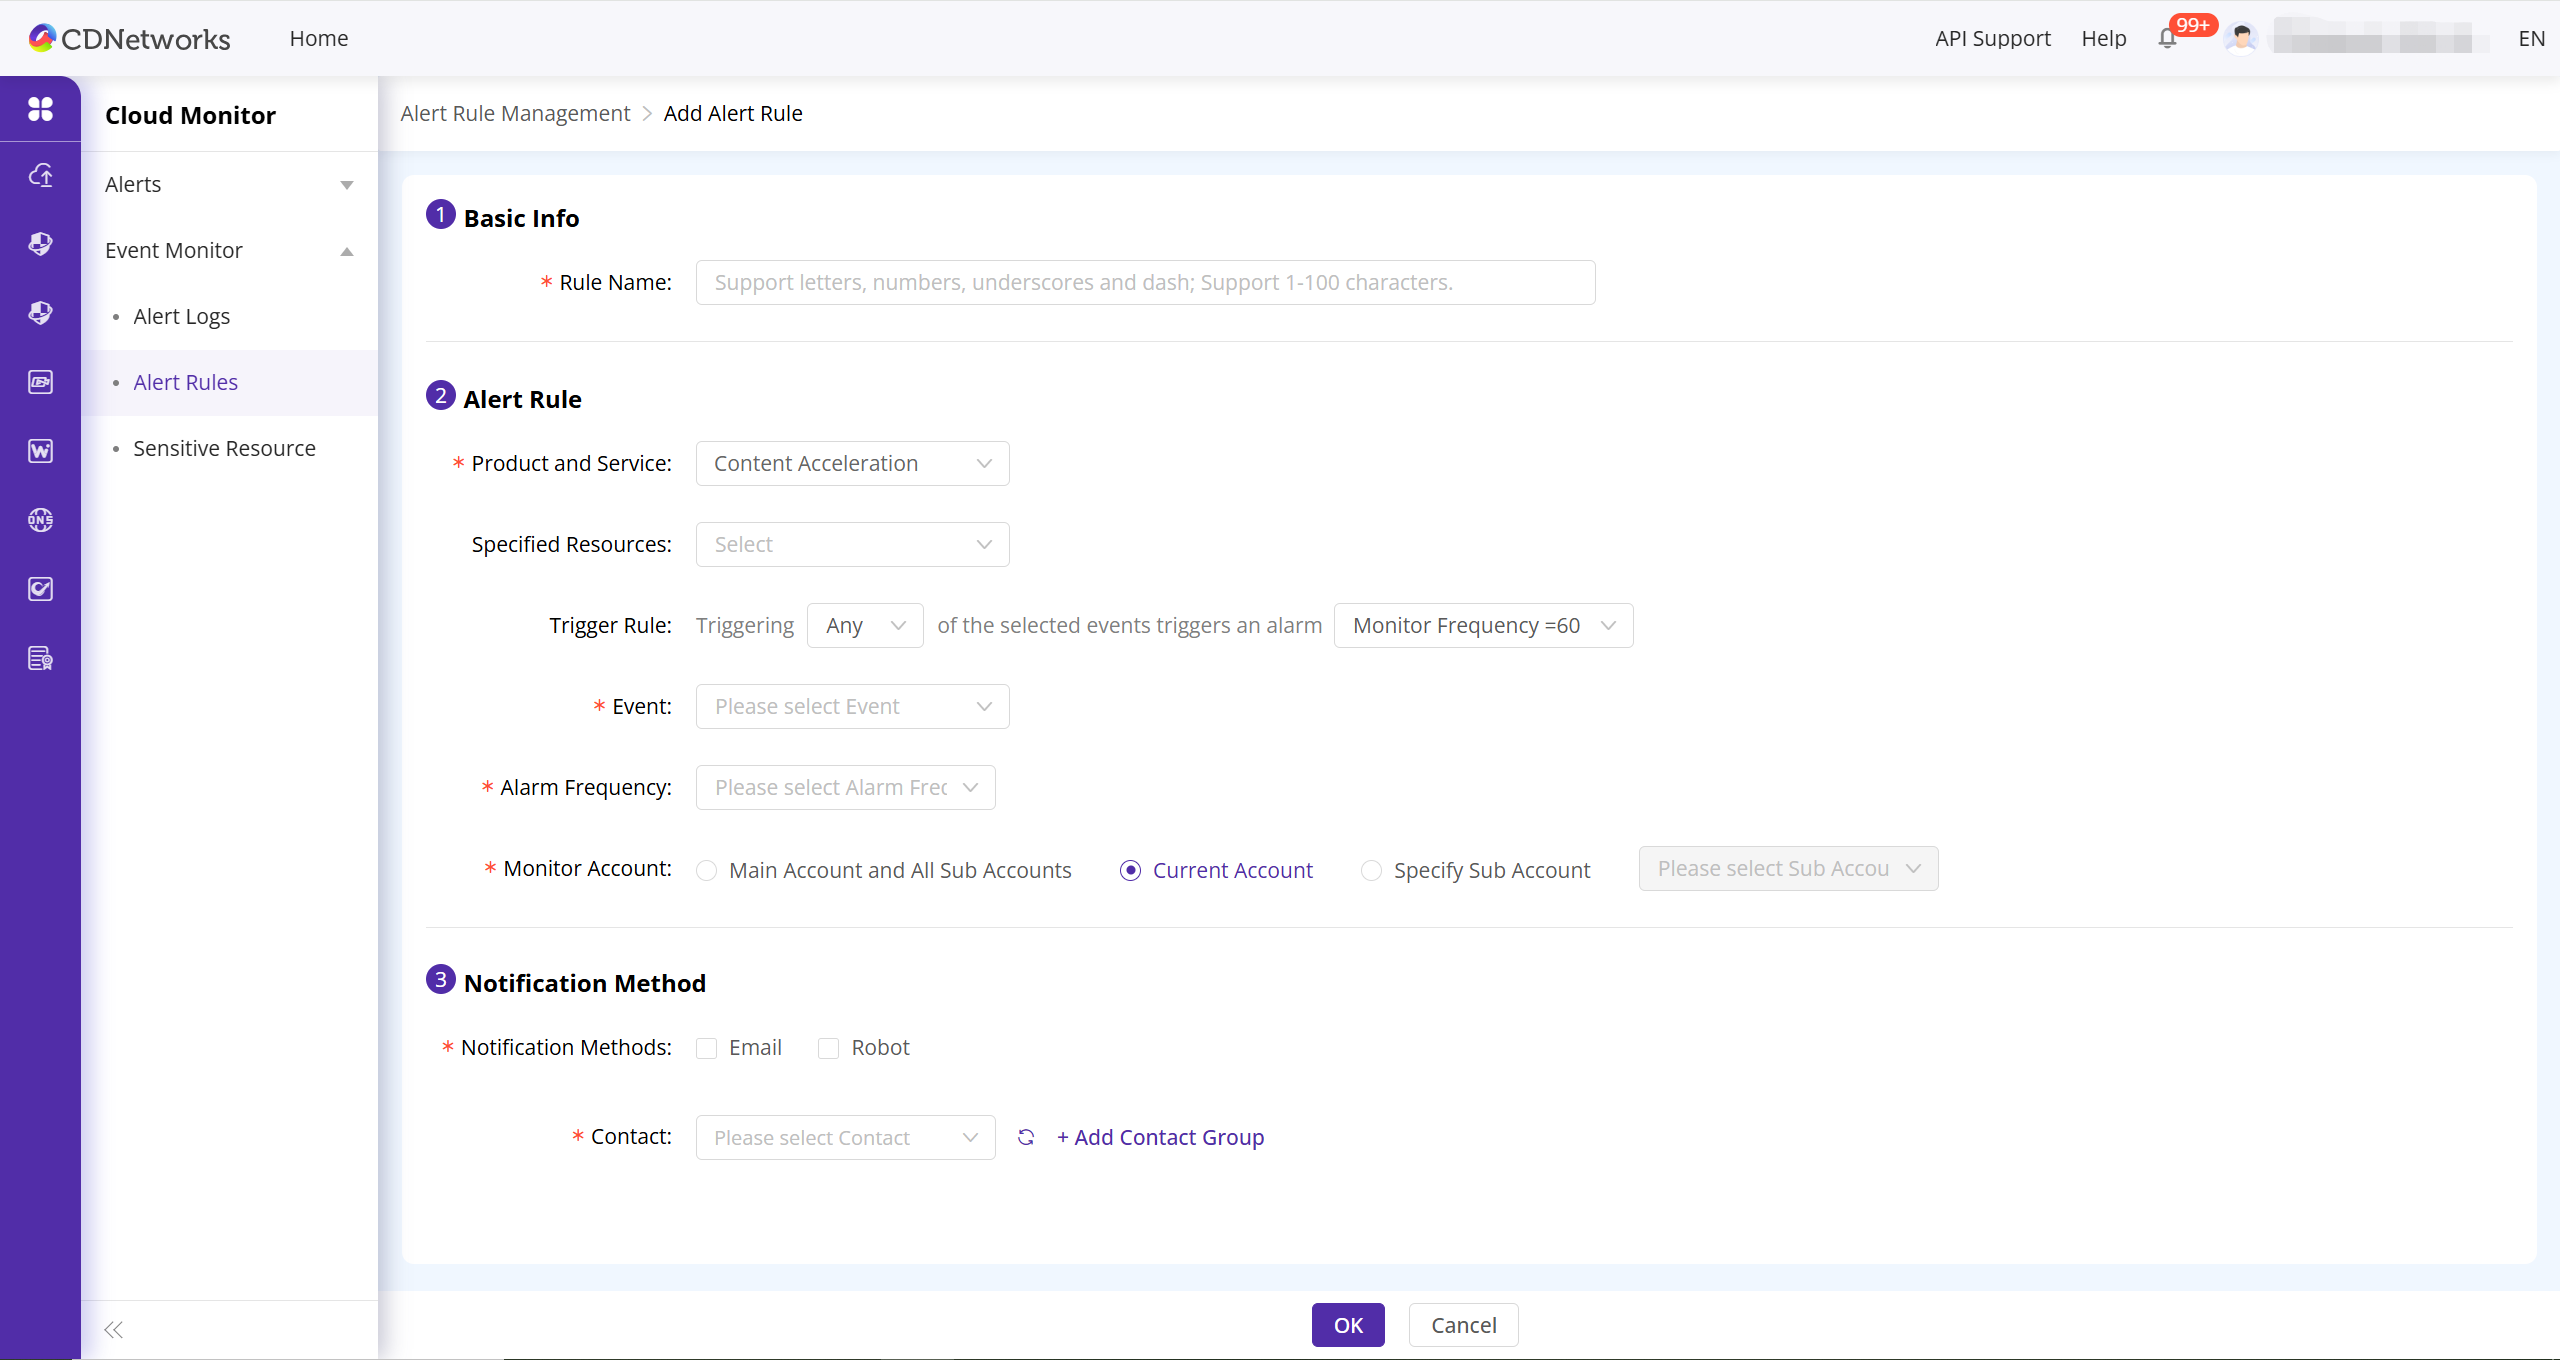
Configuration Parameters Explained
| Section | Item | Description |
|---|---|---|
| Basic Info | Rule Name | Set a unique name for your alert rule. This name will be used as the subject of the alert notification for easy identification. |
| Alert Rule | Product and Service | Select the product or service to which the events you want to monitor belong. |
| Specified Resources | (Optional) Narrow the monitoring scope further, for example, by specifying a particular domain or instance. | |
| Trigger Rule | Define how multiple events trigger an alert. You can set a Monitor Frequency (e.g., check every 60 minutes) and choose between: • Any: The alert is triggered if any one of your selected events occurs within the monitoring period. • All: The alert is triggered only if all of your selected events occur within the monitoring period. |
|
| Event | Select one or more specific events you want to monitor, such as “Create Domain” or “Delete Domain.” A single rule can monitor up to 10 events simultaneously. | |
| Alarm Frequency | Set how often notifications are sent after a trigger condition is met. | |
| Monitor Account | Define the source account for the actions to be monitored: • Main Account and All Sub Accounts • Current Account • Specify Sub Account |
|
| Notification Method | Notification Methods | Choose the channels for sending notifications, including Email and Robot (Webhook). |
| Contact | Select the Contacts or use + Add Contact Group to receive the alert. You can also choose to notify your dedicated technical and sales support representatives. |
Complete Creation
After completing all configurations, click the OK button. Your event alert rule will take effect immediately.
2. Managing Existing Event Alert Rules
You can perform the following management operations on your created event alert rules.
- Return to the Event Monitor > Alert Rules page.
- Find the rule you want to manage in the list and perform one of the following actions:
- Edit: Click Edit to modify the rule’s parameters.
- Disable/Enable: Click Disable when you temporarily do not need a rule. You can click Enable later to reactivate it.
- Delete: Click Delete to permanently remove a rule. You can also select multiple rules for a Batch Delete.
- Alert Logs: Click Alert Logs to view all alert records triggered by this rule. This is useful for auditing historical actions and troubleshooting issues.
Is the content of this document helpful to you?
Yes
I have suggestion