Example of Using Authing for SAML SSO
Last update:2026-03-25 15:25:40
Authing SAML Integration Steps
Log in to Authing and configure the application
1. Log in to the Authing platform site
Log in to the Authing platform at https://www.authing.cn/ and open the console
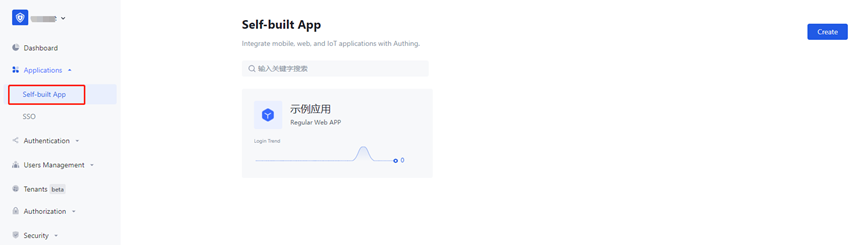
2. Protocol configuration
Select [Applications] -> [Self-built App] -> [Create Self-built App] or [Edit Existing App] -> [Protocol Configuration]
“Applications” - “Self-built App” - “Create” - “Protocol Configuration”
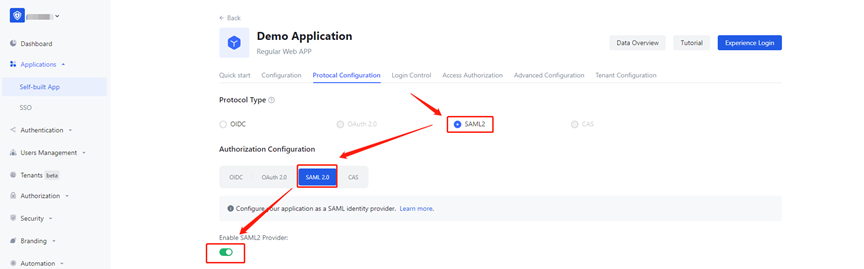
Select the SAML2.0 protocol
Note: The default protocol type can only be selected after enabling and saving saml2.0.
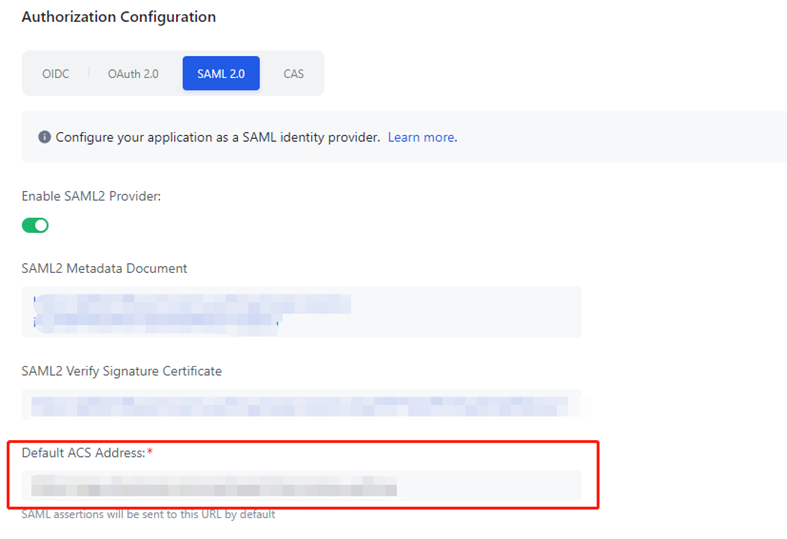
3. Configure the [Default ACS Address]. Please ensure that the configured address matches the content provided in the documentation.
The address is: https://login.cdnetworks.com/cas/login?client_name=${provider}
Reference documentation: SAML Configuration for Enterprise IdP during SSO
For provider creation, please refer to: SAML Configuration for SP during SSO
4. Configure custom SAML Response attributes

Fill in the configuration:
Line 1:
Name:
https://login.cdnetworks.com/SAML/Attributes/LoginName
Value:
wsc:iam::${parentLoginName}:login-name/${loginName},wsc:iam::${parentLoginName}:saml-provider/${provider}
•${parentLoginName}: Replace with the main account associated with your CDNetworks account.
•${loginName}: Replace with the CDNetworks account that your current IdP user uses to access CDNetworks.
•${provider}: Replace with the name of the SAML identity provider you created in the CDNetworks console.
Second line:
Name:
https://login.cdnetworks.com/SAML/Attributes/RoleSessionName
Value:
${NameID} — You can enter any English characters here, but this field cannot be left blank.
After completing the configuration, click [Save] to finish.
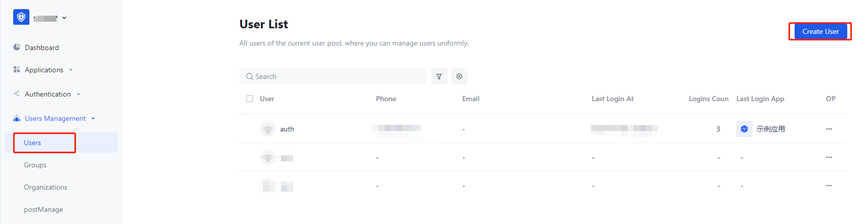
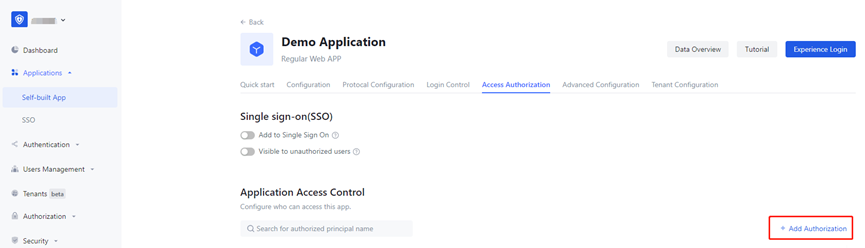
5. Application Authorization
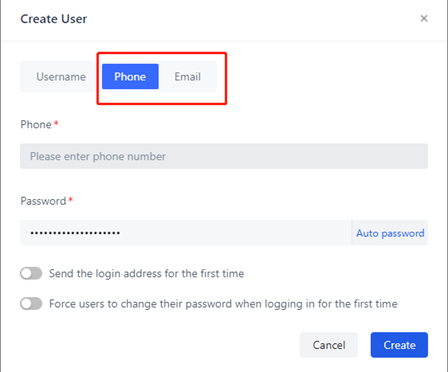
[User Management] -> [User List] -> [Create User]
[Users Management] -> [Users] -> [Create User]
Since the login page only supports login with mobile phone number or email by default, please use either a mobile phone number or email address during registration.
After the user is created, return to the application’s [Access Authorization] page to grant permissions. Set the authorization action to [Allow] so that the user can access the specified application.
Provider Information Configuration in CDNetworks console
1. Download the metadata file
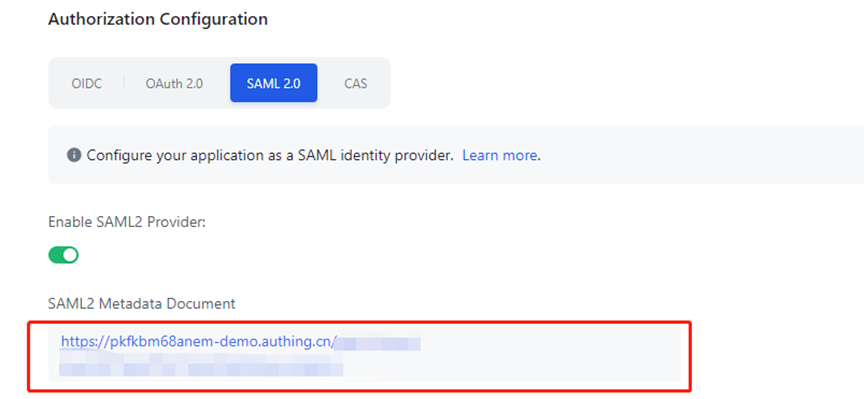
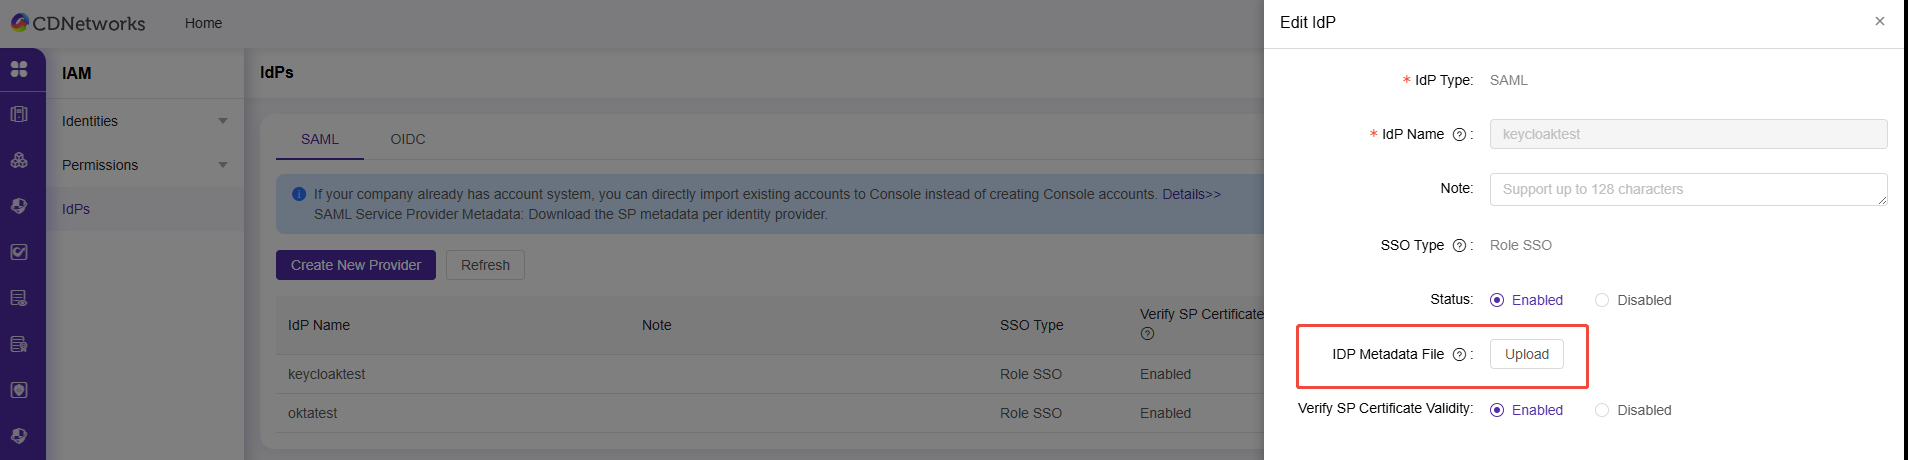
2. Upload the metadata file to the CDNetworks console
Locate the provider name for this configuration, click Edit, and upload the metadata file. At this point, all configuration steps are completed.
(https://documents.cdnetworks.com/document/iam/role-sso-sp)
Access Test
1. CDNetworks redirects to Authing authentication
Directly access the address in the browser:
https://login.cdnetworks.com/cas/clientredirect?client_name=Provider Name,
Confirm whether the Authing login page is redirected
2. Authing redirects to CDNetworks authentication
After Authing login authentication is successful, CDNetworks is redirected to enable Single Sign-On without entering account credentials