Add Application
Last update:2023-12-15 18:00:09
Content
1. Usage Scenario
An application can be any network address accessible to users through ESA. The only requirement is that the network address is resolvable and routable from the Connector on which the application is deployed.
The application management function enables IT administrators to manage and deploy applications to the ESA platform. Access permissions for users can only be authorized after the applications are deployed.
2. Preconditions
1)Before starting, applications can be categorized into three type:
- Private applications inaccessible from outside the intranet
- Private applications accessible from the public network
- SaaS or public applications/websites
Deployment recommendations for the ESA platform:
- Private applications without public access: Install an ESA connector in the environment.
- Private applications accessible from public network: Install an ESA connector to protect your applications from public networks and disable public access.
- SaaS applications or public applications: No need to install an ESA connector, simply add the access URL on the platform. For accelerated access to these SaaS applications, especially in Mainland China, please send the application list to Customer Support.
2)Ensure that the connectors are installed in the environment and have been added to your enterprise ID if you plan to deploy private applications to the ESA platform. If not, visit Add connector.
3)For each application, two access methods are available: via the ESA client and via a browser. To enable browser access, configuration of the Secure Web Gateway is required.
3. Add New Applications
1)Go to Application Deployment–>Application–>Custom Application, click Add.

2)Fill in the basic information of the application. Below is a detailed explanation of the fields.
| Field Name | Explanation |
|---|---|
| Name | 1-50 characters, support letters, symbols and numbers. |
| Content | Enter the application's IP, domain, port, and allowed access protocol. Support IP address formats such as IP, IP/subnet mask, and IP range (IPx-IPy), as well as full domain and wildcards. Separate multiple values with a semicolon or line break.
For example:- 192.168.6.1;www.google.com - 192.168.80.0/32;*.google.com - 10.16.61.0/32;10.17.60.0/32;*google.com - 10.0.0.0-10.255.255.255 |
| Category | You can define different categories and assign applications to these categories for easy management. Up to 8 categories can be added. |
| Browser Access | Configure whether to open the application in a browser when users click the app on the ESA client. We recommend enabling this option and providing the access URL. |
| Administrator | Select the administrator of this application for easy identification. Assigning an administrator allows for policy setup that restricts changes to be made only by the designated administrator. |
| Description | 1-255 characters, used to describe the application for easy identification and management. |
3) Web Proxy Configuration
This setting determines whether users are allowed to access the application via a web browser. It will be effective only after the administrator has enabled proxy access in Secure Web Gateway–Basic Configuration. See Web Proxy for more configuration details.
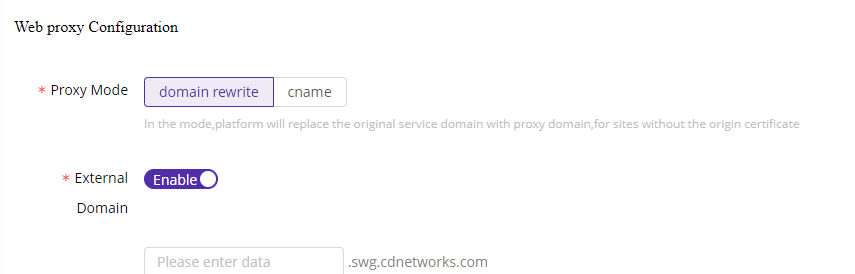
ESA supports two proxy mode:
Domain Rewrite: When the SWG is configured, users accessing the application visit a proxied domain provided by the SWG, rather than the server origin. This helps to protect the origin address.
CNAME: When the SWG is configured, users accessing the application visit the server origin address.
Parameters for proxy configuration:
| Field Name | Explanation |
|---|---|
| Domain Rewrite-External Domain | When the SWG rewrites the origin server address, it typically generates a random domain (e.g., https://swg.12345.esa.com), which may be difficult for users to manage and remember. We recommend customizing an external domain for easy recognition. |
| CNAME-CNAME Address | When configuring the SWG, CDNetworks will provide you with a CNAME address. You need to set up a CNAME on your origin server to this address so that traffic can be forwarded to the ESA platform. |
| CNAME-Source Address | Provide the real IP address of your origin server. Currently, only one IP address is supported. |
| CNAME-Application Certificate | Upload the certificate for HTTPS applications to enable mutual verification. |
| CNAME-Single Sign On | Whether to enable SSO login for this application |
| CNAME-IP Provider | Select the SSO server of the ID provider for login ID verification. |
| Watermark | Choose whether to enable a watermark on the application. Once enabled, accessing the application via a browser will result in a watermark being added. |
| Watermark Style | Select the watermark to apply to this application, and click Add Watermark to add new ones. |
| Carry user IP for Website | By default, ESA enables SNAT when the user deploys the connector. With this parameter enabled, even when SNAT is enabled, user IP addresses will be recorded when accessing the application. |
4) Connector/Gateway Deployment
This step involves deploying the application to your ESA connector.

- Deploy via Connector: This is the most recommended method.
- Deploy via Security Gateway: This option is suitable for customers who have their own security gateway instead of the ESA security gateway.
Select the appropriate connector from the list. If your application is in a different subnet than the connector, please add the Next Hop so that the connector can locate the application. Generally, the next hop refers to the address of the gateway on which the connector is deployed. For example, when adding server 1 to the connector, you need to add the WAN IP of the Core Switch as the Next Hop.

5) Associate permission groups
A permission group is a collection of applications that allows administrators to manage permissions and applications more efficiently. On ESA, application permissions are assigned to users through permission groups.

You can add the application to a permission group here or later in the application details and permission group details.
6)After confirming the above information, click Save to apply the configuration.