Quick Start Guide for ECA Functions
Last update:2024-12-25 16:41:27
This Quick Start guides you through creating a simple Edge Cloud Apps Function to perform content rewriting based on the user agent. When a user visits your website using the Chrome browser, the page content will be rewritten; otherwise, the original content will be displayed.
Prerequisites
Before you begin, ensure you have completed the following:
- Activate and Log in to Your CDNetworks Console Account: If you do not have an account, please contact your CDNetworks technical support.
- Have a CDN Acceleration Domain: Edge Application functions work in conjunction with the base CDN service. Please ensure that you have properly configured domain acceleration services on the CDNetworks platform and that your domain is accessible. For example, activate basic CDN products like Content Acceleration or Dynamic Web Acceleration.
Creating a Function
- Log in to the CDNetworks Console, select the Edge Application product, and navigate to the Function List page under Edge Cloud Apps menu bar.
- Click Create Function to enter the function creation page. Here, you can fill in the basic information for the function, choose a test domain to associate with the function, and select the function creation method.
The test domain associated here is used solely for online debugging, effective in the testing environment, and won’t impact your production environment.
- Edge Cloud Apps Function Compute allows you to create functions either “Without a Template” or “Using a Template.” This example demonstrates the “Without a Template” option. Click Save and Next Step to proceed.
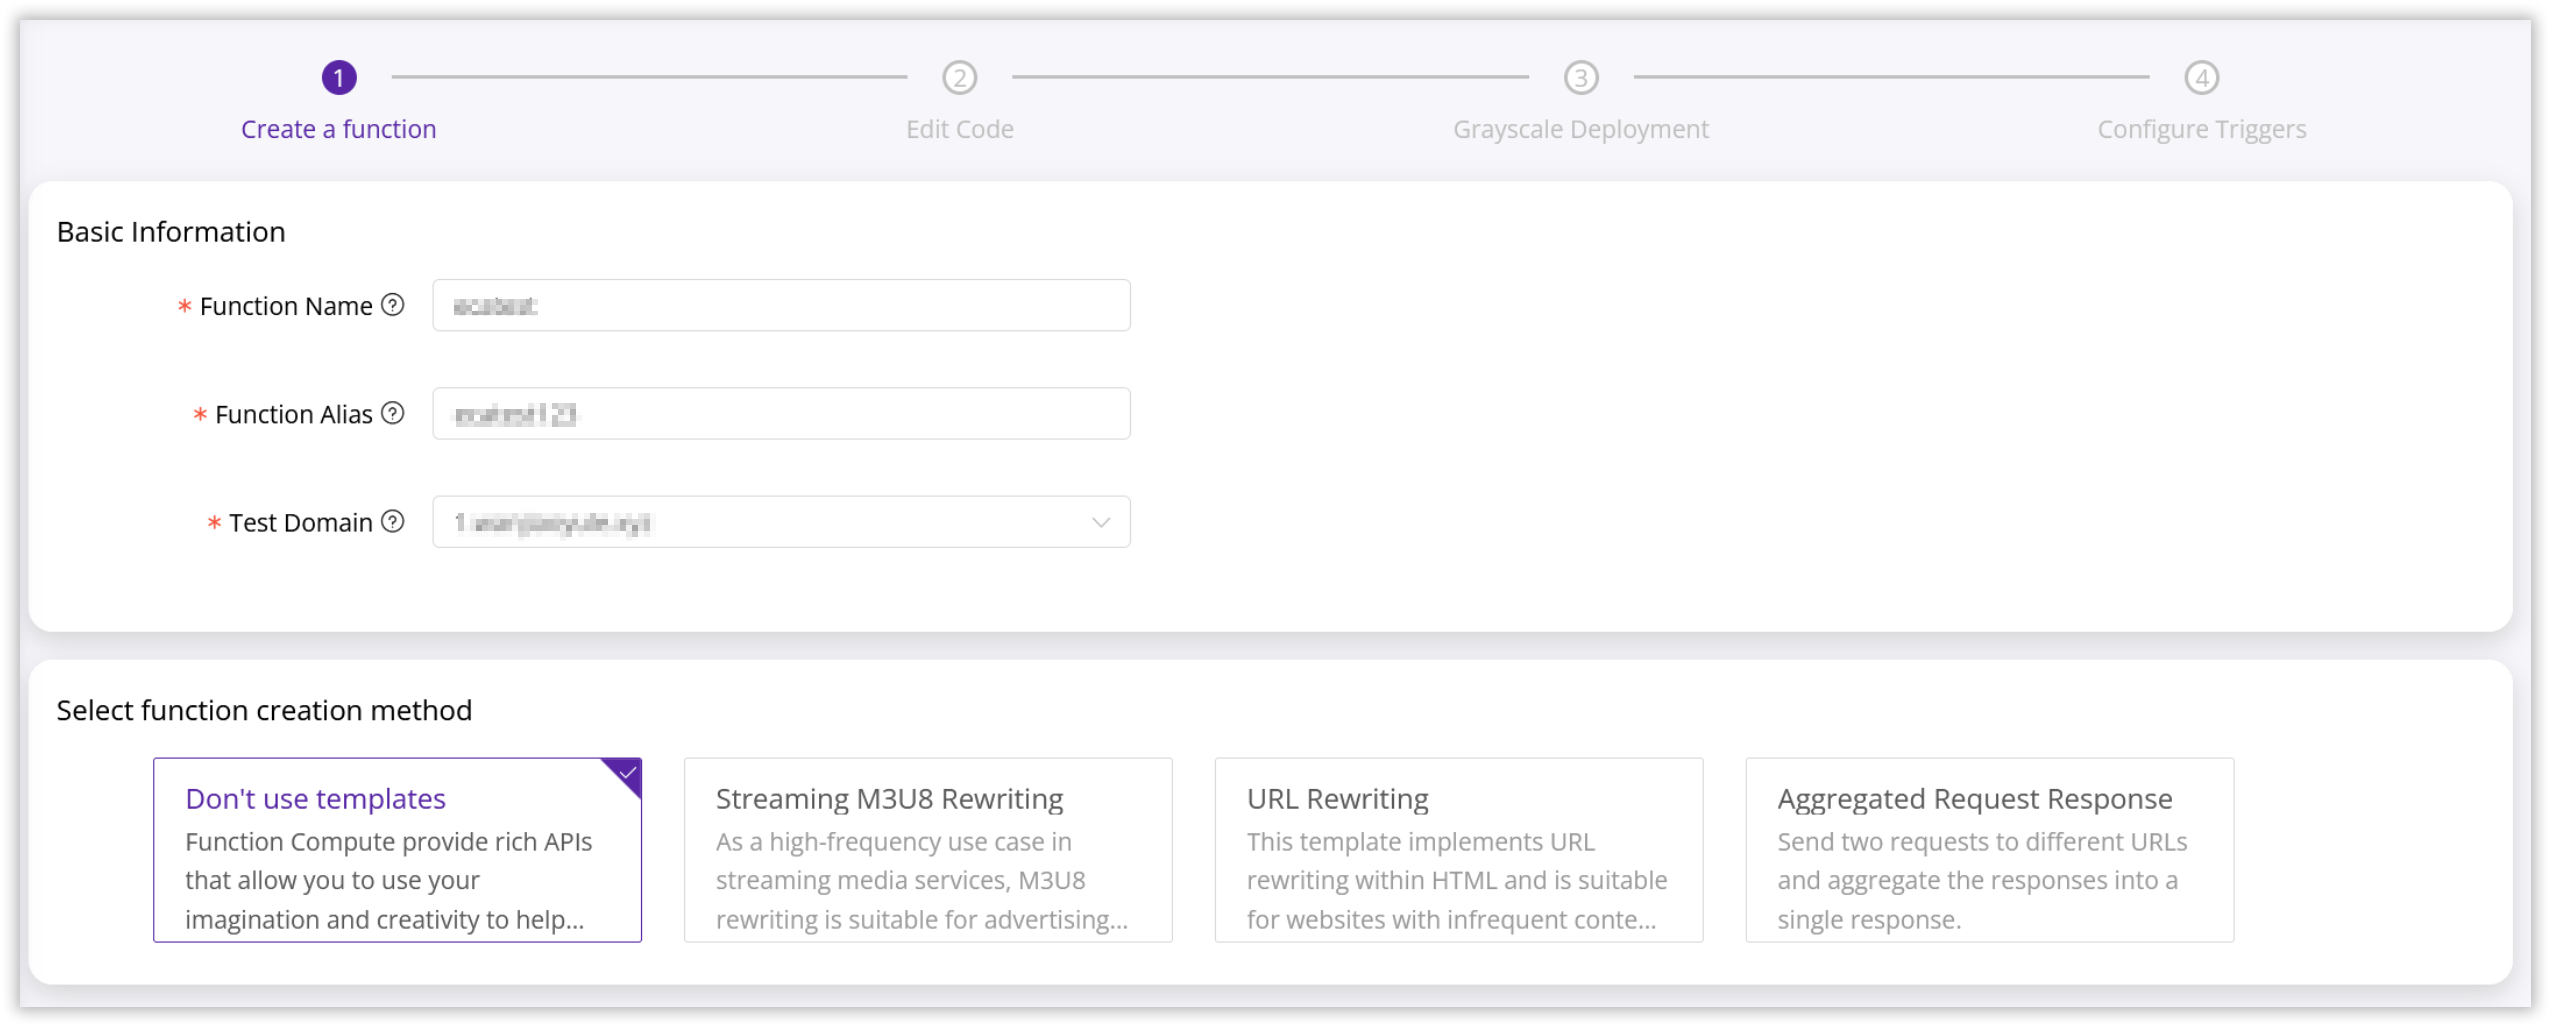
Using a Template can help you quickly create functions for common functionalities such as stream M3u8 rewriting, web link rewriting, and aggregated request responses. Each template has a description of its functionality. After selecting a template to create a function, you’ll see the corresponding function sample code directly in the CloudIDE interface. We are continuously updating the template library, and some other templates are still under development and will be available soon.
Writing Code
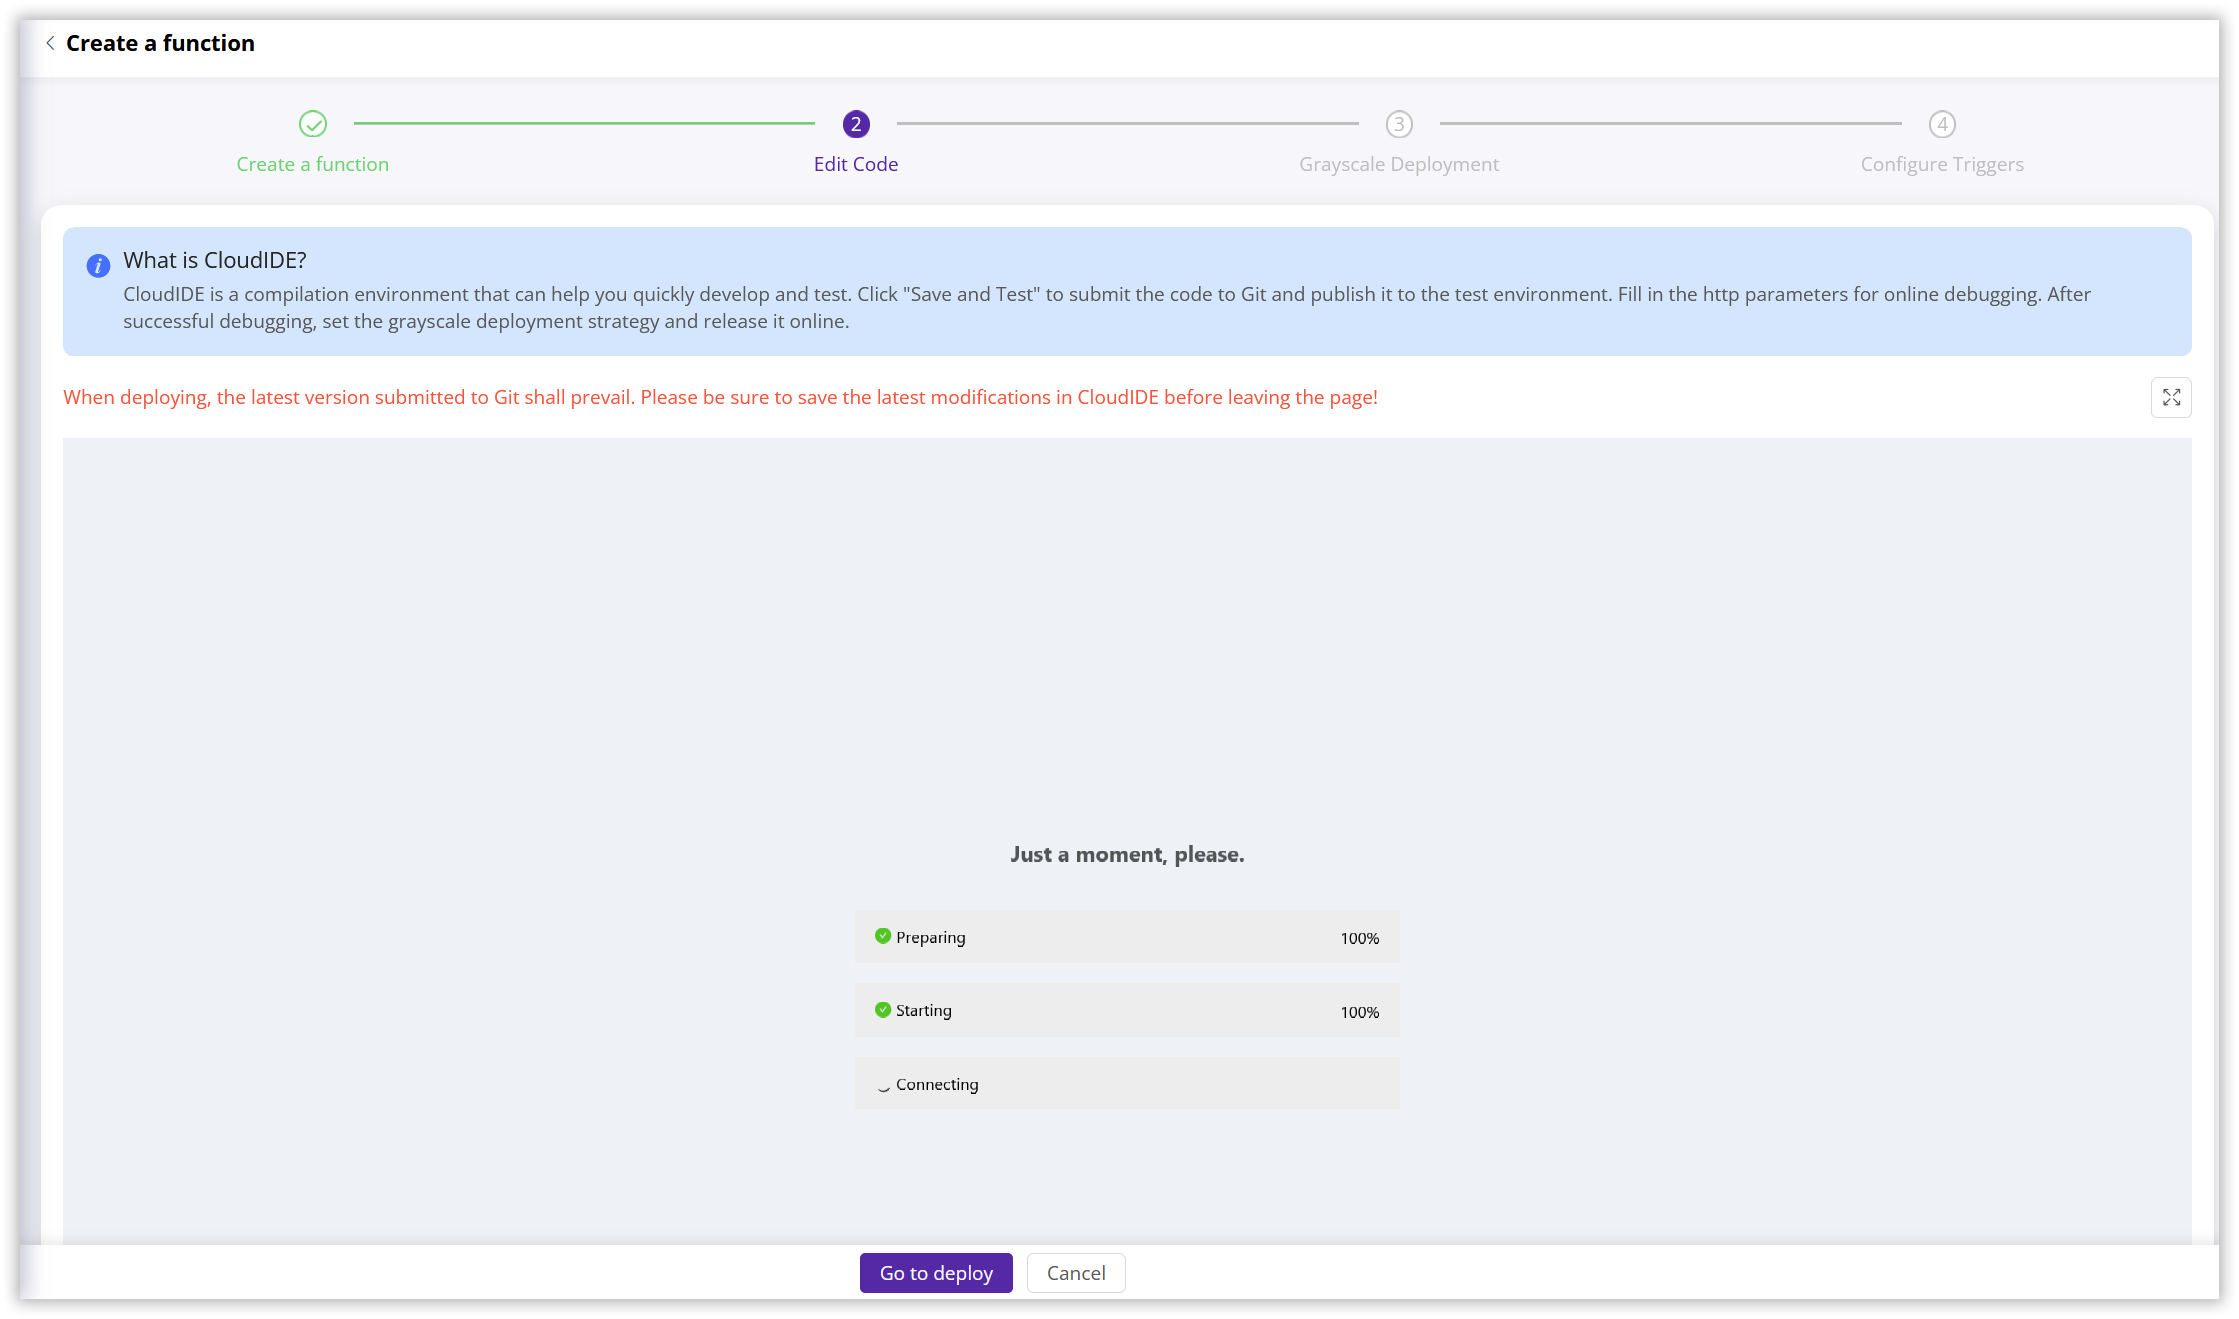
- After creating the function, the page will automatically redirect to the CloudIDE interface, as shown below:
-
Within CloudIDE, you can freely write, edit, and debug your code. CloudIDE provides features such as syntax highlighting, auto-completion, and error prompts to help you write code efficiently. For more information on CloudIDE, please refer to our CloudIDE Documentation.
-
Below is a pre-written function that demonstrates how to return different page content based on the User-Agent:
export async function handleRequest(request) {
    let response = await fetch(request)
    response.headers.set("X-Version", "petshop-v1")
    if (isFromChrome(request) && isHtml(response)) {
        console.log("rewrite page")
        let body = await response.text()
        const en = true
        body = body.replace('Make Your Pets Happy',
            en ? ':::R:::E:::W:::R:::I:::T:::T:::E:::N:::')
        body = body.replace('Dolore tempor clita lorem rebum kasd eirmod dolore diam eos kasd.',
            en ? 'Only when accessed using Chrome browser will the text be rewritten.</br>For other browsers, the original text will be displayed.</br>' : 'The content will be rewritten only when accessed using the Chrome browser</br>Other browsers will display the original text.</br>')
        response.headers.delete('ETag')
        response.headers.delete('Last-Modified')
        return new Response(body, response);
    } else {
        console.log("pass page")
        return response
    }
}

function isFromChrome(request) {
    let userAgent = request.headers.get("User-Agent")
    return userAgent && userAgent.toLowerCase().includes("chrome")
}

function isHtml(response) {
    let contentType = response.headers.get("Content-Type")
    return contentType && contentType.toLowerCase().includes("text/html")
}
addEventListener("fetch", event => {
    return event.respondWith(handleRequest(event.request))
})
Each function can contain multiple JavaScript files to help you better organize and manage complex function logic. However, please note that each function must include an
index.jsfile as the function entry point. When a function is triggered, the platform will begin executing code from theindex.jsfile.
- After writing the code in the CloudIDE editor, click the “Save and Test” button to save the current version of the code, automatically commit it to your Git repository, and deploy it to the testing environment. The system will also initialize a simulation testing plugin, making it easy for you to test your function.
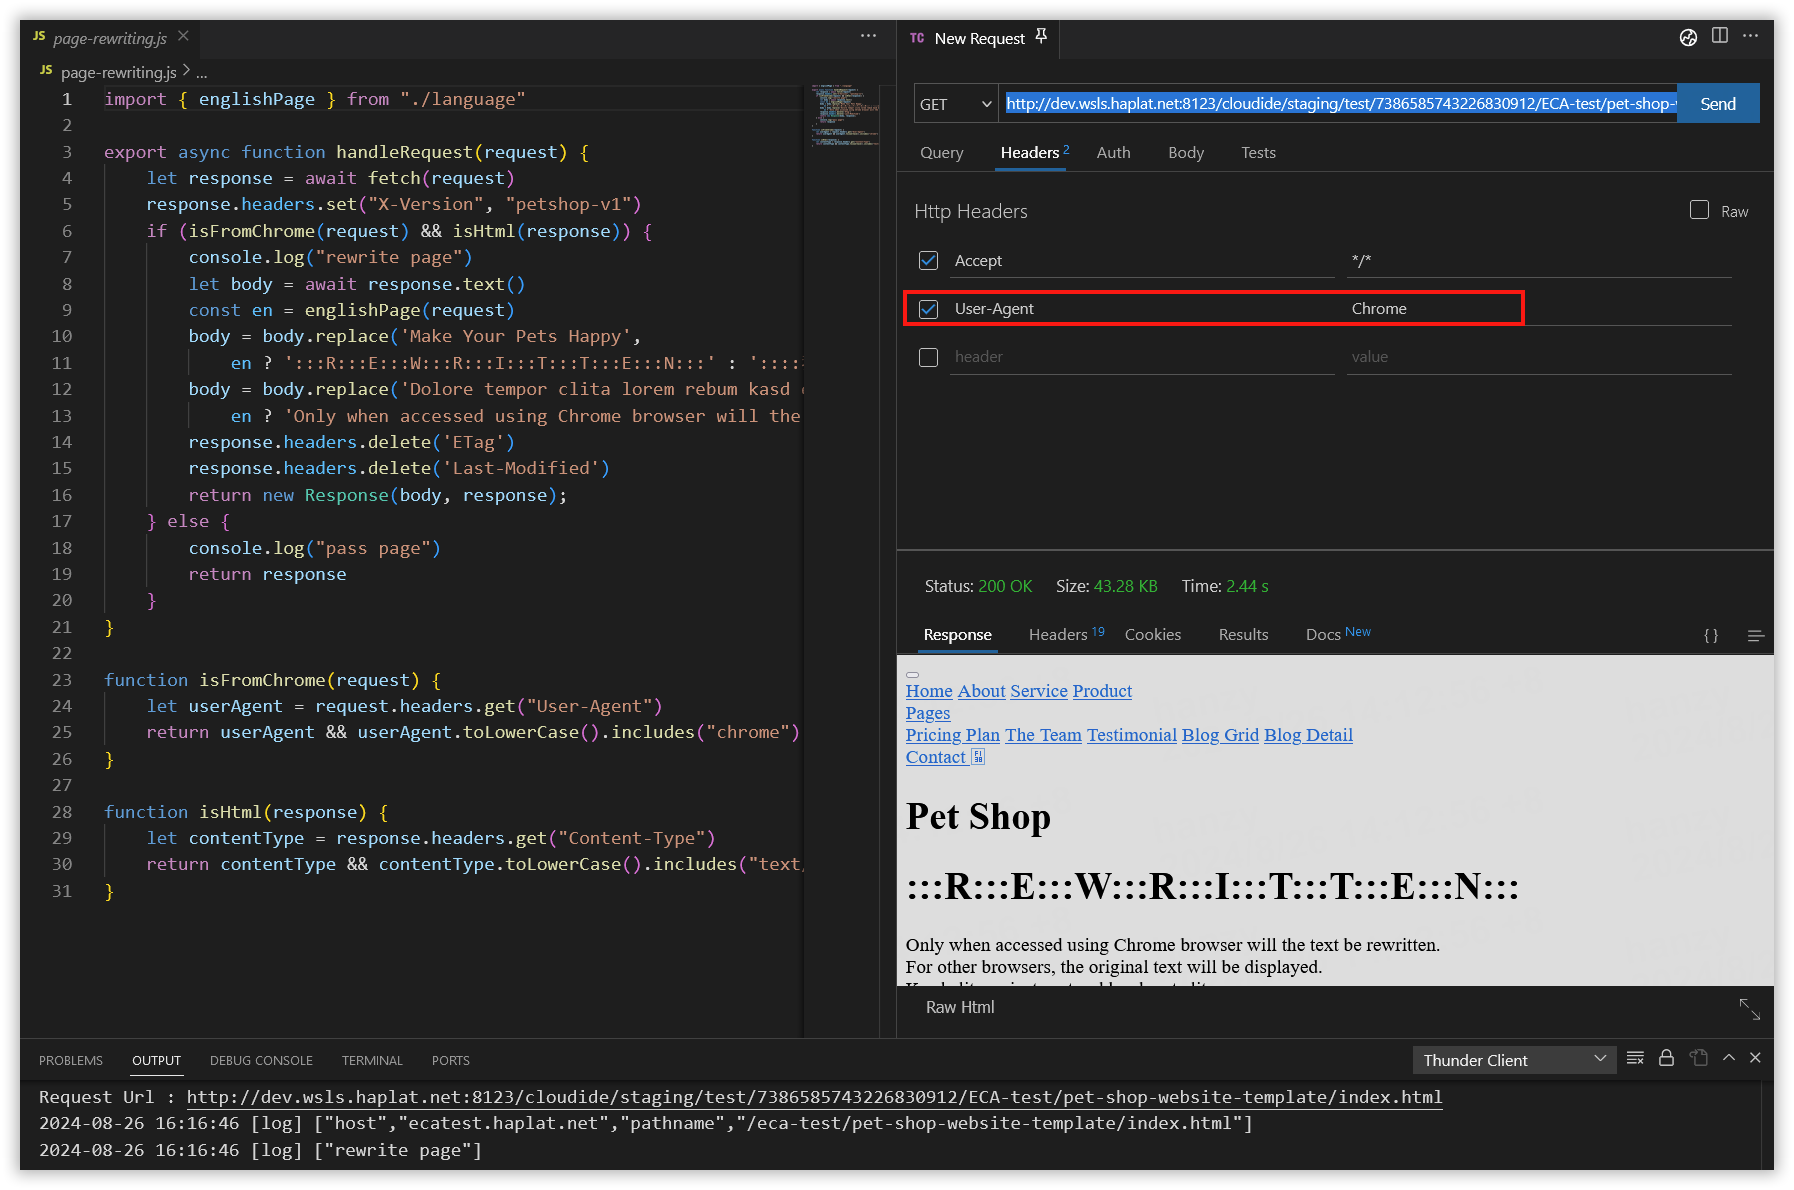
- To start debugging your function code, insert the actual URI you want to access into the address bar of the plugin on the right side of the test link. For this example, the URI is:
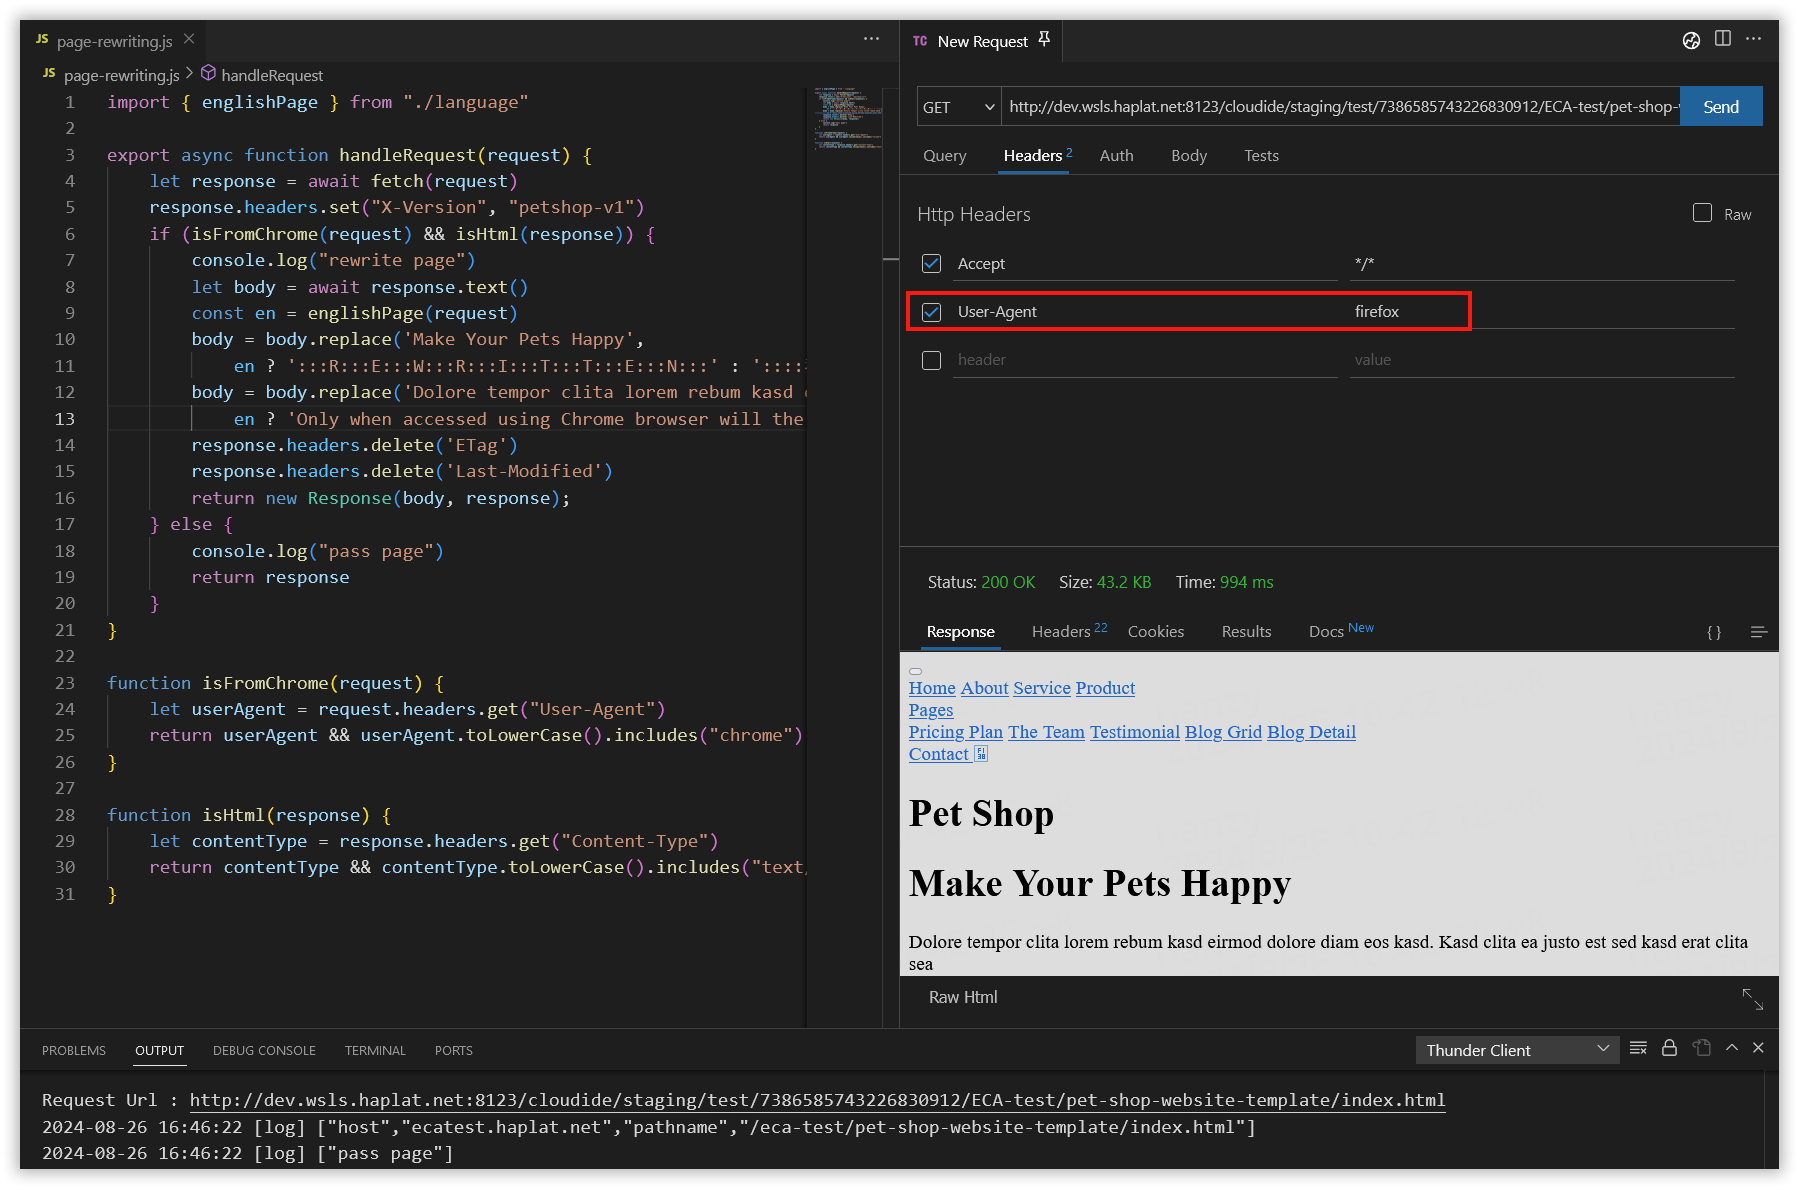
/ECA-test/pet-shop-website-template/index.html. To configure request parameters, request path, headers, or body content, configure them one by one in the corresponding tabs of the test page to simulate real request scenarios. - Click the Send button on the test page. Your request will be sent to the test environment, and the function code you wrote will be executed, returning the response and debugging information. Based on the sample function code above, the following two figures show the actual code return effect when configuring the
User AgentasChromeandFirefox, respectively:
Deploying Function for the First Time
-
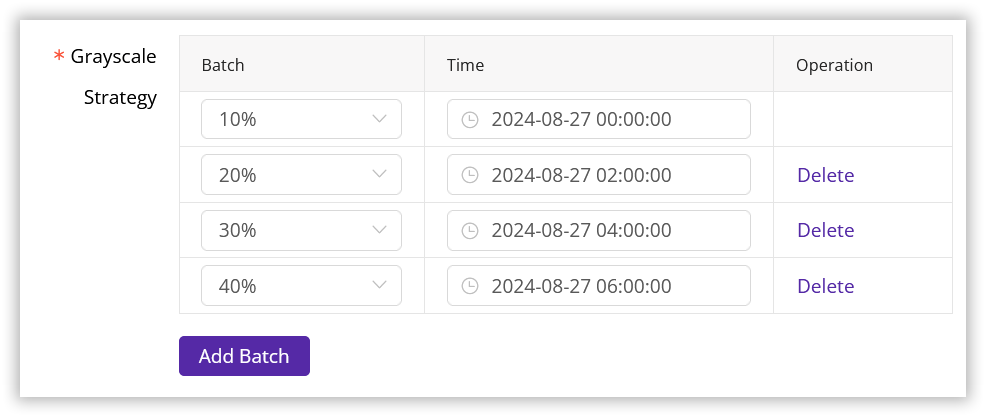
Once you have finished debugging and met the testing requirements, you can deploy the function to the production environment. You can use Edge Cloud Apps’ Grayscale Deployment feature to preset batch deployment schedules, which are triggered by the platform at set intervals. Edge Cloud Apps allows you to configure custom batch sizes and proportions for gradual deployment, as well as batch activation times. If you want the changes to take effect immediately, simply set the activation time to the current time. For more details, please refer to the Grayscale Deployment documentation.
-
After the setup is complete, you can view the deployment records and current deployment status of your created function on the Grayscale Deployment interface. If you no longer need to deploy, you can click Stop to terminate your deployment schedule.
- Once the deployment status of your function shows as Deployed Successfully, you can proceed to the next step and associate your function with a specified domain to take effect.
Configuring Triggers
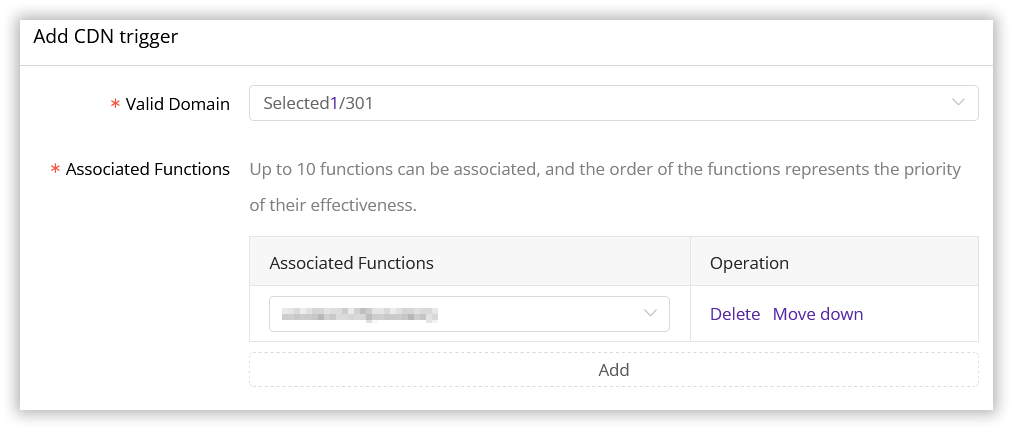
- Functions require a domain as an entry point for client access. You need to associate your acceleration domain on the CDNetworks platform with the function you created through trigger configuration. This way, clients can trigger the function execution by accessing the domain. Refer to the Trigger documentation for more configuration details.
- In the left menu bar, locate Function Triggers. Click the Add button, select the domain you want to associate with the function, and then select the function you just created and successfully deployed to the online environment. Before associating, please ensure that the function has been successfully deployed.
Monitoring Function
After configuring the trigger, your function officially takes effect on your acceleration domain configured on the CDNetworks platform. Next, you can monitor the function’s running status, such as the actual number of requests, average runtime, and error rate, through the Function Analysis page on the CDNetworks console.
Code Effect Demonstration
When the User Agent in the user’s request header is Chrome:

When the User Agent in the user’s request header is Firefox: