Back-to-Origin Settings
Last update:2022-06-28 15:35:41
•Entrance
Product → Configuration → Edit Configuration → Back-to-Origin Settings
•Introduction
With this configuration, there are three functions for Back-to-Origin Settings
- Alternate Back-to-Origin : the domain or port will be replaced for those requests goes to origins and Host header of Back-to-Origin Host Header
- Protocol Rewrite : Set the request HTTP(S) protocol and back-to-origin HTTP(S) protocol rewrite rules to change HTTP → HTTPS or HTTPS → HTTP
- Origin URL rewrite : at default, origin URL path is root directory of origin server, but this function support change Origin Path with URL rewriting rules
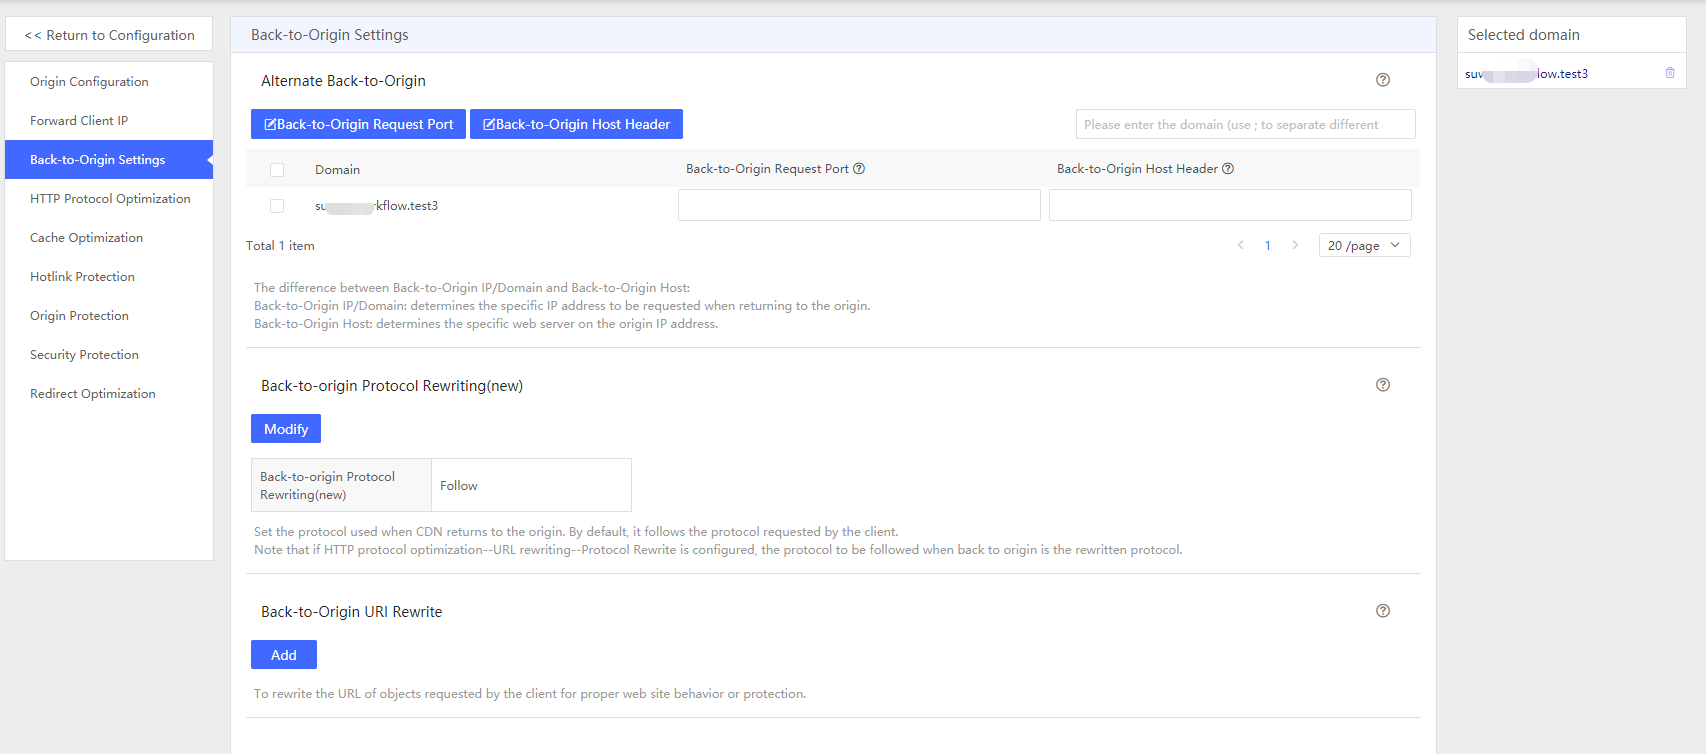
1 Alternate Back-to-Origin
•Entrance
Product → Configuration → Edit Configuration → Back-to-Origin Settings → Alternate Back-to-Origin
•Introduction
This function is Alternate Back-to-Origin that change the port (Back-to-Origin Request Port) will be replaced for those requests goes to origins and Host header of Back-to-Origin Host Header
•Guides for operations
The following page is for configurations with many selections on the left menu, ‘Back-to-Origin Settings’ included. Fill the column with port and host header as you want, then click next.
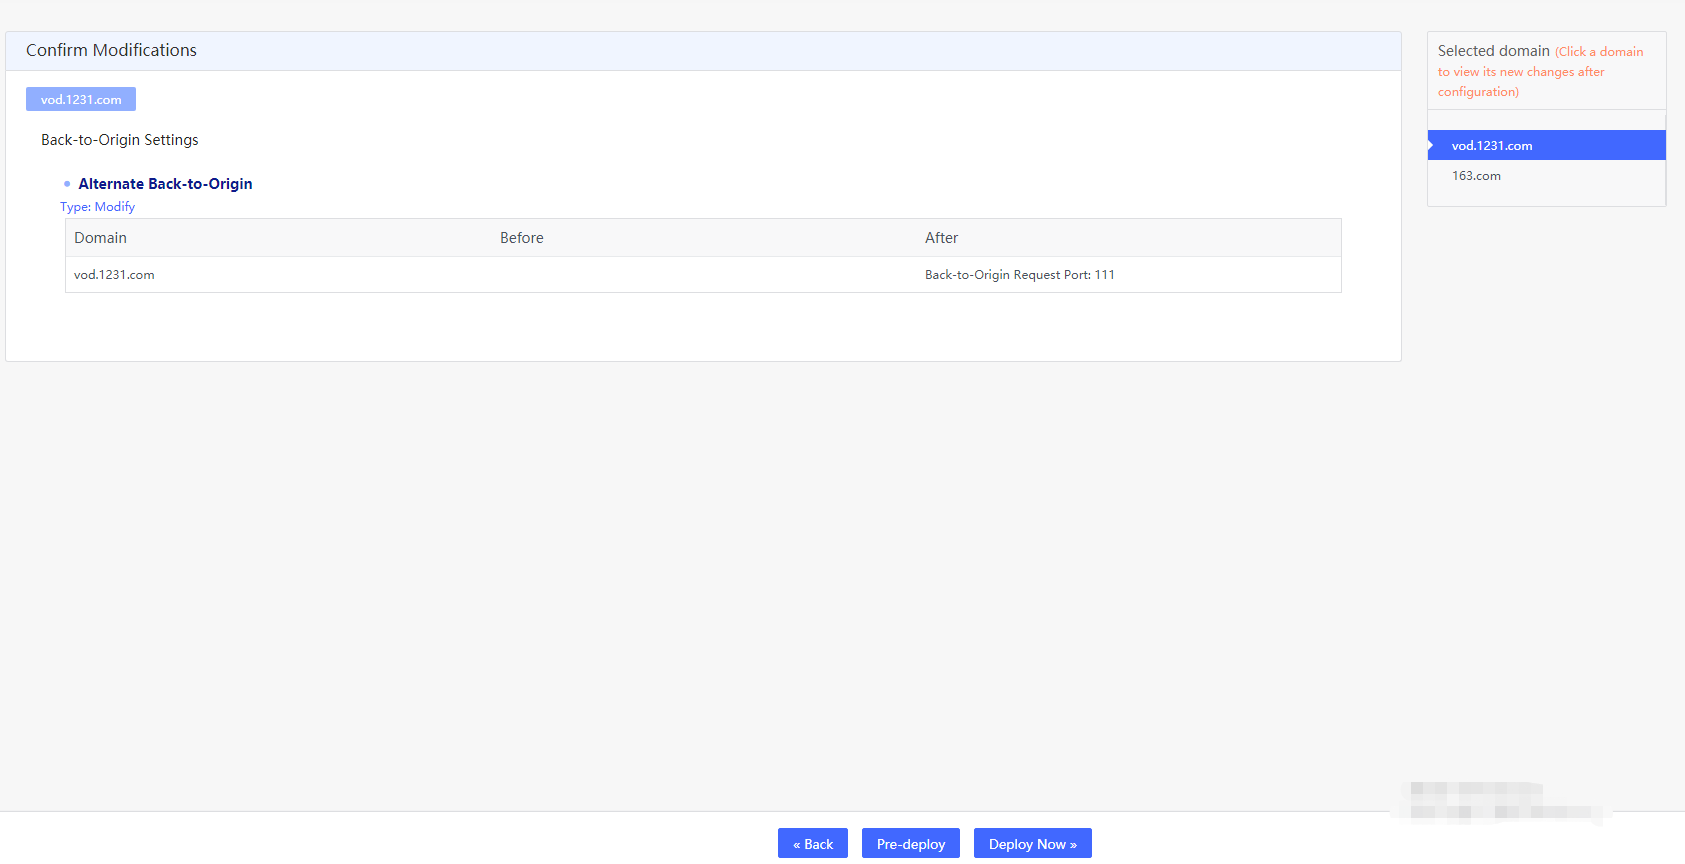
in the Confirm Modification page, You need to confirm all of the information that you have change, then choose Pre-deployment or Deploy Now for the next step which will take 3 to 5 minutes.
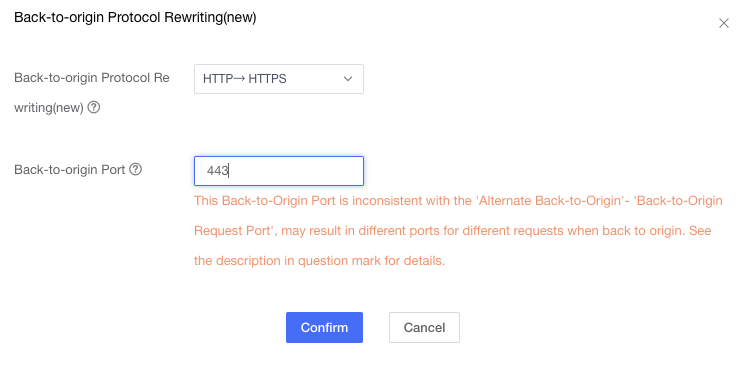
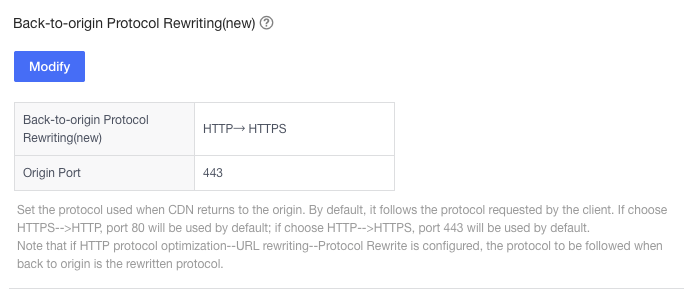
2 Back-to-Origin Protocol Rewrite
•Entrance
Product → Configuration → Edit Configuration → Back-to-Origin Settings → Back-to-Origin Protocol Rewriting
•Introduction
This function is to set the request HTTP(S) protocol and back-to-origin HTTP(S) protocol rewrite rules to change HTTP → HTTPS or HTTPS → HTTP
•Guides for operations
The following page is for configurations with many selections on the left menu, ‘Back-to-Origin Settings’ with ‘Back-to-Origin Protocol Rewrite’ configurations included. A window will pop up when you click add, then click next after all column haven been filled.

You need to confirm all of the information that you have changed, then choose Pre-deployment or Deploy Now for next step which will take 3 to 5 minutes.
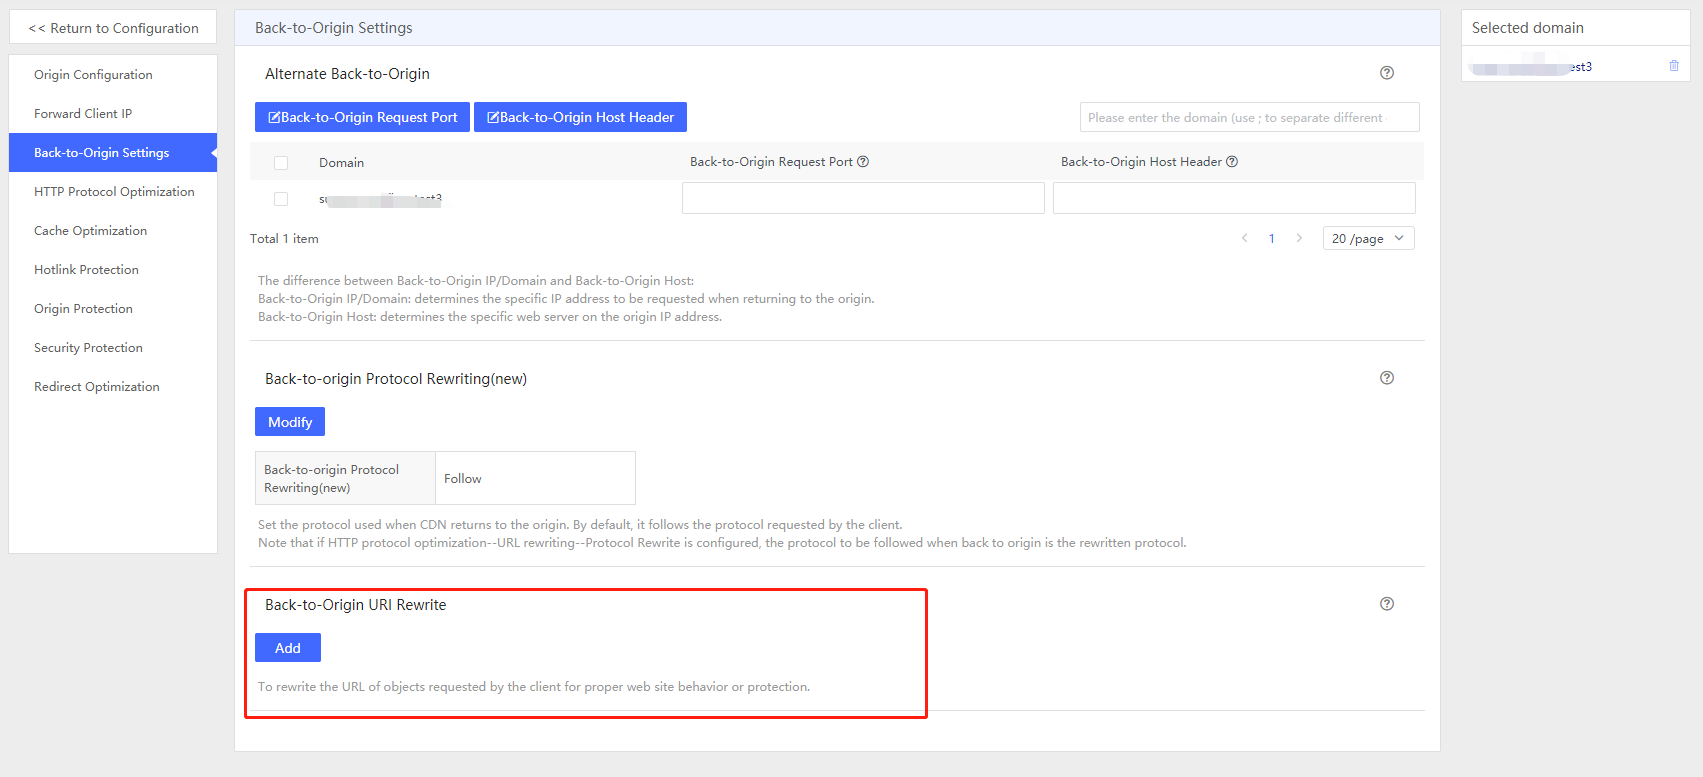
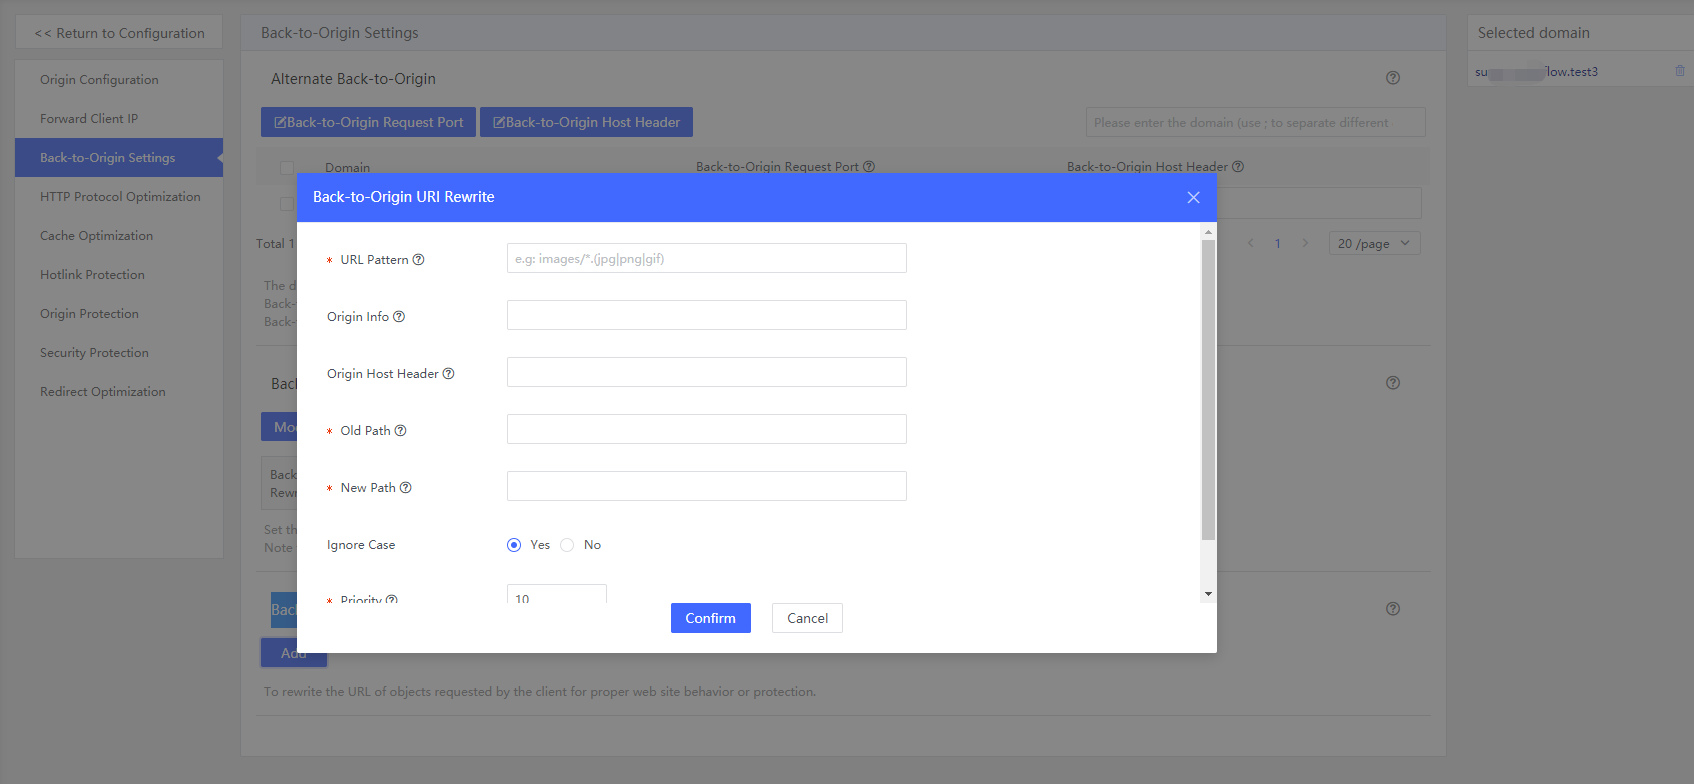
3 Back-to-Origin URL Rewrite
•Entrance
Product → Configuration → Edit Configuration → Back-to-Origin Settings → Back-to-Origin URL Rewrite
•Introduction
This function is to change URL path of origin server with URL rewrite pattern.
at default, origin URL path is root directory of origin server, but this function support change Origin Path with URL rewriting rules
if you change origin URL path with your origin URL path rule, you can change origin path with URL rewrite pattern assigned.
•Guides for operations
The following page is for configurations with many selections on the left menu, ‘Back-to-Origin Settings’ included. Fill the column of URL Rewrite Patten as you want, then click next.
•Examples
Assume that the ‘URL rewrite’ at the ‘Back-to-Origin Settings’ for following snapshot is configured as below
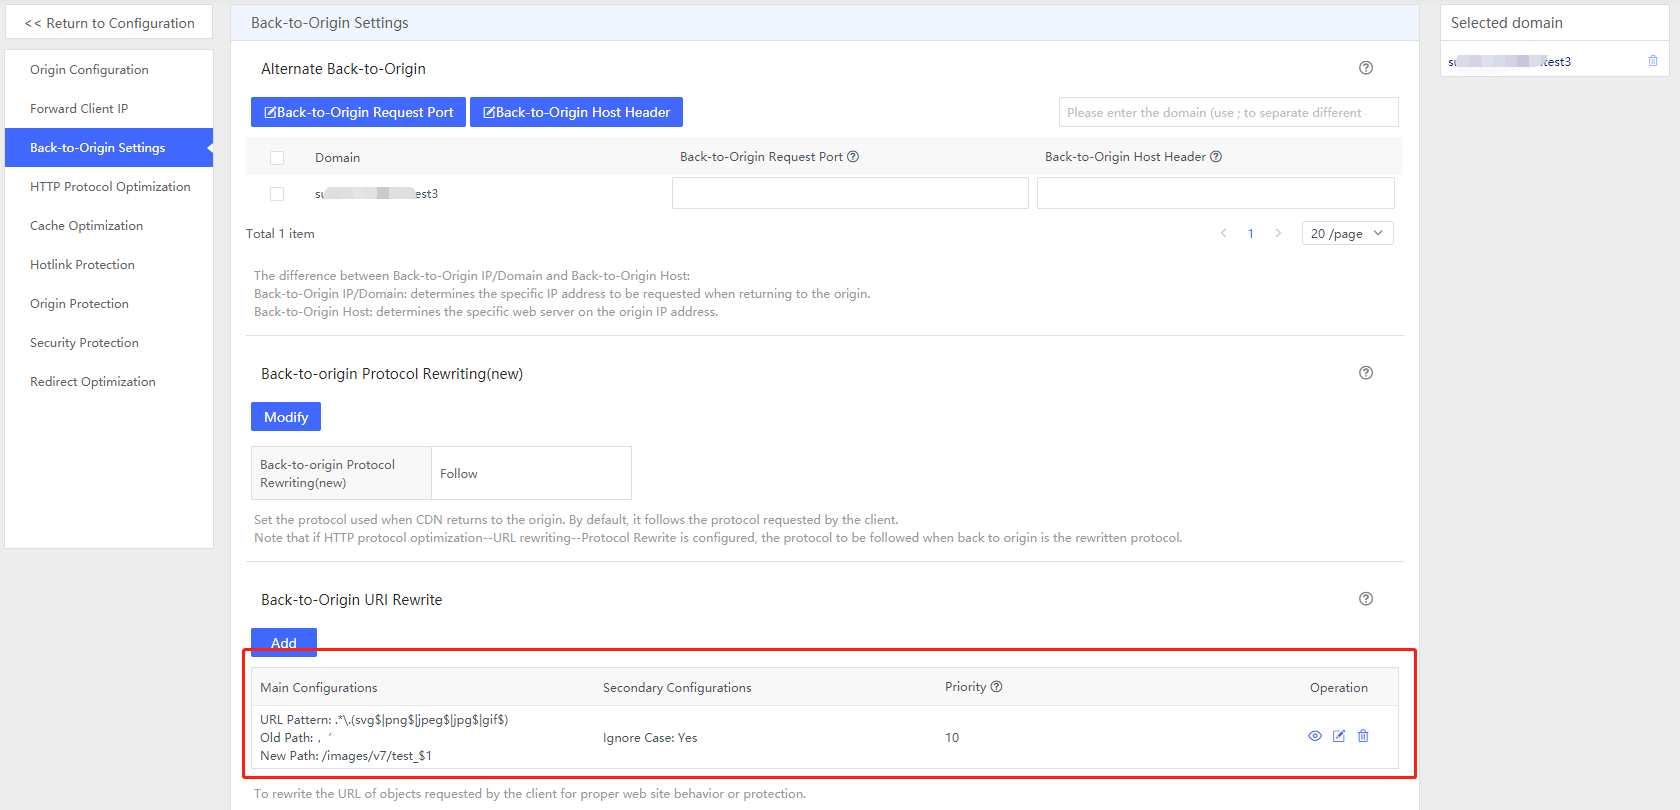
When CDN nodes have no caches for requests with URL pattern “.*.(svg$|png$|jpeg$|jpg$|gif$)” they will get objects by going to origins with a URL pattern “/images/v7/test_$1”. Then these objects will be cached on CDN nodes.