Create Zone
Last update:2023-10-27 16:06:39
You can create zones through the Customer Portal.
Step 1: Log in to your account.
Step 2: Click on the Cloud DNS menu item.
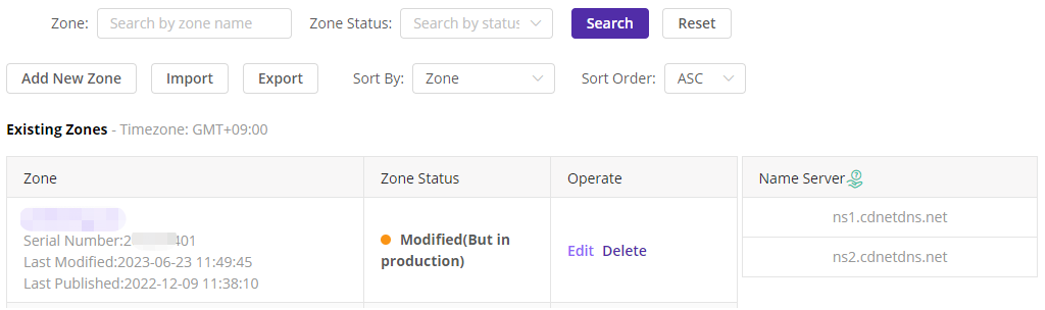
Step 3: Click on Zones (under Cloud DNS menu) and you will be presented with the page as shown below:
Step 4: Click on the button “Add New Zone” and you will get the page as the below screenshot shows:
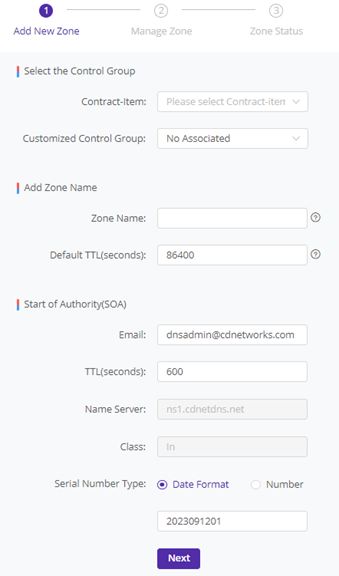
Step 5: Choose the control group.
a) Choose the Contract-item.
b) Choose the Customized Control Group.
Step 6: Specify your Domain Name and enter a TTL.
a) Specify your Domain Name.
b) The Default TTL value is 86400. If you want to change the value, double-click the value in the field and type a new value.
Step 7: Add SOA Record
a) The default value of the Email field is the email address of the administrator who will be responsible for our DNS system management.
If you want to change the value, double-click the value in the field and type a new value.
b) The default TTL value is 600(s).
If you want to change the value, double-click the value in the field and type a new value.
c) The Name Server field is pre-populated with our server name and is not editable.
d) The Class field is set to “IN” and is not editable.
e) Two formats are available for the Serial Number field:
- Data Format: This field is pre-populated by the system and is not editable. The number is of the format: yyyymmddnn, where nn is a nature number differentiator of changes on a single day. It automatically set the limit on the number of changes that you can make to you zone file on a single day to 99.
- Number: It can any arbitrary number chosen by you.
Step 8: Click on the Next button, and you will be presented with Tips.
Click Yes, and you will be directed to the page as the following screen:
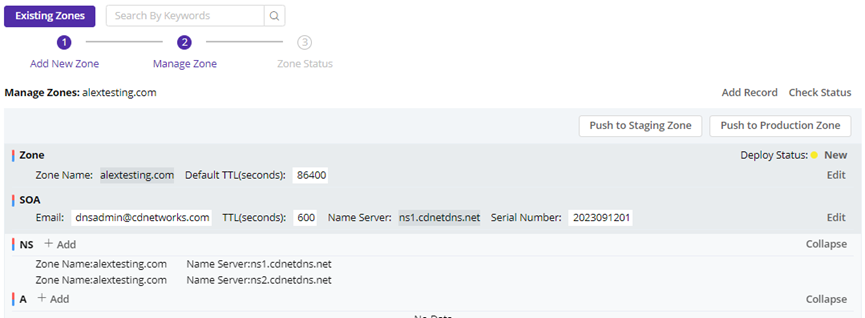
- Click on the “Push to Staging Zone” button, and you will send your DNS data to our staging zone: xxx.staging-test.net.
- Click on the “Push to Production Zone” button, and you will send your DNS data to our production server.
Step 9: Click on the “Add” icon to add record type or click on the “Add Record” icon at the top.
Click either one of these two icons, you will see the following screen.

Change the record type by clicking on the record label, and the input field is different for each record.
CDNetworks Cloud DNS Service supports DNS Record types below:
- NS
- A
- AAAA
- CNAME
- ALIAS
- MX
- TXT
- PTR
- RP
- SPF
- SRV
- CAA
NS Record
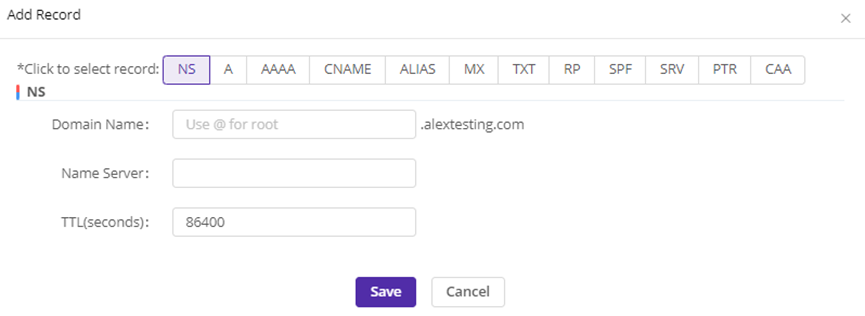
a) Add a Host name.
Note: Wildcard (*) is not allowed.
b) Add a Name Server
c) Specify a TTL for this record.
The default TTL is 86400(s). You can modify this value.
A Record

a) Add a Host name.
b) Add the corresponding IP address.
c) Specify a TTL for this record.
The default TTL is 86400(s). You can modify this value.
AAAA Record
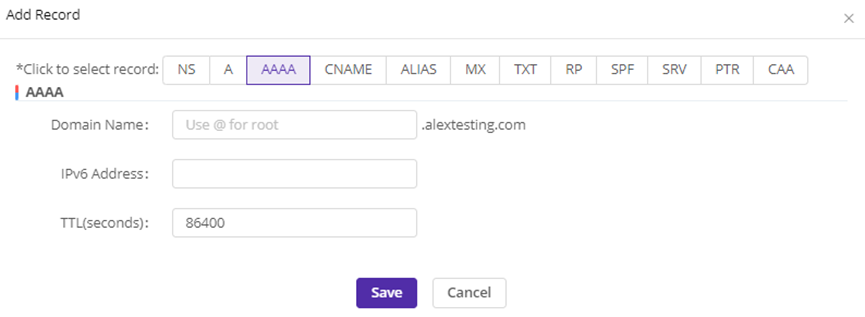
a) Add a Host name.
b) Add the corresponding IPv6 address.
c) Specify a TTL for this record.
The default TTL is 86400(s). You can modify this value.
CNAME Record
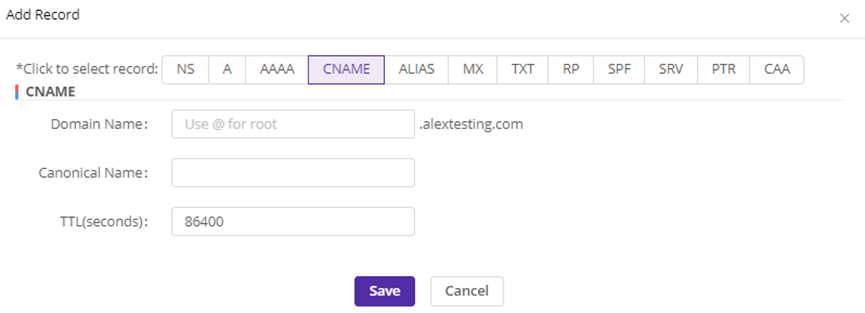
a) Add a Host name.
b) Add the corresponding Canonical Name.
c) Specify a TTL for this record.
The default TTL is 86400(s). You can modify this value.
ALIAS Record
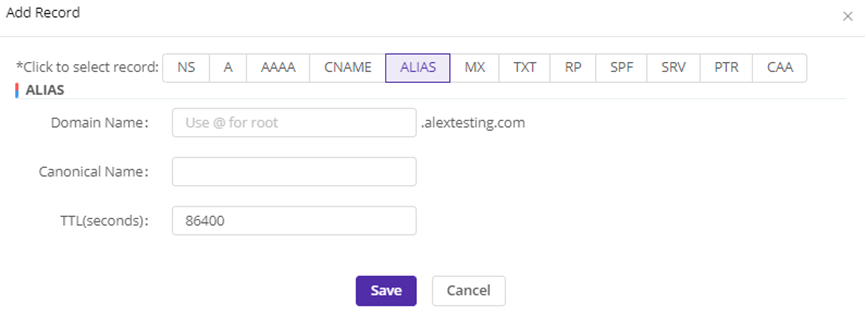
a) Add a Host Name.
b) Add the corresponding Canonical Name.
c) Specify a TTL for this record.
The default TTL is 86400(s). You can modify this value.
MX Record
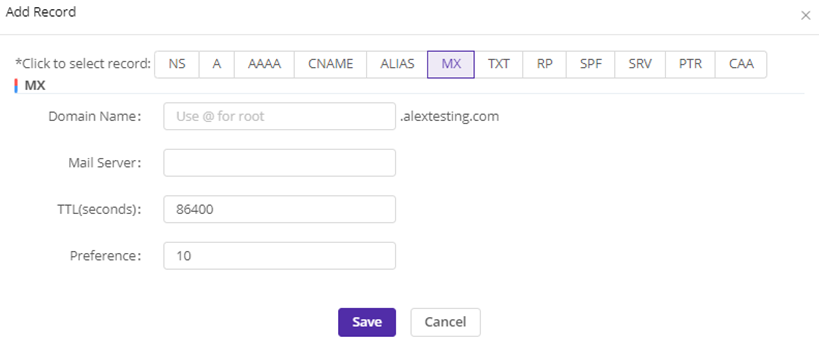
a) Add a Host Name and add a Mail Server Name.
b) Specify a TTL for this record.
The Default TTL is 86400(s). You can modify this value.
c) Add the Preference for this record.
The default value of Preference is 10. You can modify it.
TXT Record
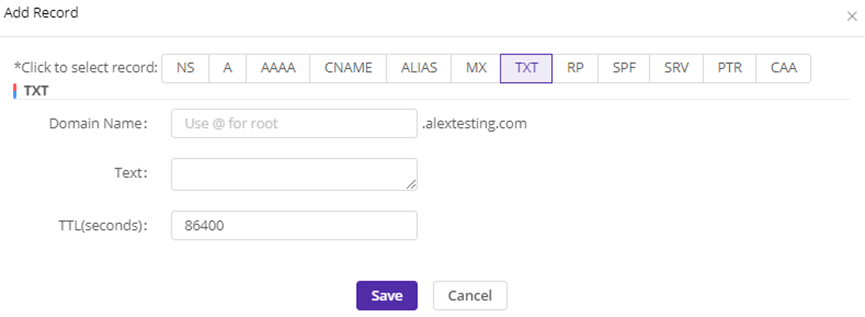
a) Add a Host Name.
b) Type any text you would like to associate with this record into Text field.
c) Specify a TTL for this record.
d) The default TTL is 86400(s). You can modify this value.
RP Record
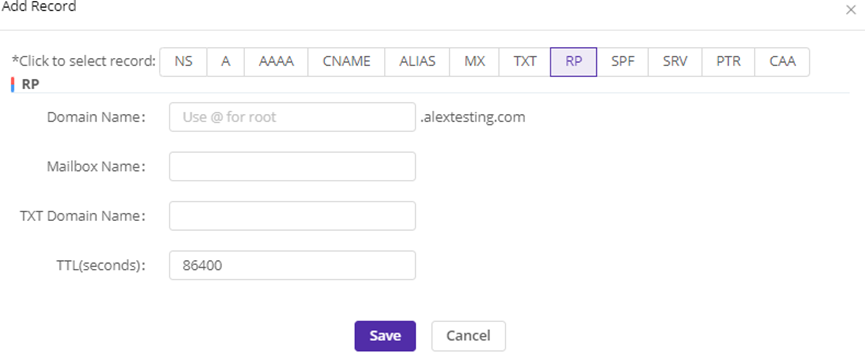
a) Add a Host Name.
b) Add the email address of the responsible person.
c) Add a domain name for a TXT with additional information.
d) Specify a TTL for this record.
The default TTL is 86400(s). You can modify this value.
SPF Record
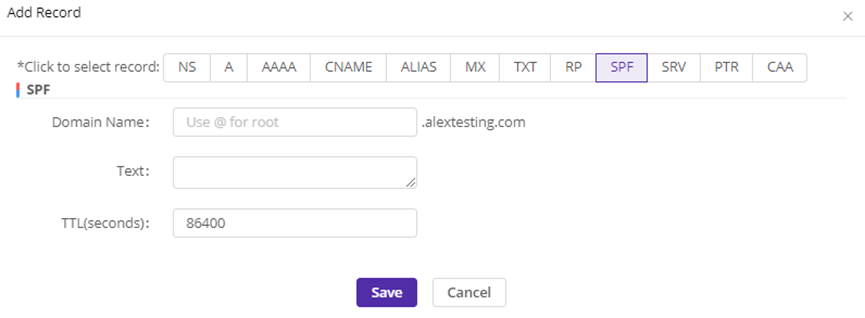
a) Add a Host Name.
b) Type any text you would like to associate with this record into Text field.
c) Specify a TTL for this record.
The default TTL is 86400(s). You can modify this value.
SRV Record
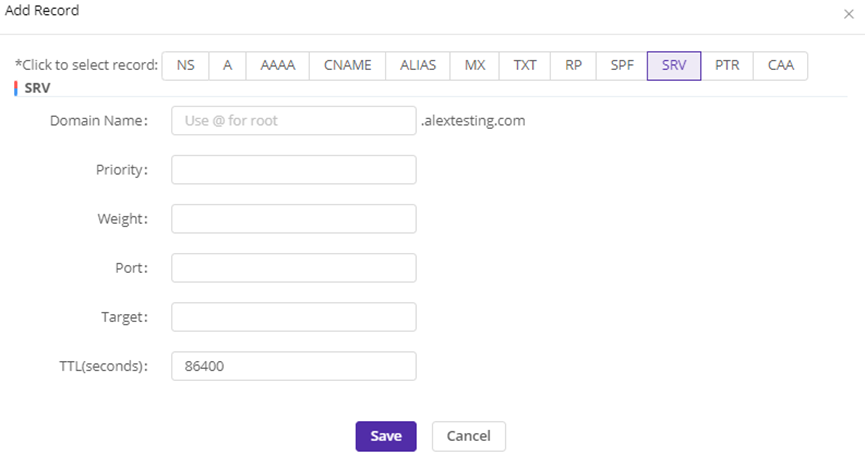
a) Add a Host Name.
b) Add a number for priority usage.
c) Add a weight
d) Add the port number of the server that provides this service.
e) Add the Domain Name of a target which is running service on the specified port.
Add the Domain Name of a target which is running service on the specified port.
f) Specify a TTL for this record.
The default TTL is 86400(s). You can modify this value.
PTR Record
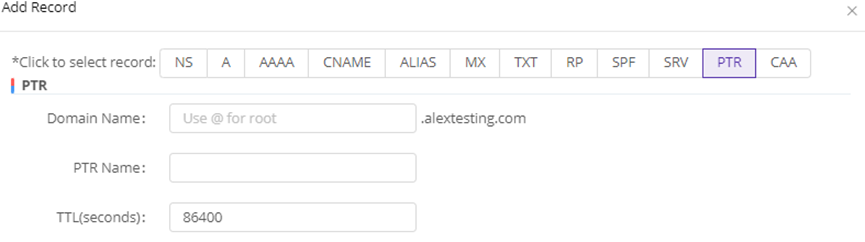
a) Add a Host Name.
b) Add a PTR Name that you would like to associate with this record.
c) Specify a TTL for this record.
The default TTL is 86400(s). You can modify this value.
CAA Record
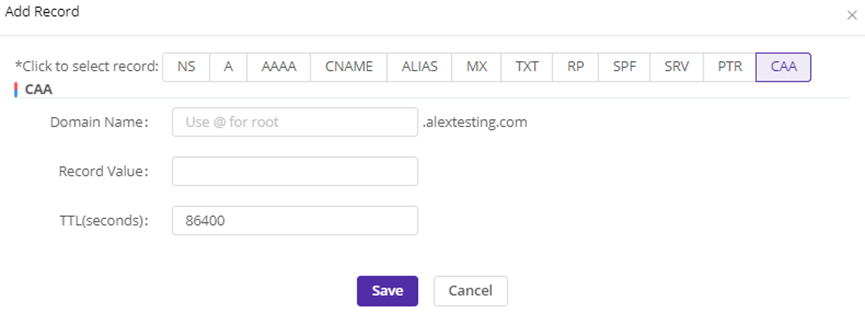
a) Add a Host Name.
b) Add a CAA Record Value.
c) Specify a TTL for this record.
The default TTL is 86400(s). You can modify this value.
CLB record
Please refer to “Manage CLB Domains”.