Example of Using Keycloak for OIDC SSO
最終更新日:2026-03-25 15:16:54
Procedure
Keycloak Deployment and installation
For details, see: Installation and Publish process
User OIDC connection to CDNetworks configuration
1. The administrator or management account logs in to the Keycloak Platform

2. Create a new Realm
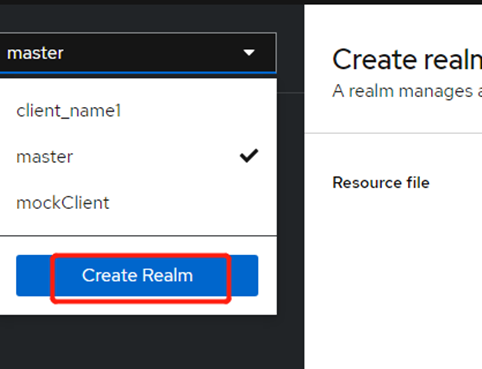
On the Create realm page, enter Realm name as oidc_shengbo, and then click Create to create a new Realm named oidc_shengbo. Realm represents the tenant in Keycloak.
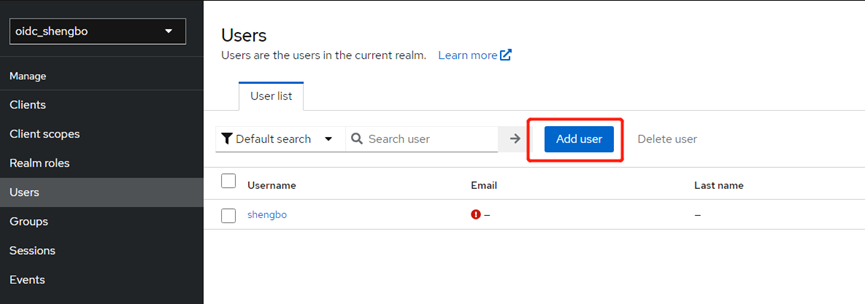
3. In the drop-down list in the upper left corner of the page, select the created oidc_shengbo, select Users in the left navigation bar, and then click Add user.
4. On the Create user page, enter Username as shengbo. Other options are optional. After setting, click Create to create user shengbo.
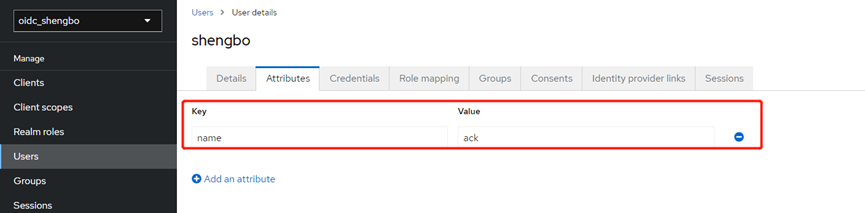
5. On the shengbo page, click Attributes, add the relevant attributes of user shengbo, set the Key to name, the Value to ack, and then click Save. This attribute can be injected into the ID Token.
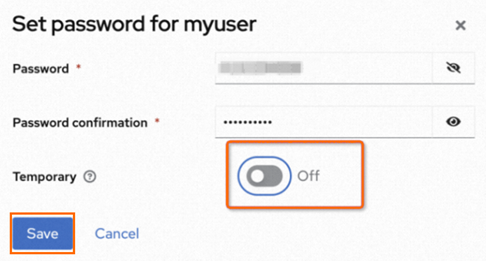
6. On the shengbo page, click Credentials, and then click Set Password.
7. Set Temporary to On when setting the password, then click Save. You will need to change the password after logging in for the first time.
The address for logging in to Keycloak is https://${Keycloak edgeHostname}/realms/${user realm}/account.
Client Settings
Client is the client that requests Keycloak to authenticate the user. After the user settings are completed, you need to complete the Client settings.
1. Select Clients in the left navigation bar of the oidc_shengbo page, and then click Create client on the Clients page.
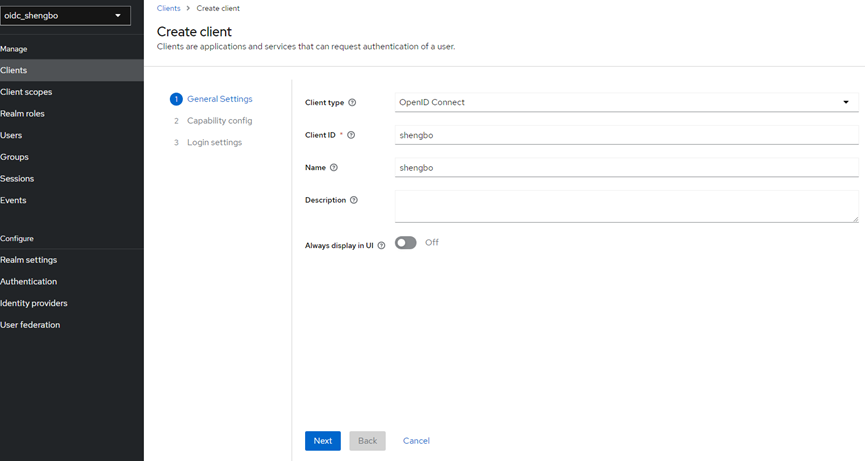
2. On the Create client page, set General Settings, Capability config, and Login settings.
a. On the General Settings page, set the Client ID and Name. In this example, set them to shengbo, and then click Next.
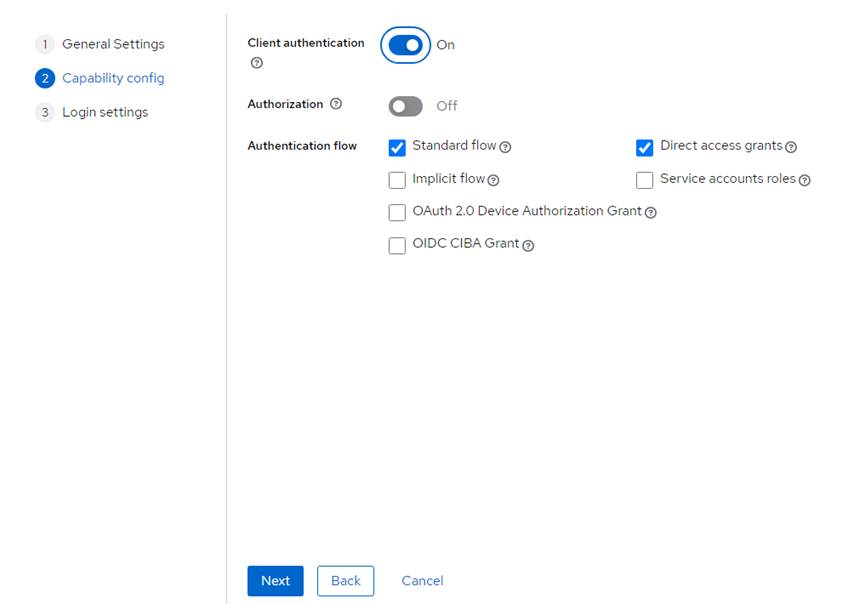
b. On the Capability config page, set Client authentication to on, which means setting the Client access type to confidential. Keep other options as default, and then click Next.
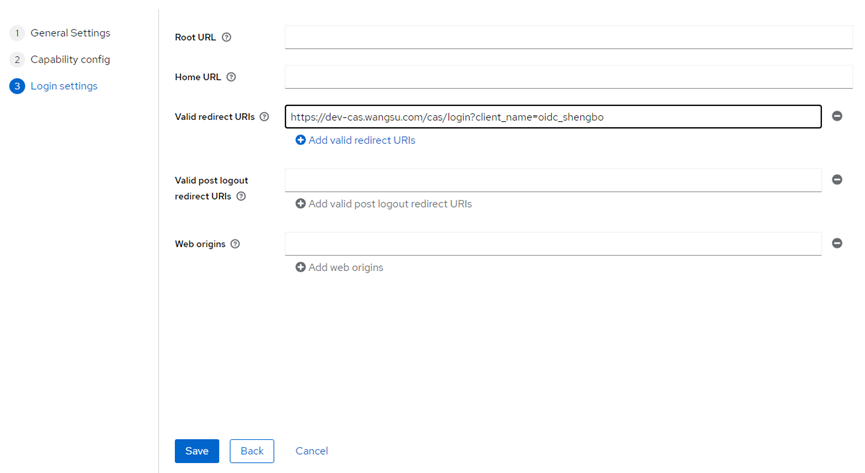
c. On the Login settings page, set Valid redirect URIs to https://login.cdnetworks.com/cas/login?client_name=oidc_shengbo&service=https://dash.cdnetworks.com/ to match all HTTP redirect URLs. Then click Save.
Client scopes settings
Client scopes are a set of common protocol Mappers and Roles shared among multiple client.
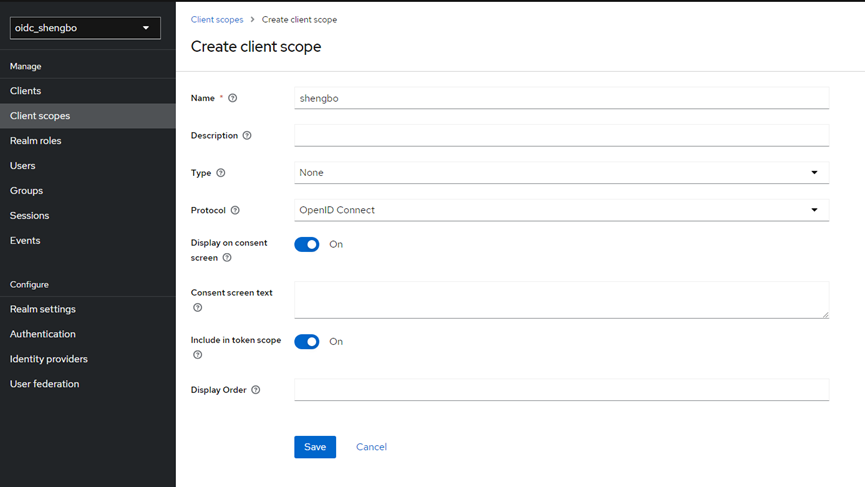
1. Select Client scopes in the left navigation bar of the oidc_shengbo page, and then click Create client scope on the Client scopes page.
2. On the Create client scope page, set Name to shengbo, keep other configuration items as default, and then click Save.
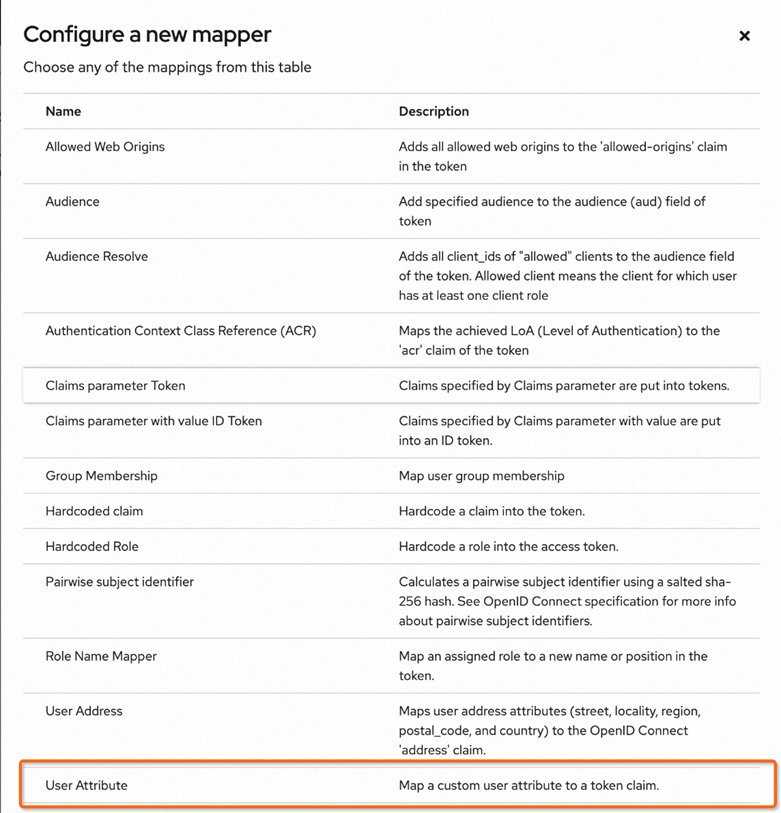
3. On the shengbo page, click Mappers, and then click Configure a new mapper.
4. On the Configure a new mapper page, create a User Attribute to inject user attributes into the ID Token, namely the name and ack fields added in step 6 above.
5. On the Add mapper page, set Name to name, User Attribute to name (name: ack attribute set above), and Token Claim Name to name (name of the attribute in the token). Keep other configuration items as default. Then click Save.

6. In the left navigation bar, click Clients to return to the Clients page, and then select the Client named shengbo.
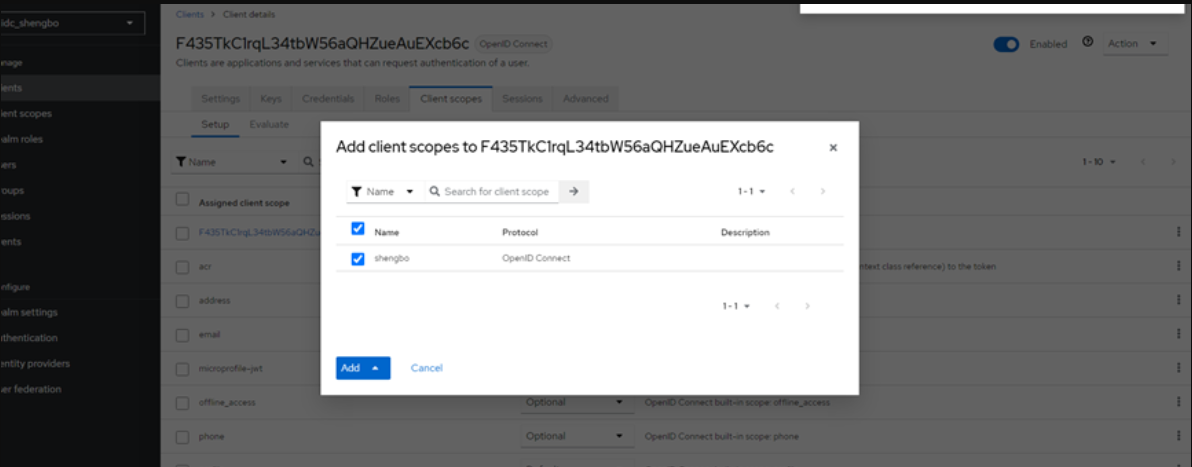
7. On the client page of shengbo, click Client scopes, then click Add client scope. In the pop-up dialog box, select the Client scope to be added, and then click Add.