Example of Using Azure for OIDC SSO
最終更新日:2026-03-25 15:16:56
Operation Steps
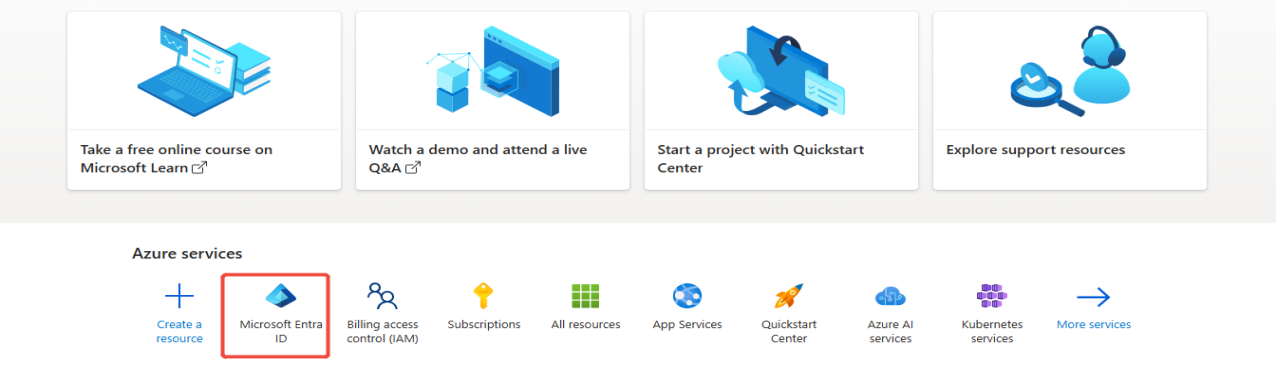
1. Log in to the Azure platform and locate Microsoft Entra ID
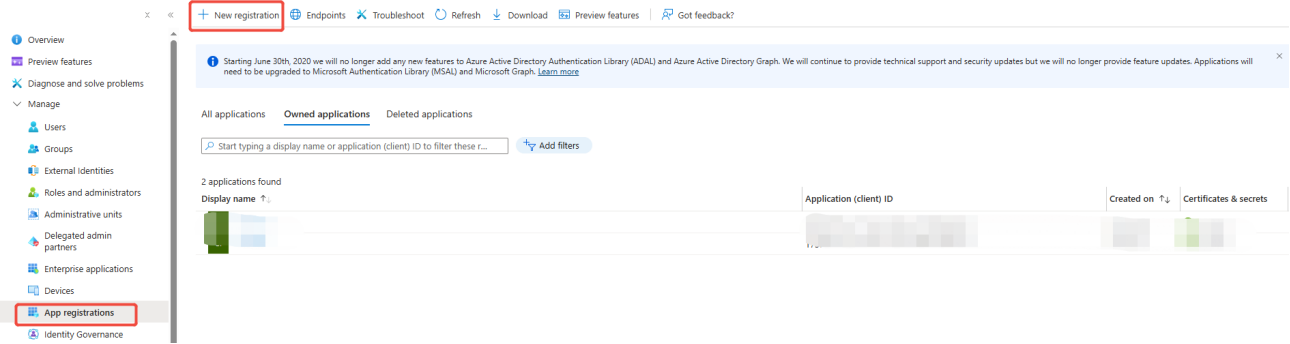
2. In App registrations, create a new application by clicking New registration
3. Complete the application information, select web as the redirect address type, and enter the redirect URL
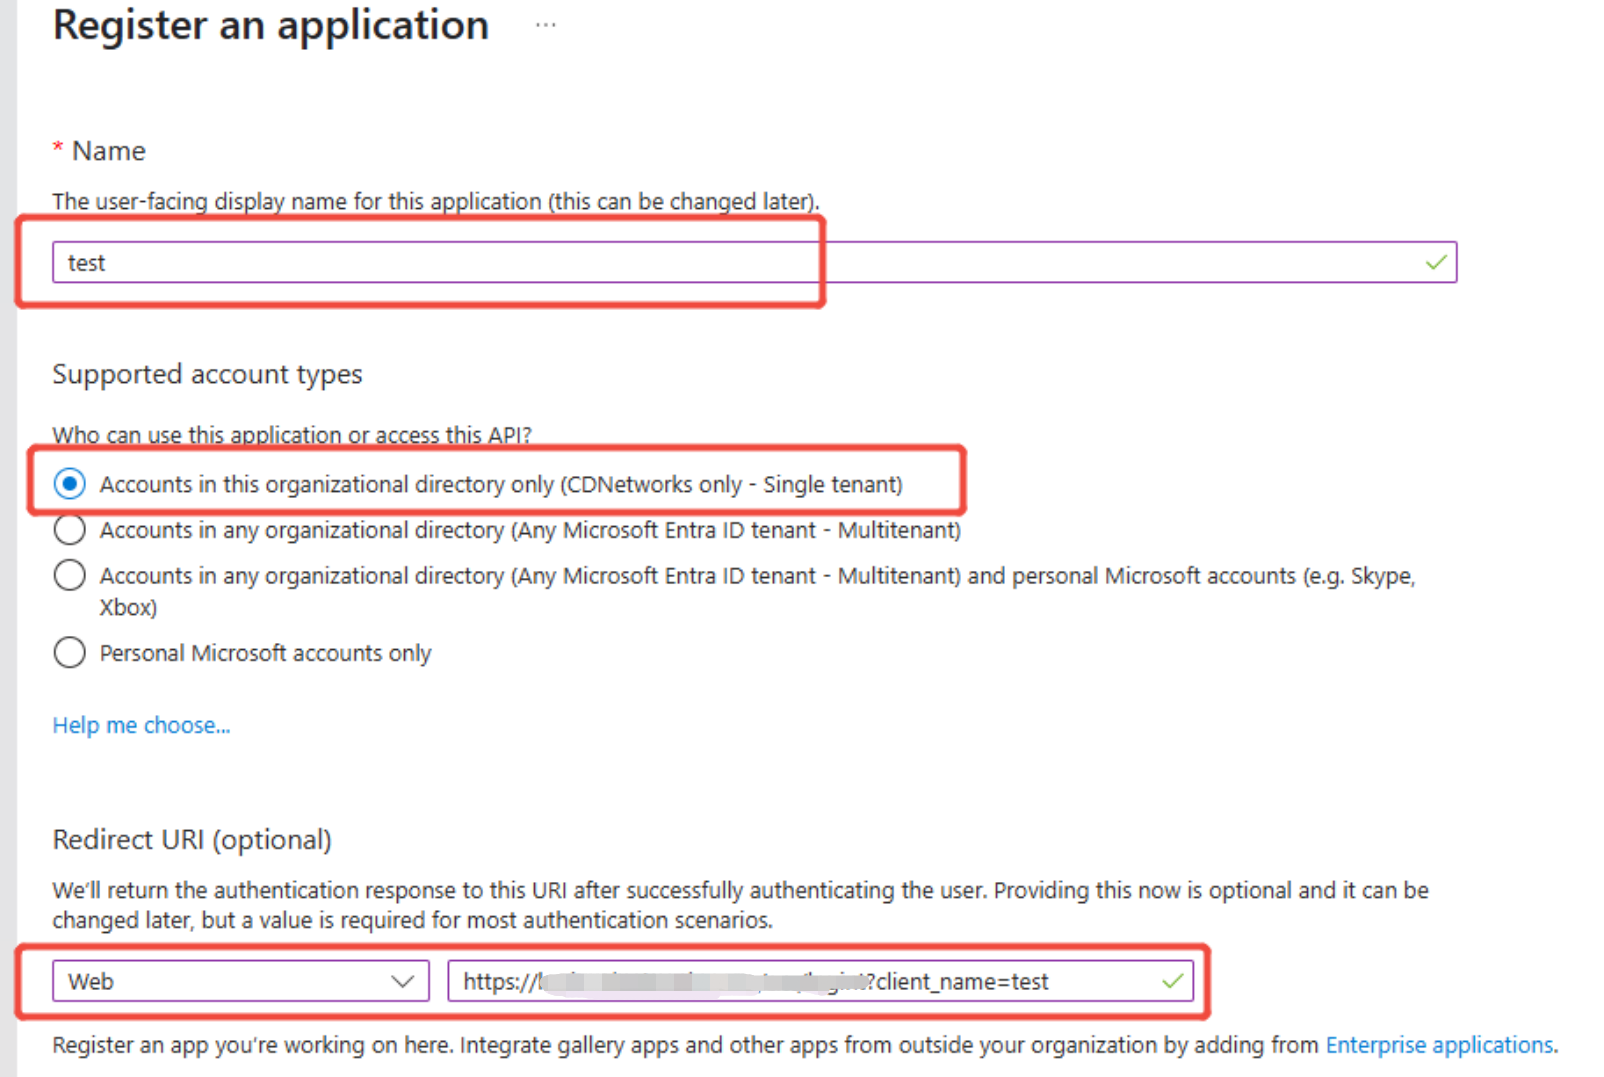
Redirect URL: https://login.cdnetworks.com/cas/login?client_name=
For example, if you set the IdP Name to test, enter the following: https://login.cdnetworks.com/cas/login?client_name=test
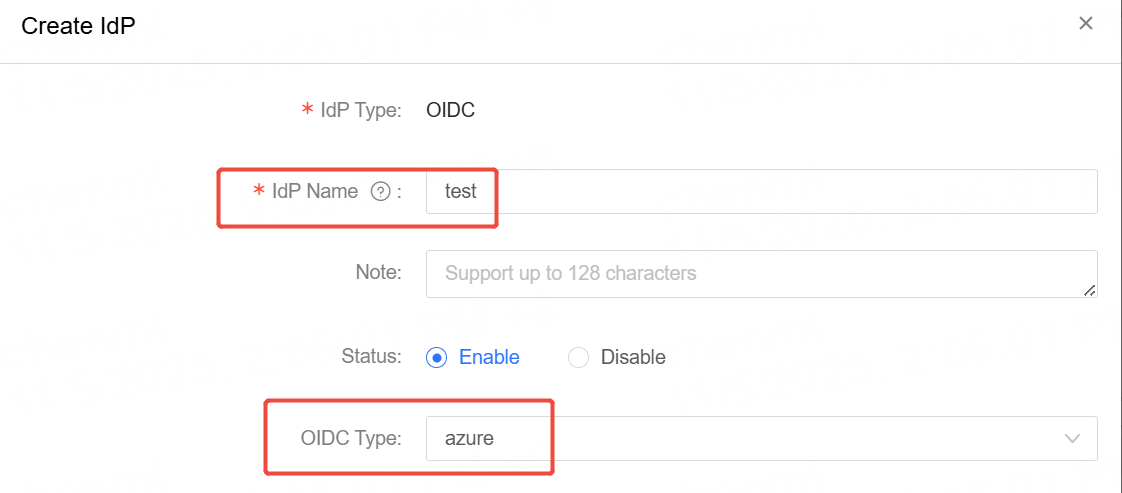
4 Open the console, go to [Access Control] -> [Identity Provider], and add a new identity provider configuration.
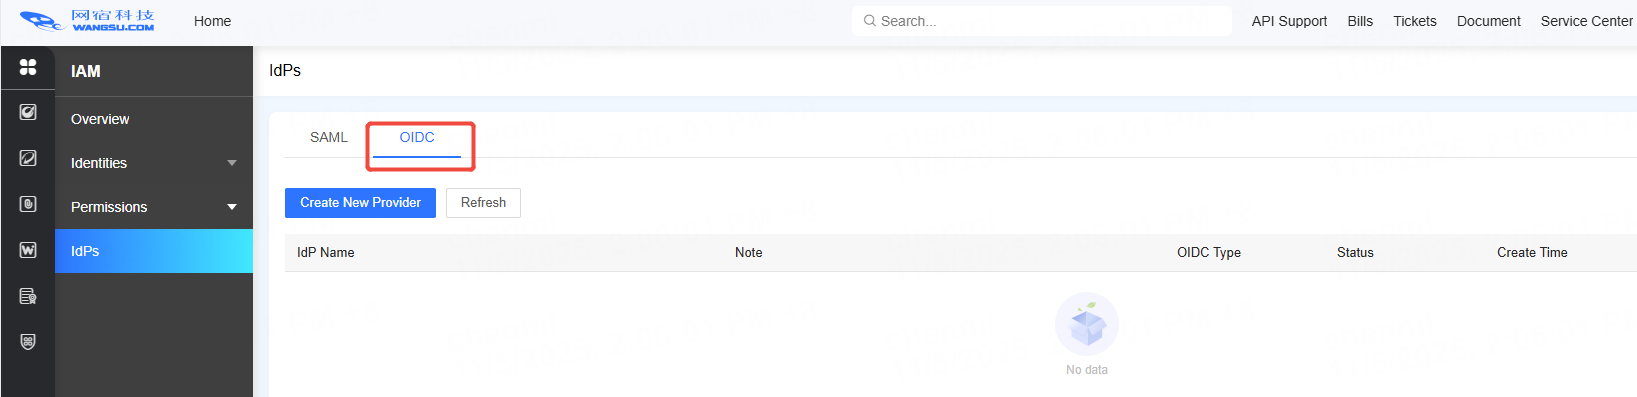
Fill in the same [Provider Name] on the console as the IdP Name set in step 3, and select Azure as the [OIDC Type].
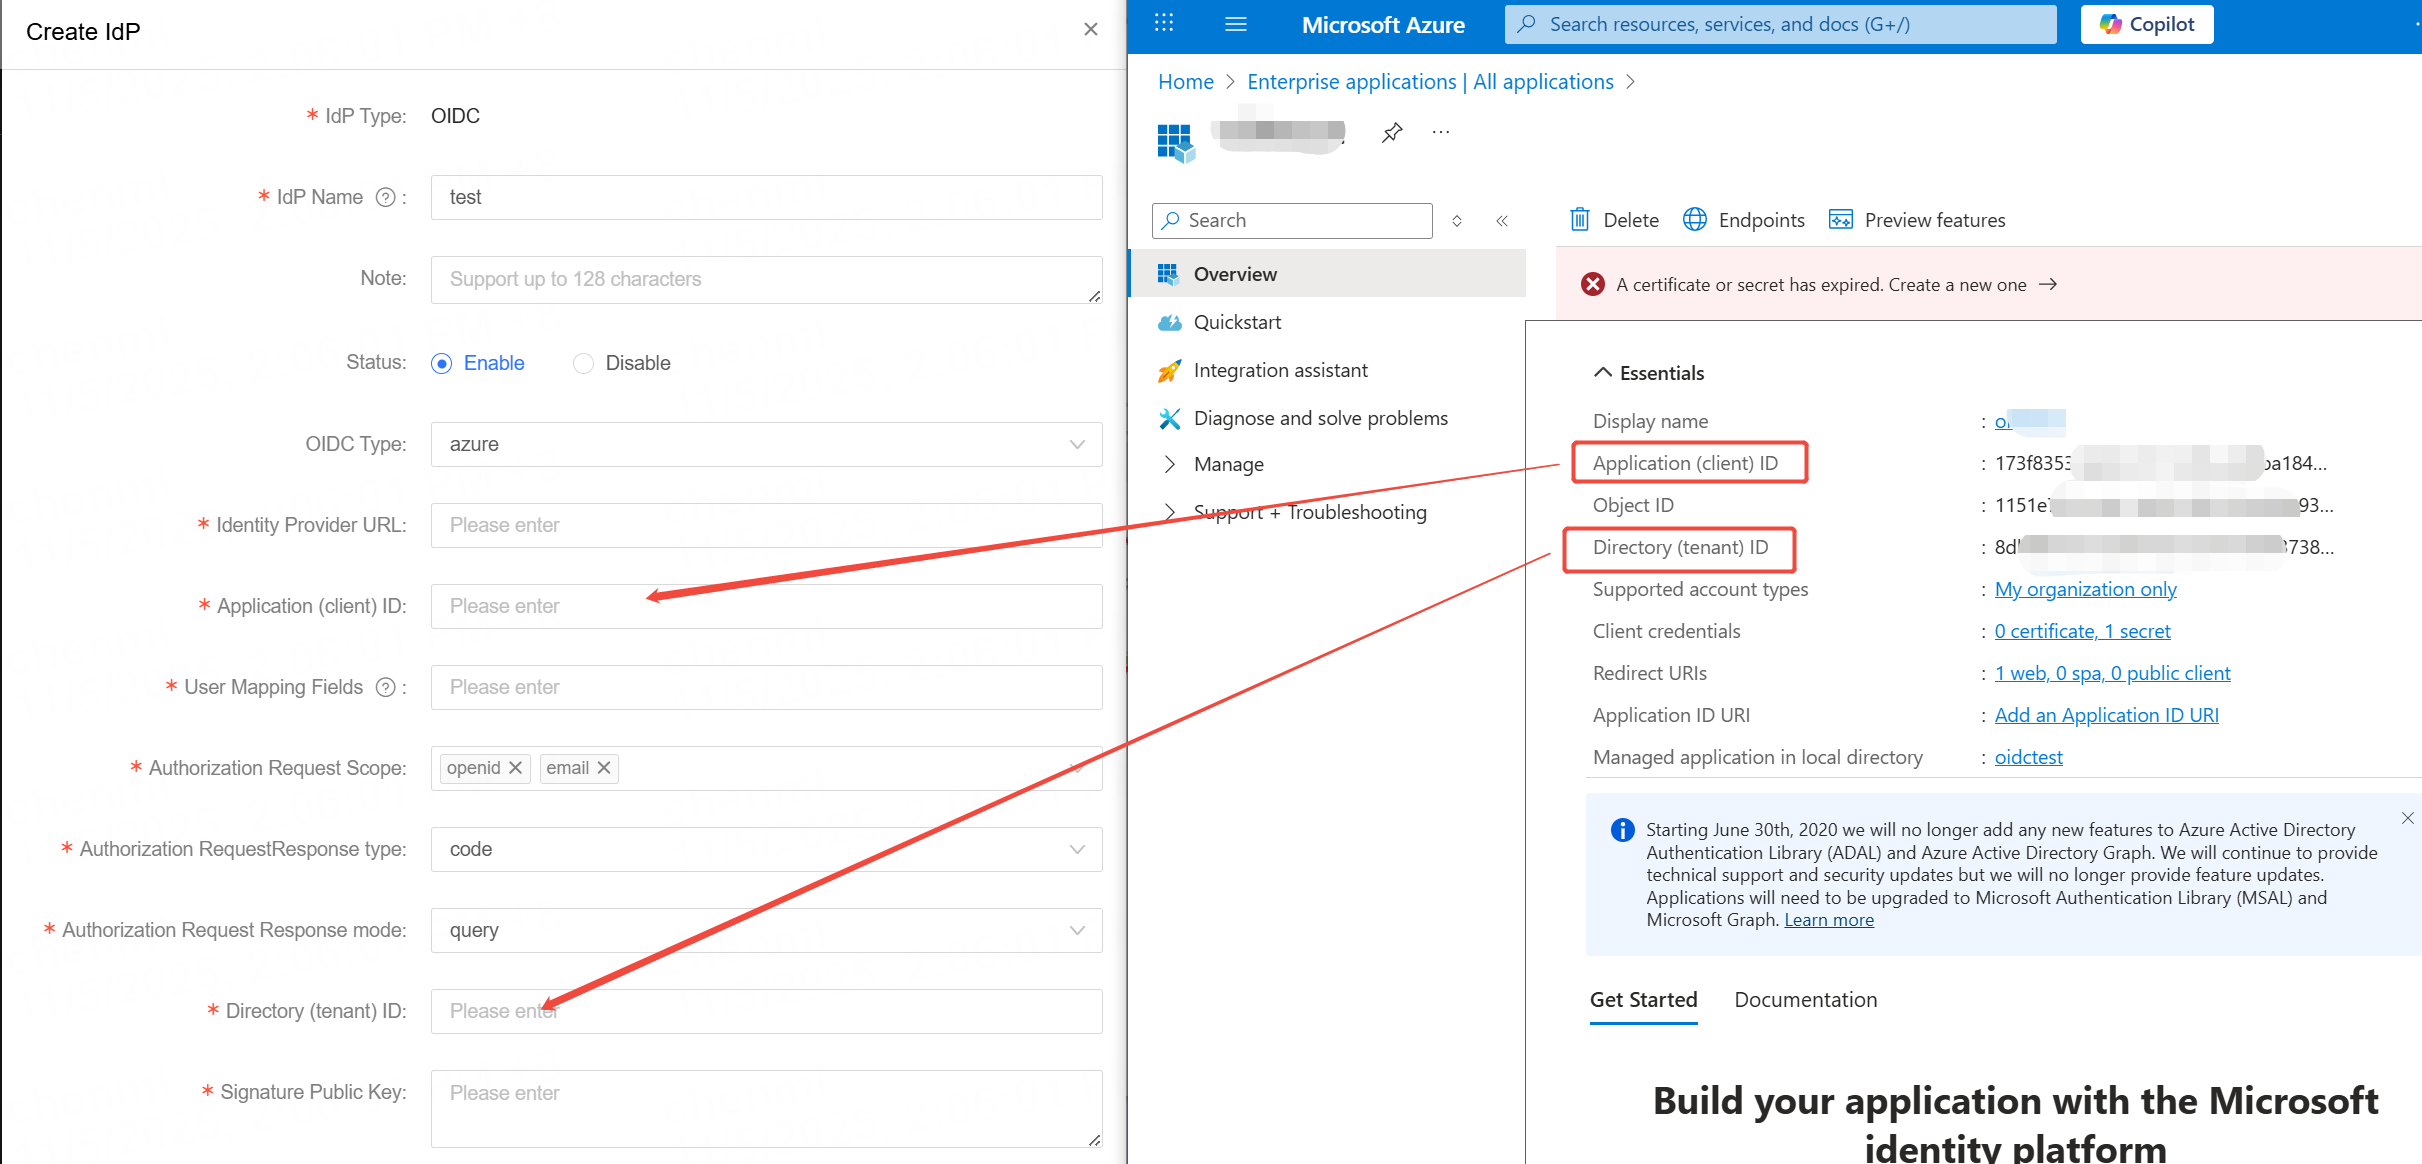
5. Enter the Client ID and Tenant ID into the respective fields in the Config Form on the console, as shown in the diagram.
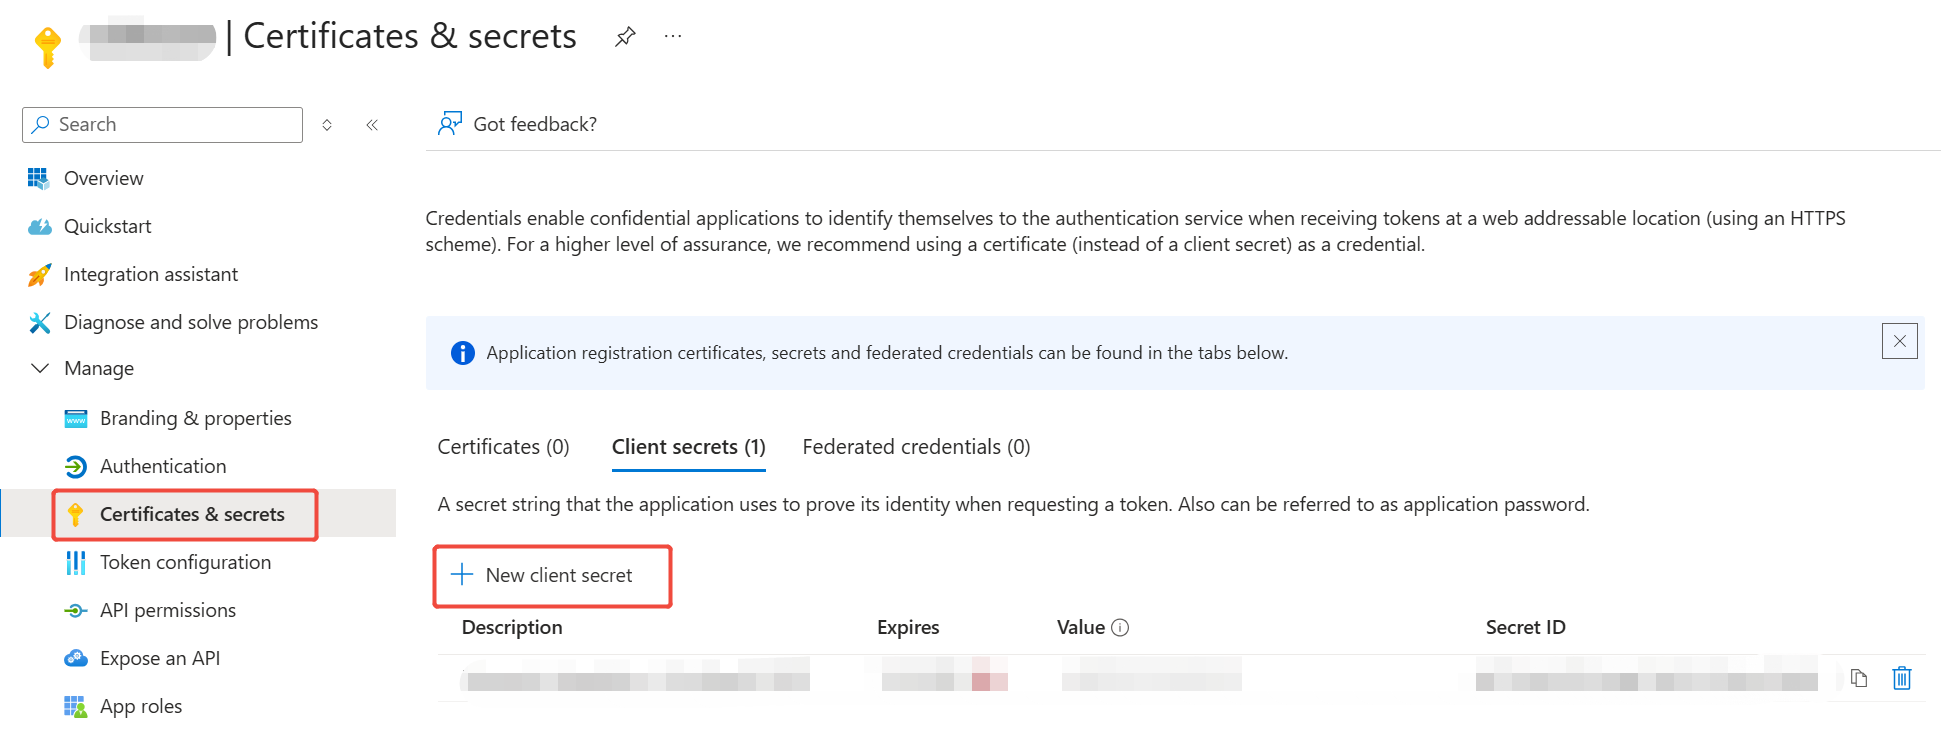
6. Set a password for the application. Navigate to the Certificates & secrets section, and click New client secret to add a password.
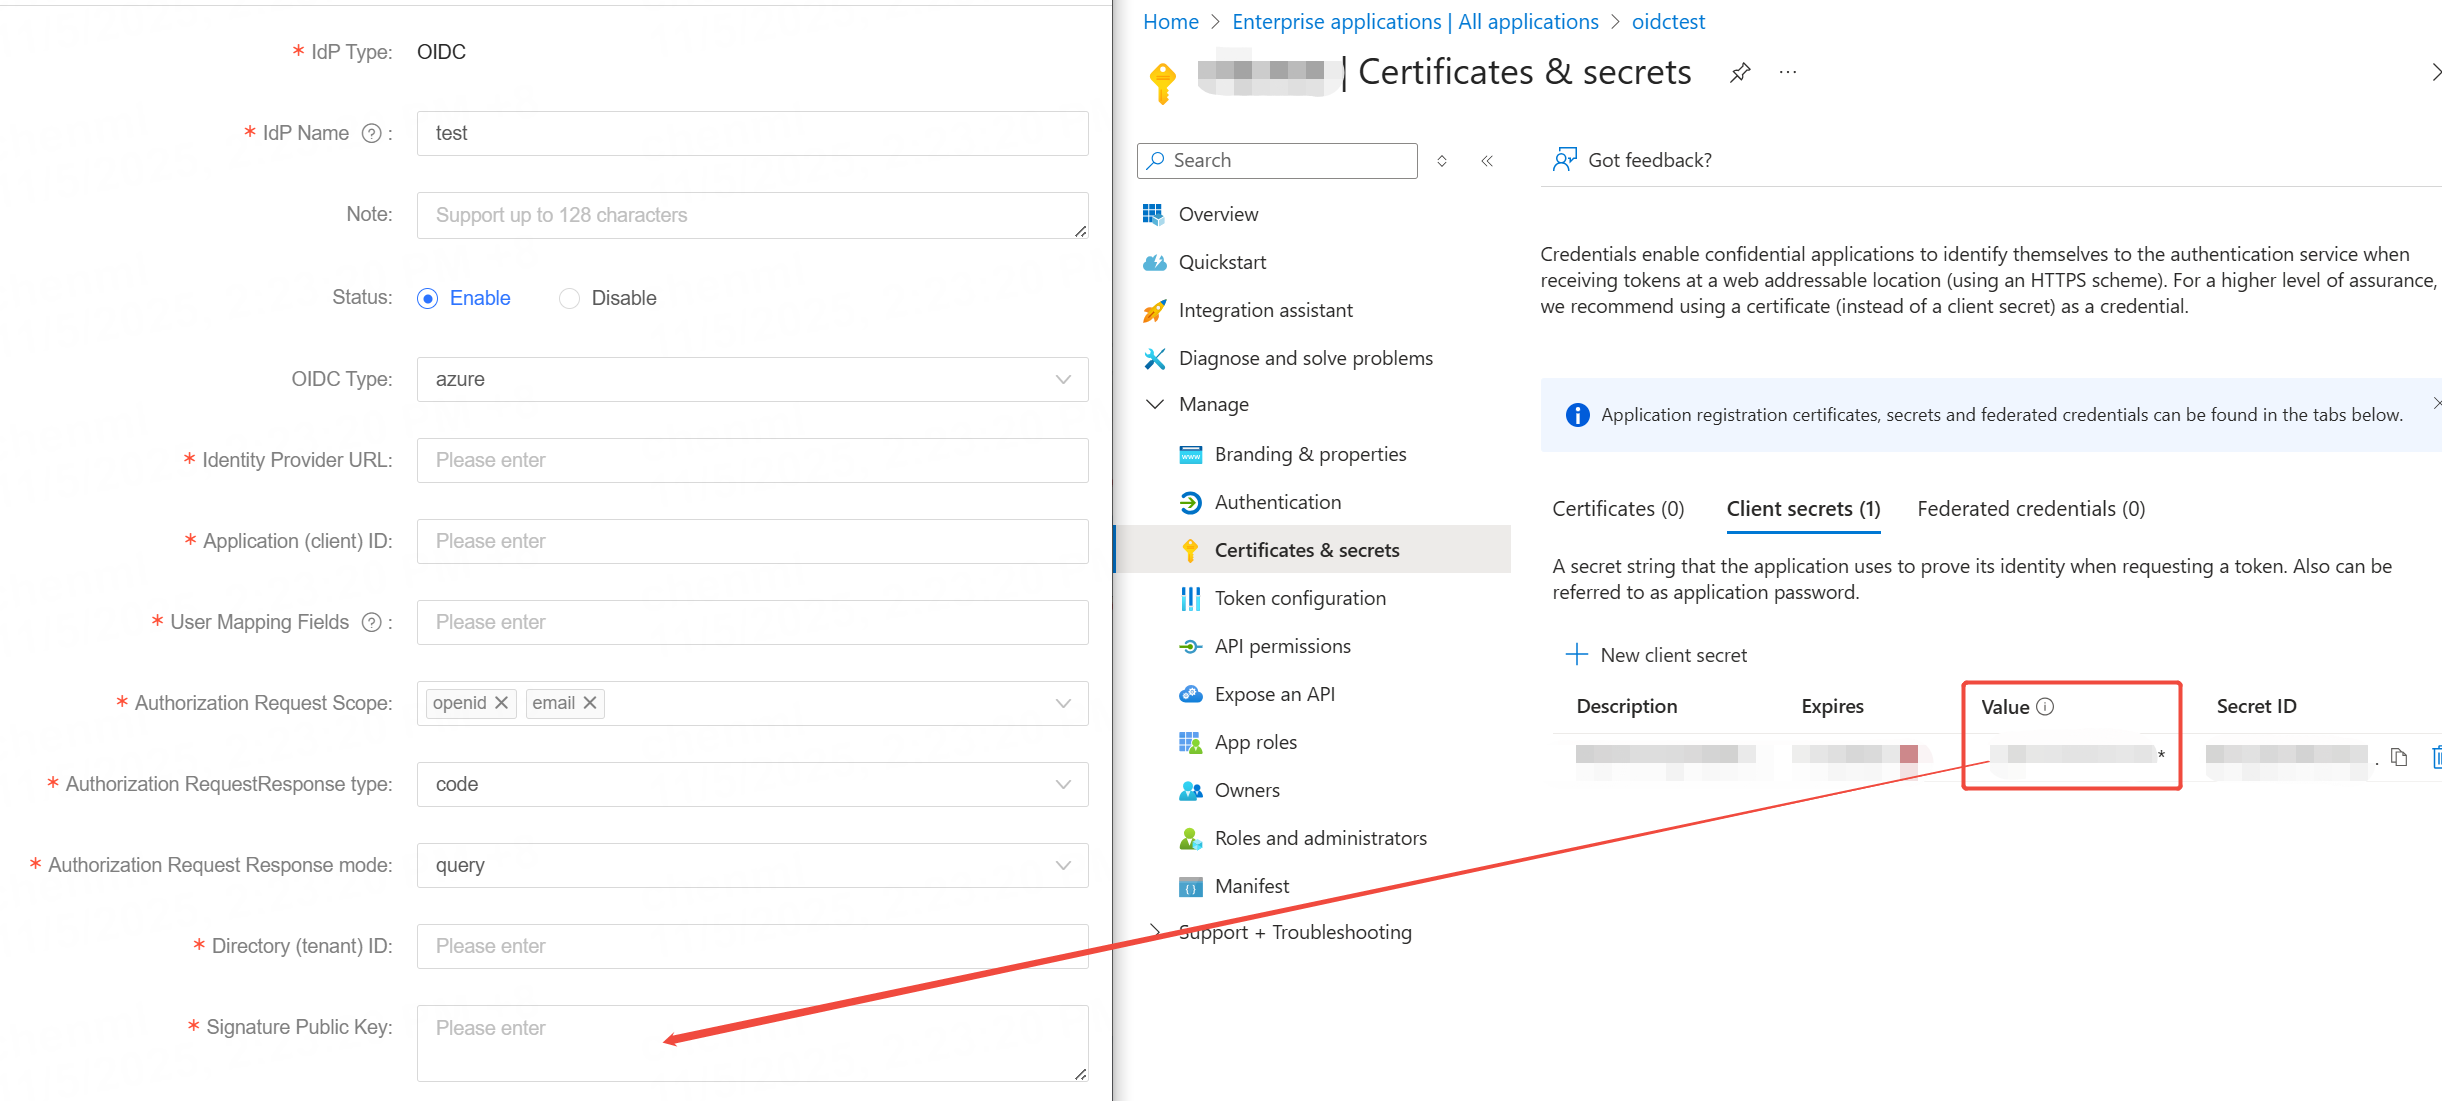
Then enter the password’s Value field into the Config Form on the console, as shown in the diagram.
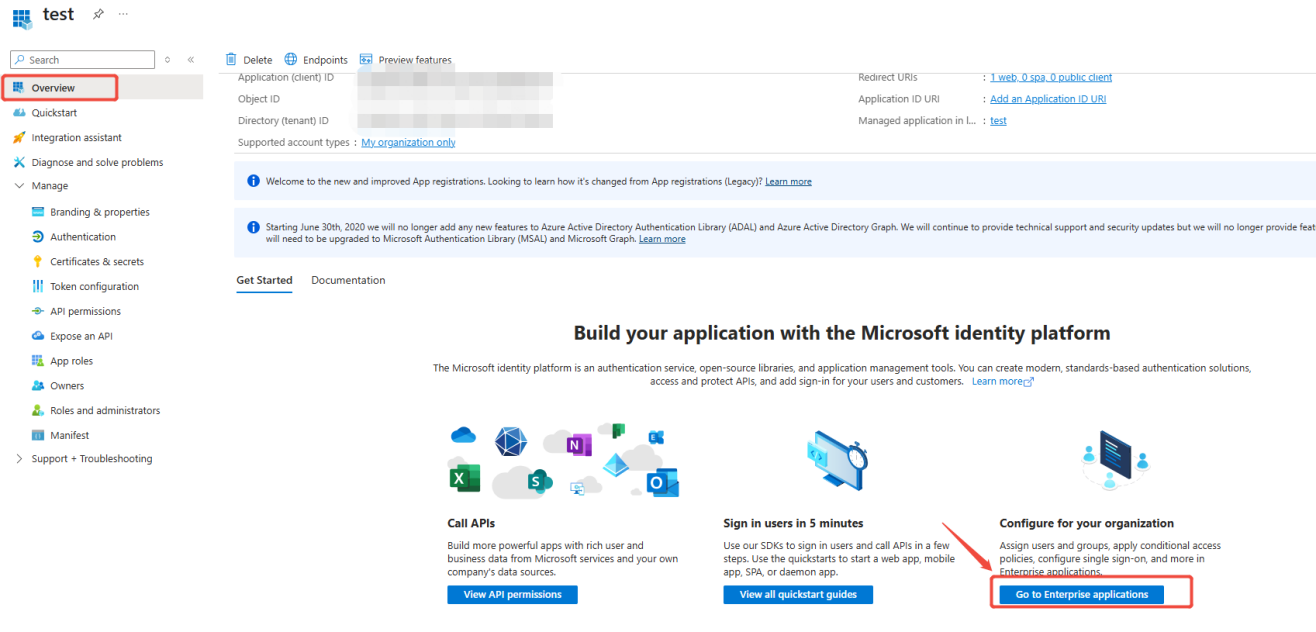
7. To assign application access permissions to users, return to the Overview page and click ‘Go to Enterprise applications’.
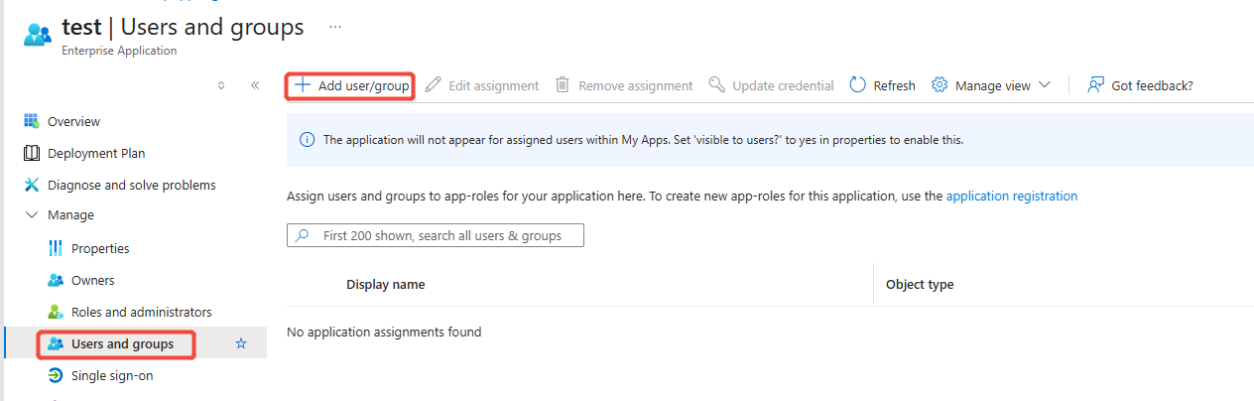
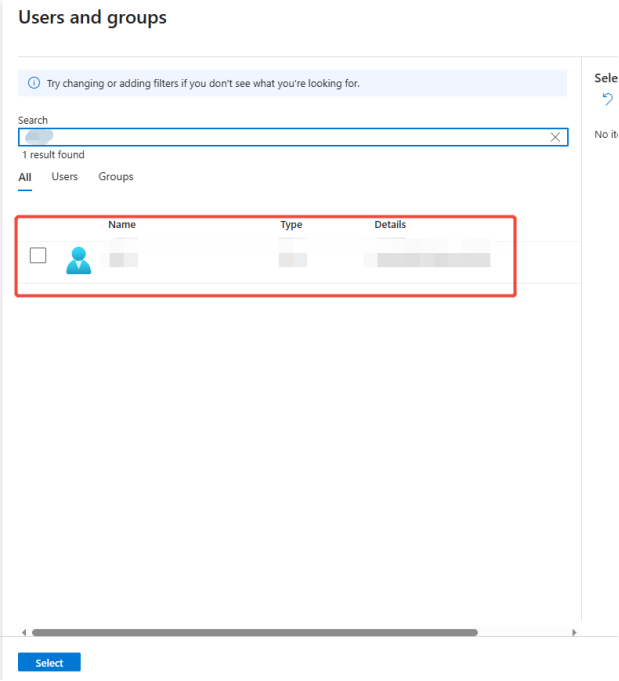
Go to ‘Users and groups’, add users, and select the users or user groups that need authorization from the existing users or user groups.
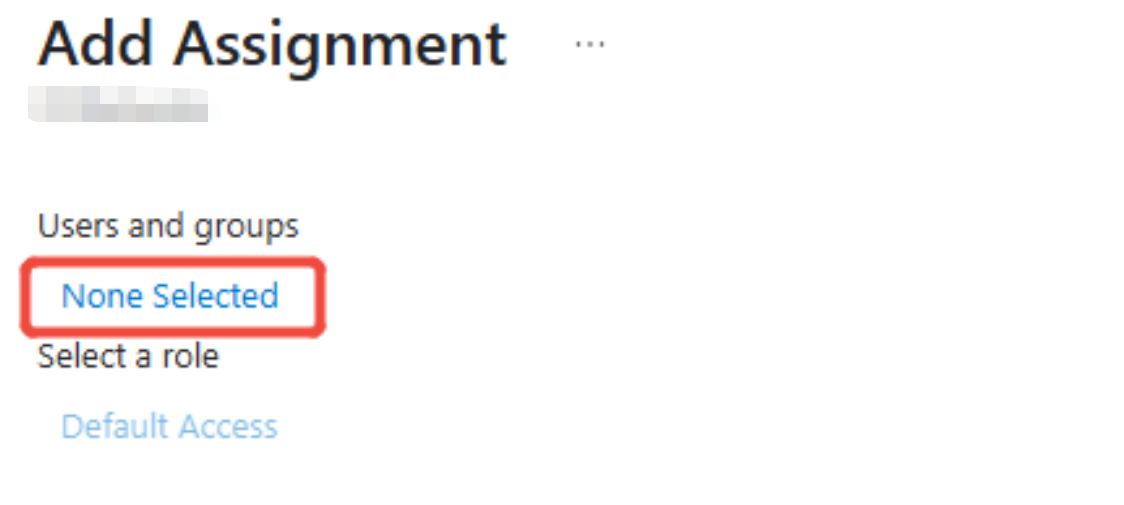
Select user
8. Finally, return to the console and fill in both the [Identity Provider URL] and [User Mapping Field] information.
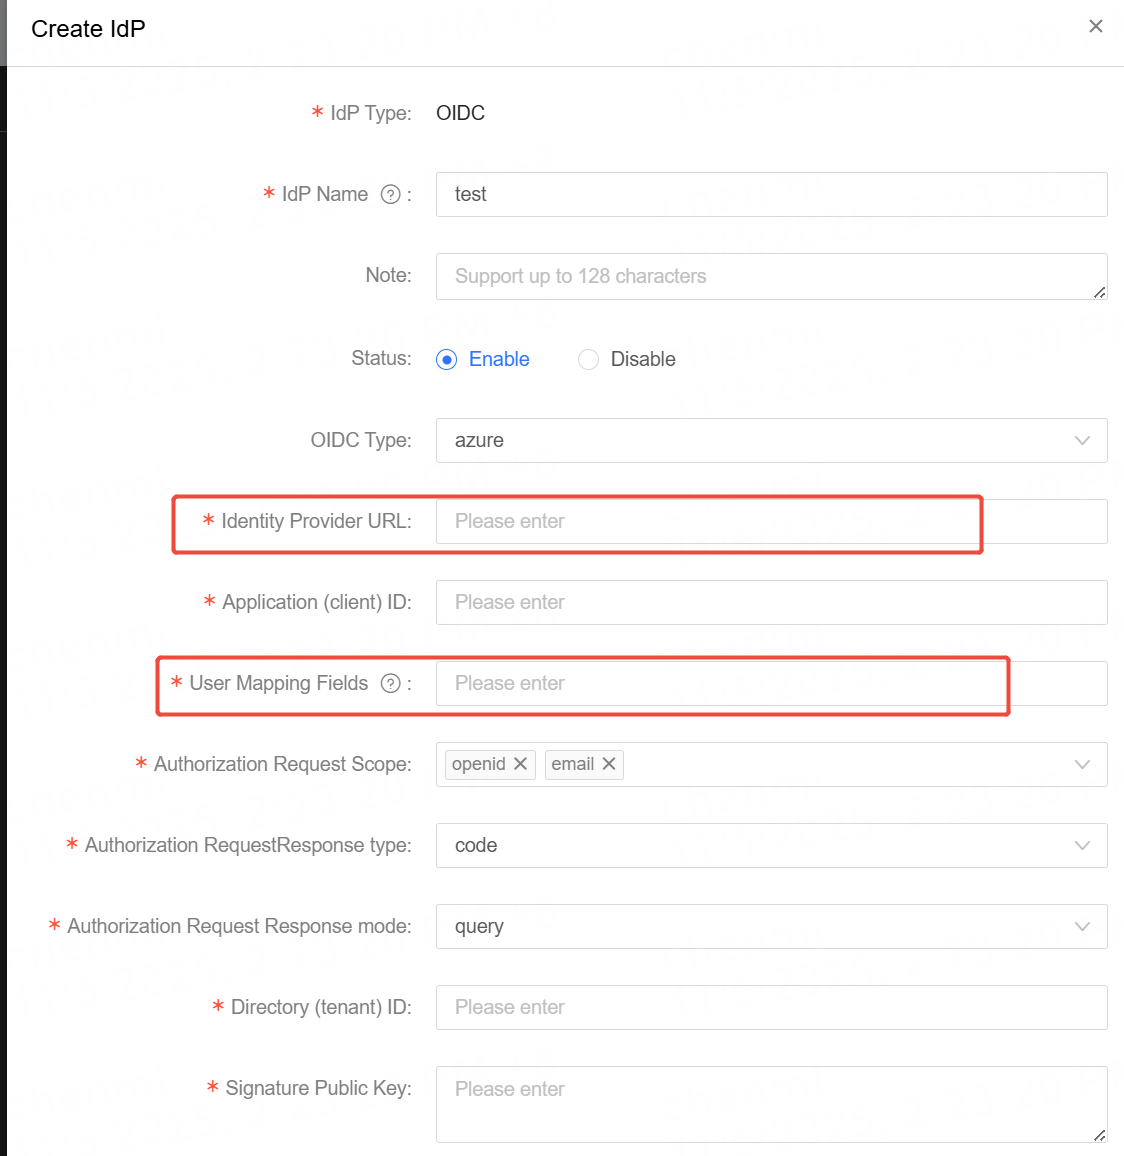
(Identity Provider URL) The fixed format is:
https://login.microsoftonline.com/
Here,
(User Mapping Field) Optional values: name, email
If the content entered is name, please verify the user information on the Azure platform to ensure that the value of the Display name matches the login account on the console.
If the content entered is email, please verify the user information on the Azure platform to ensure that the value of Email matches the login account on the console.
