Manage Zone
Last update:2023-10-27 16:06:44
You can manage your zones through the customer portal.
- Search
- Import
- Get a list of all the zones
- Delete zones
- Add/Delete/Edit Record
- Reset Serial Number
- Export
- Show History
Search and Import
Log in to your account.
Click on Zones and then you will see the page below, which will display a list of all your current zones.
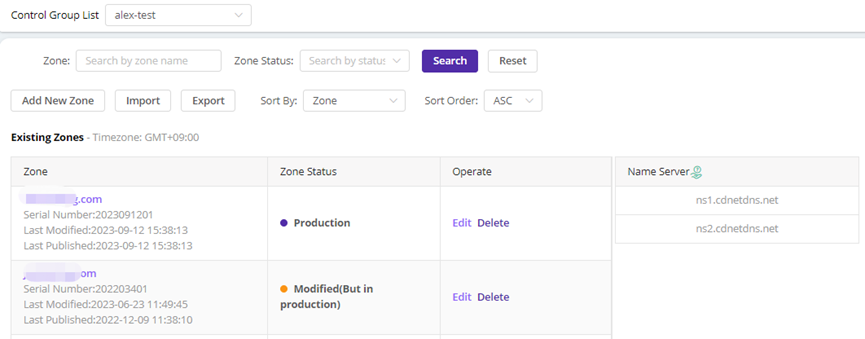
- Control Group List
You can view the list of zones that are assigned to the selected Control Group. - Search
Enter the key word (by zone) or/and select the status, then click on the “Search” button.
Reset: you can reset the key word by clicking on the “Reset” icon. - Import
You can import a DNS zone file in the standard format by clicking on the “Import” button.
You can upload BIND file or you can Download Template and follow the instruction to complete the file.
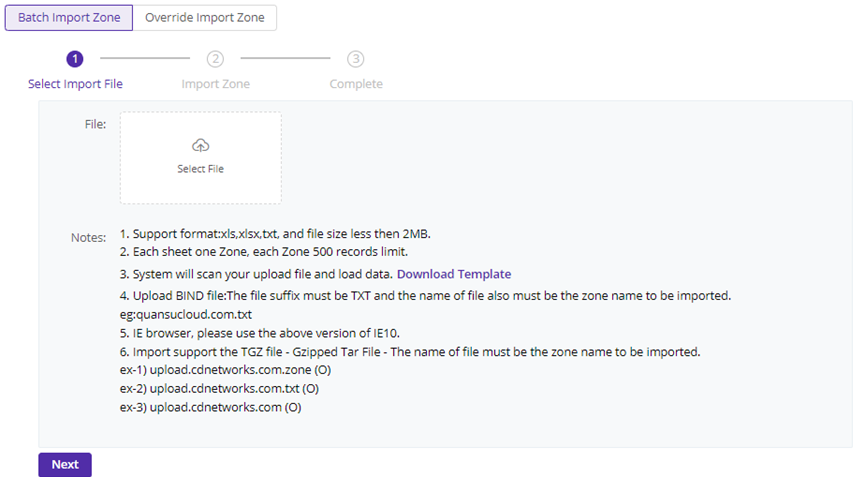
1. Select the way to import file.
- Batch Import Domain
If you select this way, only the new record will be added, and the original domain and record won’t be changed.
NOTE: If the record in the file uploaded already existed, then the original (existing record) will be preserved. - Override Import Domain
If you select this way, original record will be deleted and overwritten with the new record in the file you upload.
2. Click on “Select File” icon and select the file to import.
Files in xls, xlsx and txt formats are supported, and the file size is limited to 2MB.
If the file format is in xls or xlsx, each sheet one Zone, each Zone 500 records limit.
You can also upload BIND file and the name of the file must be the zone name with a suffix “txt”. eg: quansucloud.com.txt
IE browser, please use the above version of IE10.
Import support the TGZ file - Gzipped Tar File - The name of file must be the zone name to be imported.
3. Click on the “Next” Button.
The system will begin with the format validation.
If there is validation errors detected, “Some Failed” window will prompt up in the screen, and you can check the detail or correct the error.
If it is successful, it will appear “valid success” in the screen, and you can import the file now.
4. Click on the “Import” button.
In “Batch Import Domain” way:
- If the DNS data of the file that you uploaded has already existed, it will show “Some failed” in the screen. Please check the file.
- If the DNS data of the file that you uploaded is new, it will show “Import success” in the screen.
In “Override Import Domain” way,
- If there is no error, it will show “Import success” in the screen.
Export
You can select all zones or some of your zones, and click the “Export” button.
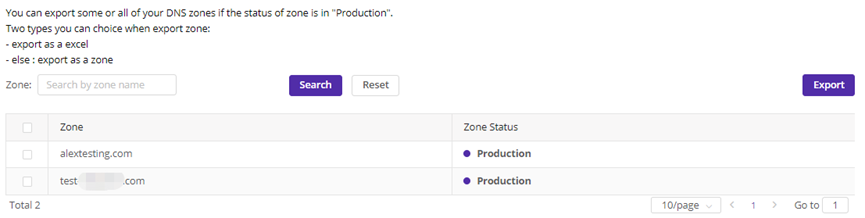
1. Select the check boxes for the data you want to export.
However, if the zones have (a) CLB record(s), the CLB record will not show in the exported file.
2. Click on the “Export” button.
Export File Extension: ZONE (zip file, txt format), excel
Export File name: Domain.zip or Domain.xls
3. Save the file
When the export is completed, a window will pop up on the screen. You can open, save or cancel the file.
Get the list of all the zones
- View a zone information
a) The corresponding serial number
b) The last modified date
c) The last published data - View the status of a zone
A zone can be in any one of the following statuses:- New: The zone is created but has not been pushed to the staging zone or production server.
- On Staging: The zone is in the testing phase and is not pushed to production zone yet.
- Production: The zone is in production and can respond to DNS queries.
- Modified: The zone data has been modified, but the previous data is currently in production and will be used to respond to DNS queries.
- Failed: The zone is created but failed to be pushed to Staging Zone or Production Zone.
- Pending: In the process of being pushed to Staging Zone or Production Zone.
Delete zones
Click on the “Delete” icon in the “Operate” column to delete a zone.
- If the zone has been deleted, it is not possible to respond DNS requests.
You should make sure the NS records will be serviced by other DNS system and there is enough time for the changes to be notified. (The time taken would be 72H)
Add/Delete/Edit Records
To edit the zone, click on the zone name or the “Edit” button in the “Operate” column, and you will see the following screen:
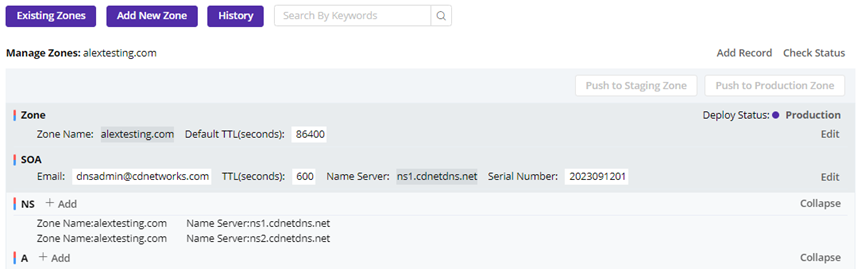
- You can add a new record for any of the record types by clicking on the “Add” button right next to the record type. Records can also be added in bulk by clicking on the button “Add Records” on the right top corner.
- You can edit the existing record by clicking “Edit” icon at the right of the corresponding row of the record.
- You can delete an existing record by clicking “Edit” icon at the right of the corresponding row of the record.
- When you add, edit or delete the information in this screen, “Push to Staging Zone” button and “Push to Production Zone” button will be activated. So, you can publish the new configuration.