Video Editor
Last update:2022-01-07 13:53:32
1. Introduction
You can edit (trim, splice) the uploaded video files with Video Editor and manage the trimming and splicing tasks in a list.
2. Instructions
2.1 Task Management and Query
Go to Video Editor menu:
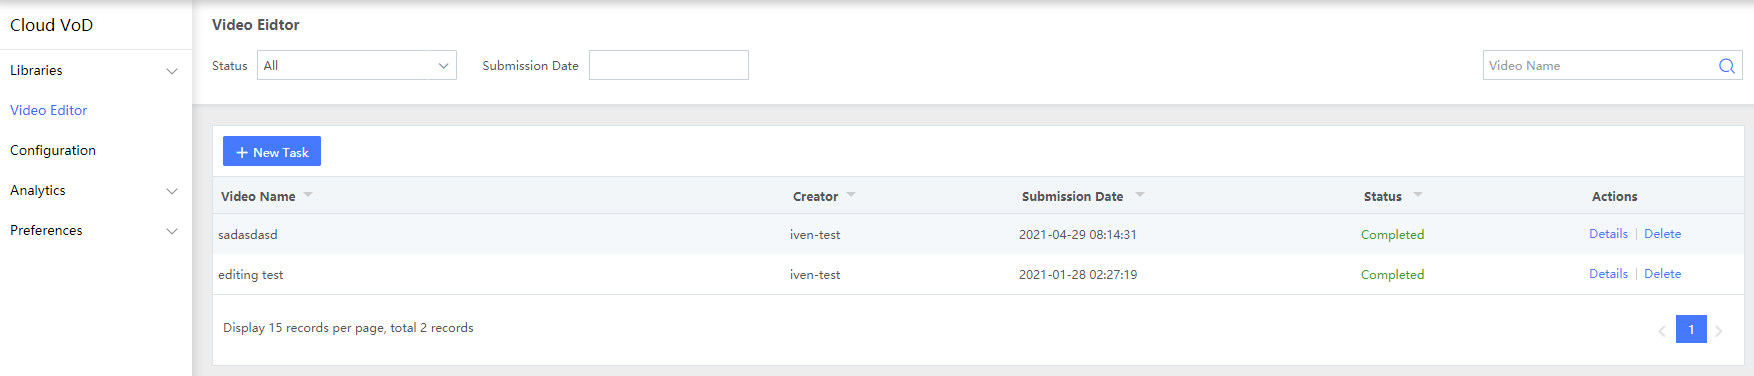
- View Task Information
You can quickly view the Video Name, Creater,Submission Date of tasks, task Status through the task list. In addition, you can view the Total Duration, Format, Resolution, Bitrate, and source video list by clicking Details , as shown in the figure below:
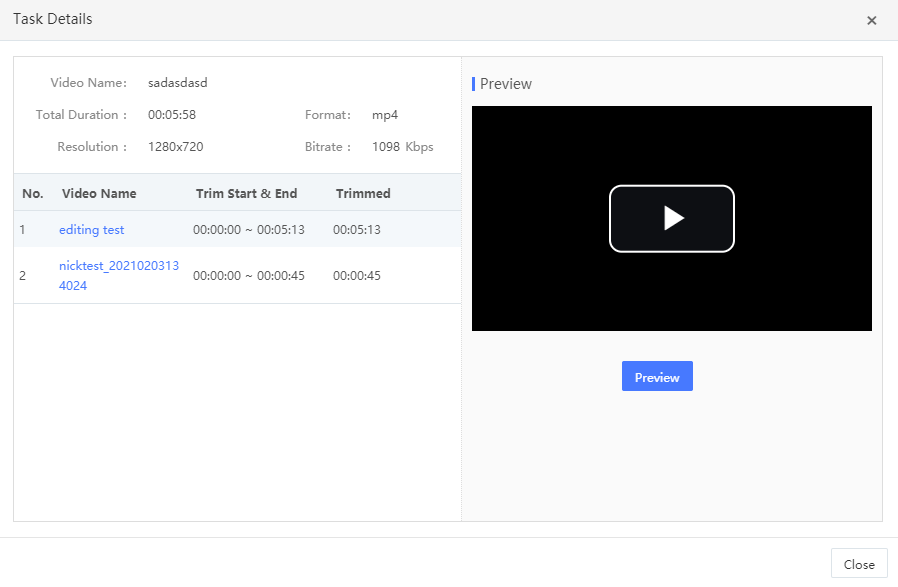
Click on the file name on the source video list, then the source video will be previewed in the preview window.
Click Preview button to preview the output video after trimming and splicing.
- Task Management
You can create new tasks, filter and delete existing tasks.
Notes:
- Deleting a task will not result in the deletion of the output video generated by the task.
- Filtering options includes task status, task submission date and video name.
2.2 Add New Tasks
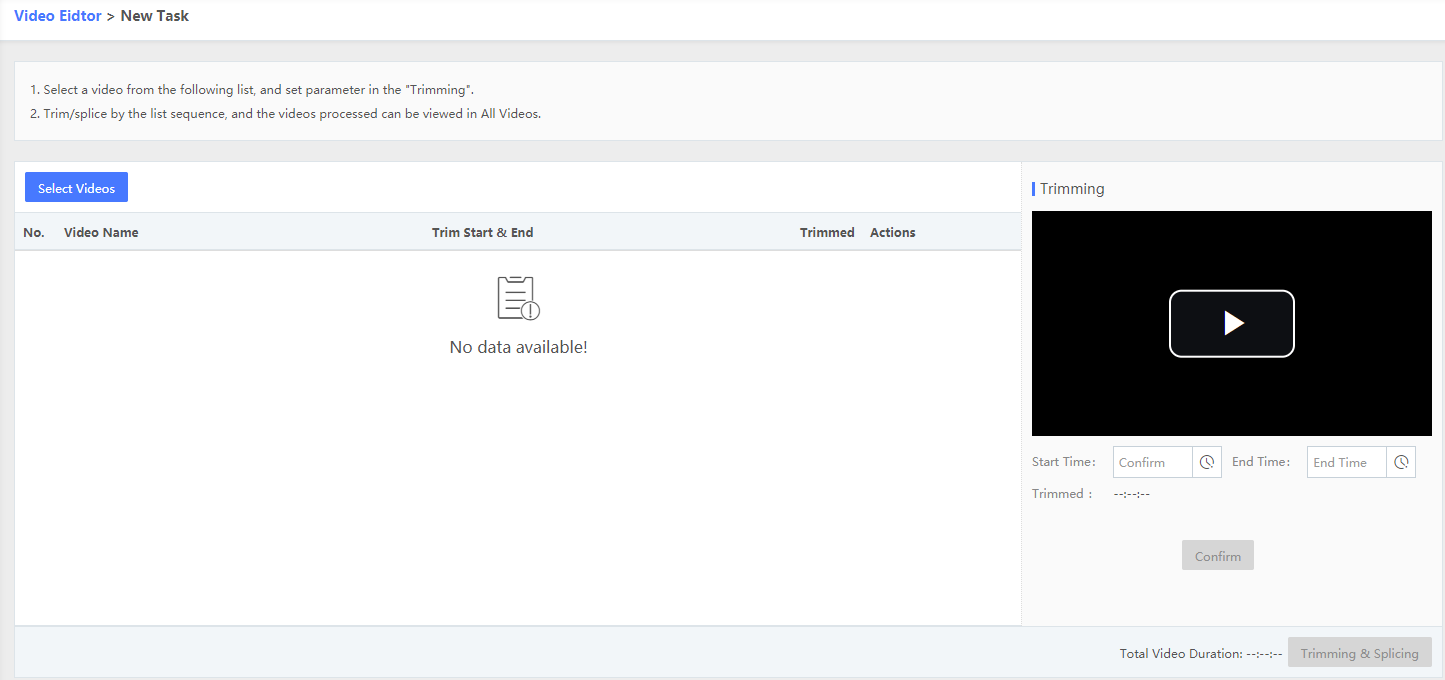
- Click on New Task button and you can see the following page.
- Click on Select Videos button, select the videos to be edited on the pop-up window and click OK. The selected videos will be added to the source video list.
Notes: Videos already on the source file list are not allowed to be added repeatedly.
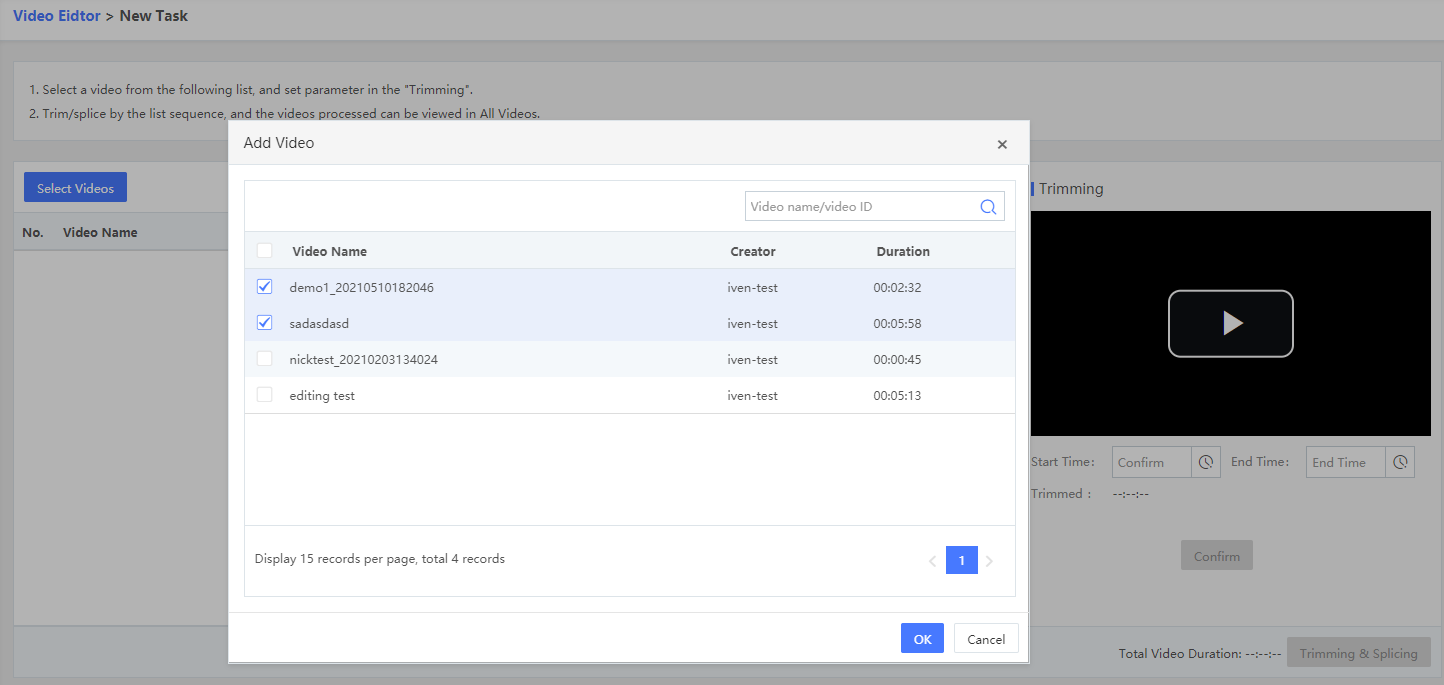
Videos selected shown on the source file list as below:
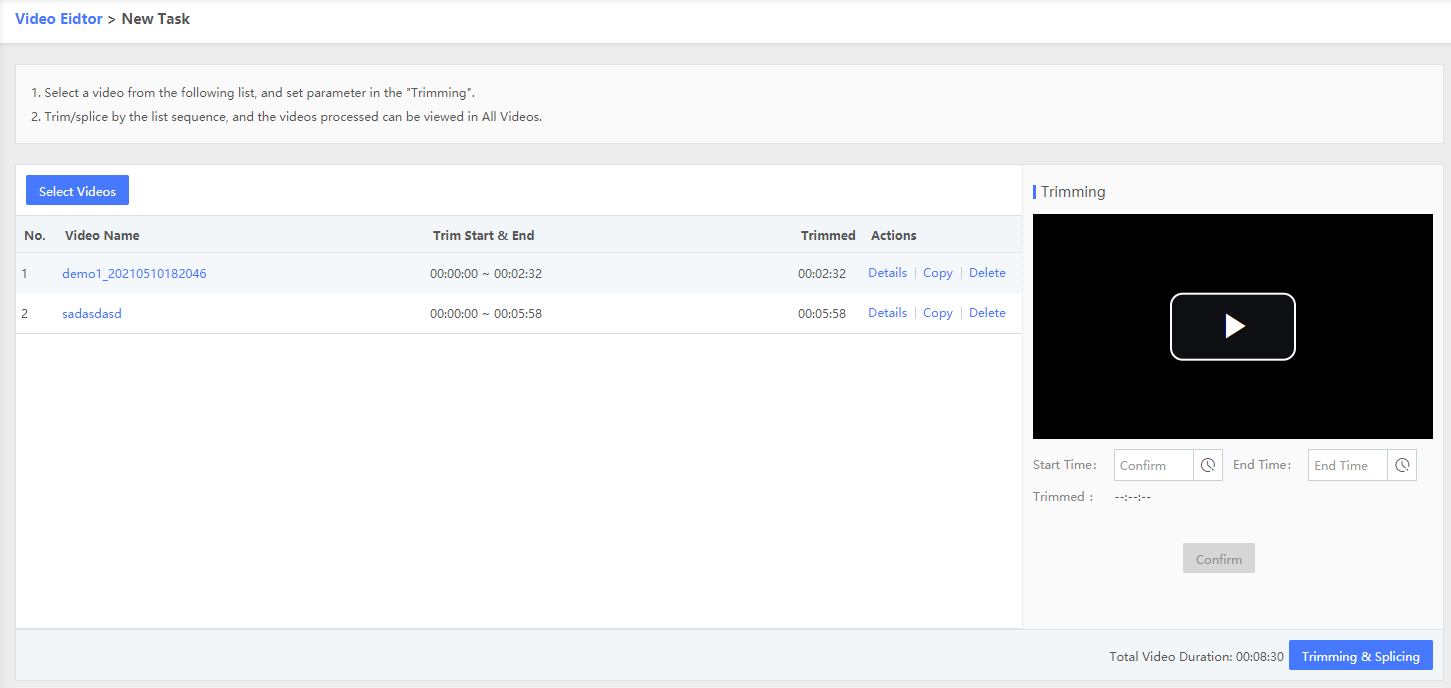
- After selecting the source files, you can perform editing related operations through this page.
- Change the video splicing order: You can change the order of the files for splicing by holding and dragging the file to right position.
- Preview the source videos: Click on the video name on the list, you can preview it in the preview window on the right;
- Trimming settings: Click on the video name to actiavte trimming settings. You can manually modify the start time and end time to trim the selected video, or you can adjust the start time and end time by clicking the small icon beside the box. While the “Trimmed” parameter will show you the video duration of the trimmed part.
- Confirm trimming settings: Click the Confirm button, the trimming settings will be saved, but the trimming is not performed immediately yet, so you can select the video file to modify the trimming settings again.
- When you finish all the trimming settings for the selected videos, click Trimming & Splicing button. The task is now created successfully, and you can view the task status on the task list on Video Editor page.
Is the content of this document helpful to you?
Yes
I have suggestion