Example of Using Keycloak for SAML SSO
最終更新日:2026-03-25 15:25:41
Operation Guide
Keycloak Deployment and Installation
For more information, please refer to Installation and Deployment Process.
Log in to Keycloak and Configure the Application
- Log in to the Keycloak platform using your administrator account.

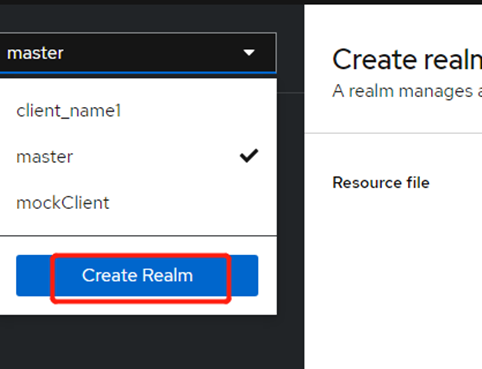
- Create a new Realm.
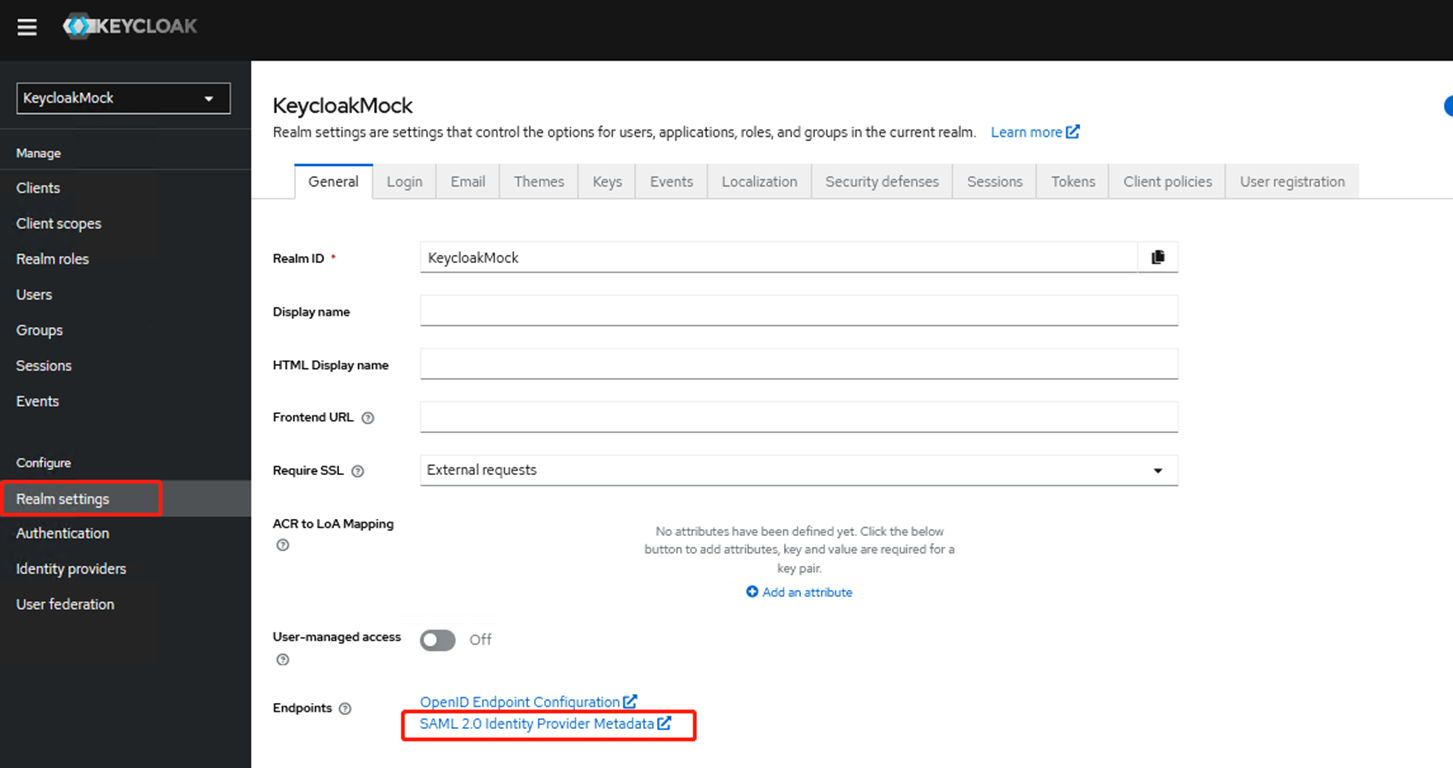
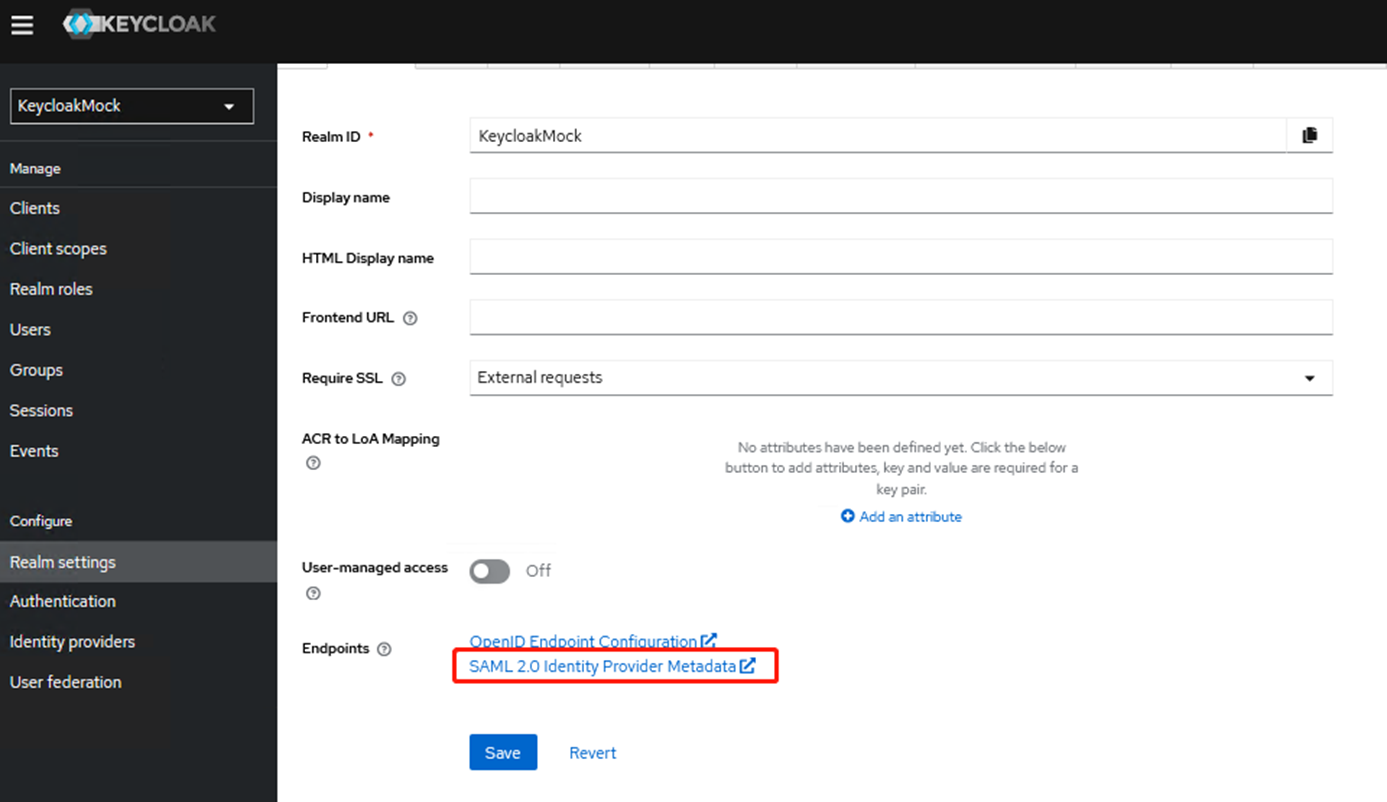
- After the creation is complete, go to Realm settings, download the initial metadata, and click [SAML 2.0 Identity Provider Metadata].
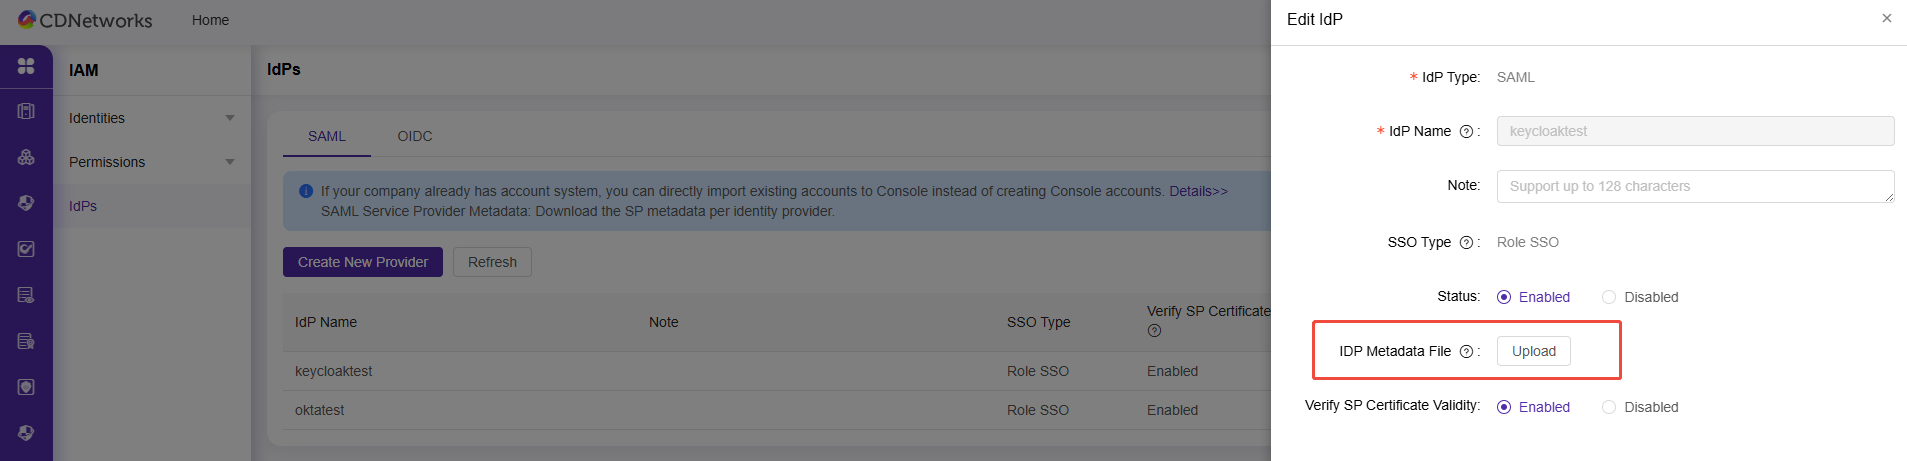
- Log in to the CDNetworks console and configure the Item provider.
Select SSO Type asRole SSOand upload theIdPmetadata file downloaded in Step 3.
Note: After completing all configurations, you must update the metadata document again.
-
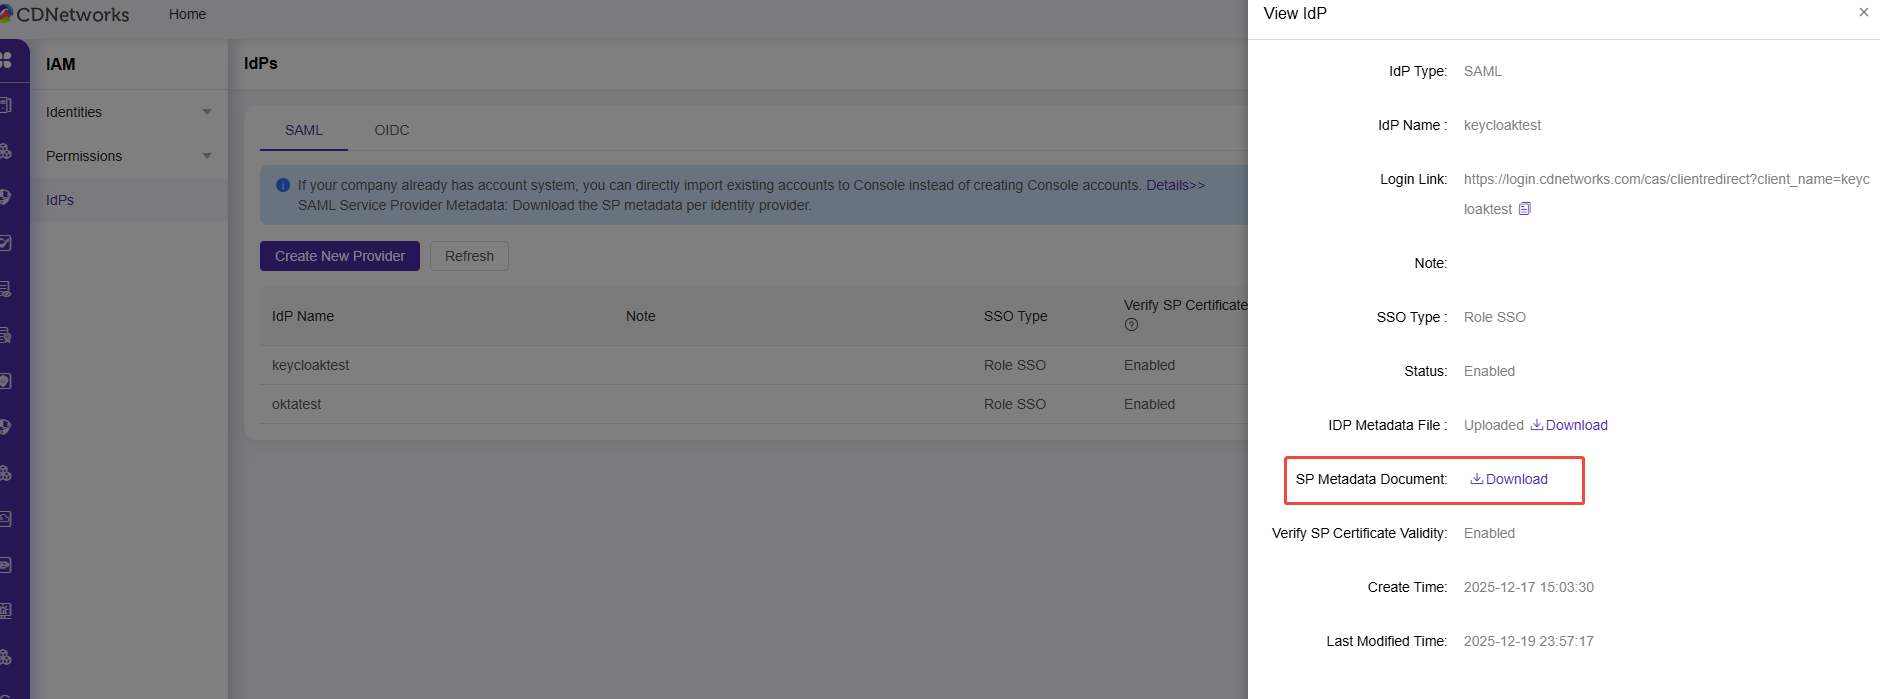
Obtain the SP metadata.
In the CDNetworks console, click “View” to enter the Provider page and download theSPmetadata document.
-
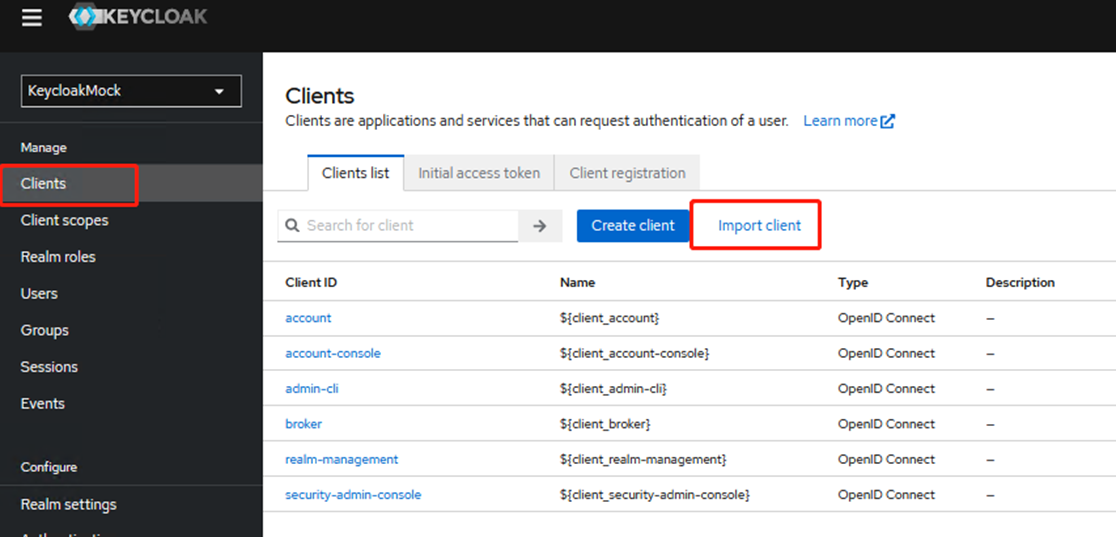
Create a push client. You can quickly create and upload
SPmetadata using the “Import push client” feature.
Note: The push client import function is only supported in Chrome browser. Otherwise, you will receive the error “Object.hasOwn is not a function”.
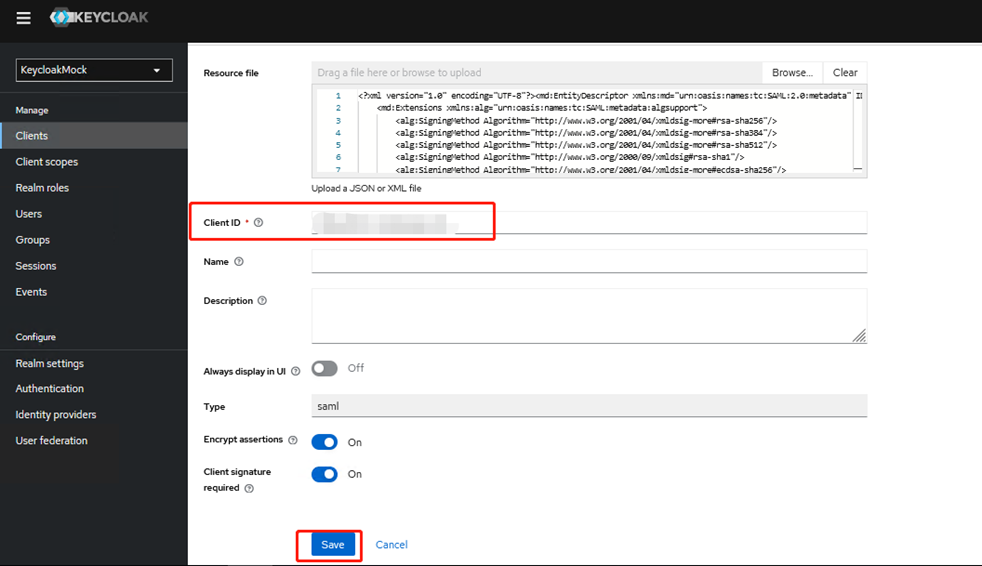
After a successful import, the Client ID will be detected automatically. Please click Save and proceed to the push client configuration page.
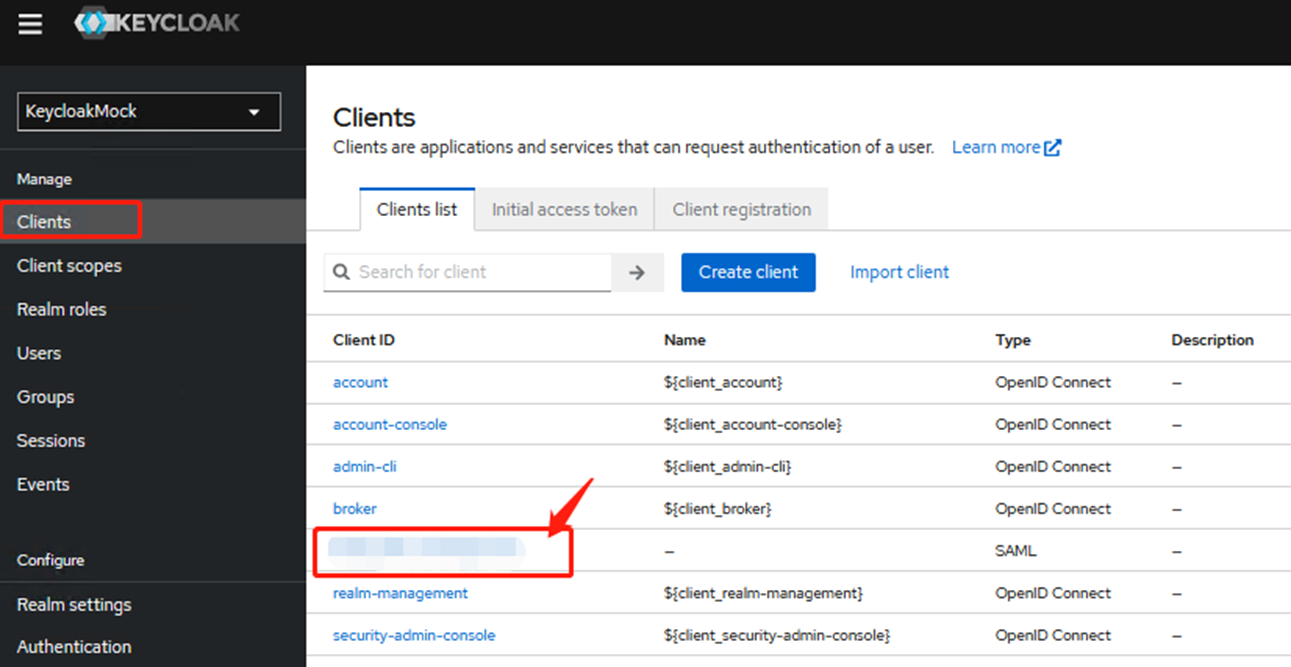
You can also find the corresponding Client ID in the push client list and enter the configuration page.
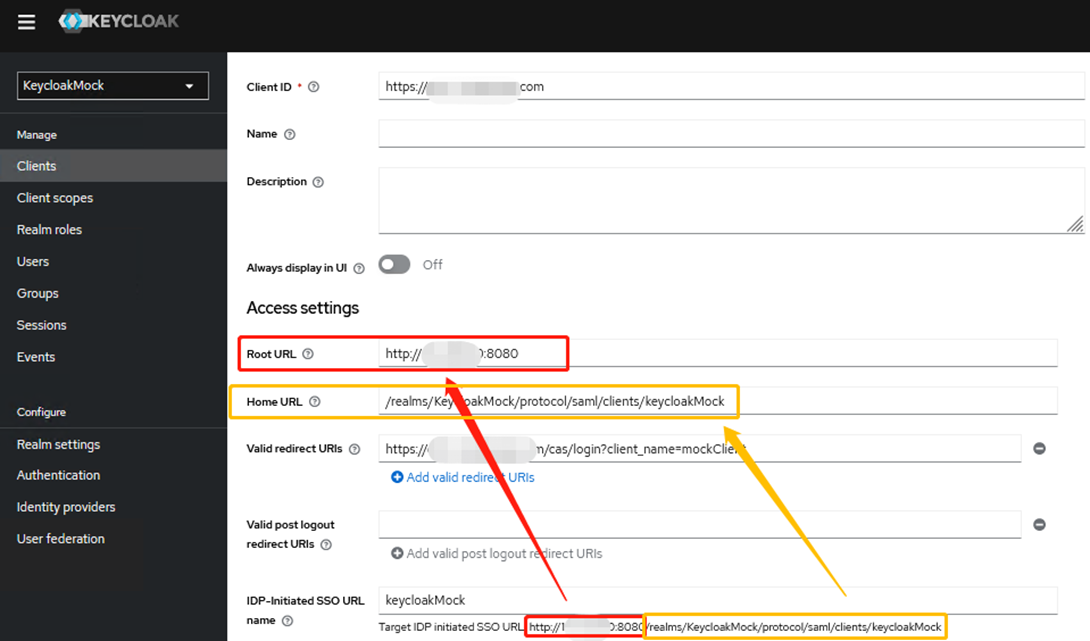
- Configure access settings.
After importing the XML file, the system will automatically generate a Client ID and a valid redirect URI. The information that needs to be configured on this page includes:
- Root URL
- Home URL
- IDP-initiated SSO URL Name. Directly enter the Realm Name; the complete IDP-initiated SSO URL will be displayed below.
- Enter the main Domain in Root URL and input the URI part in Home URL as shown below:
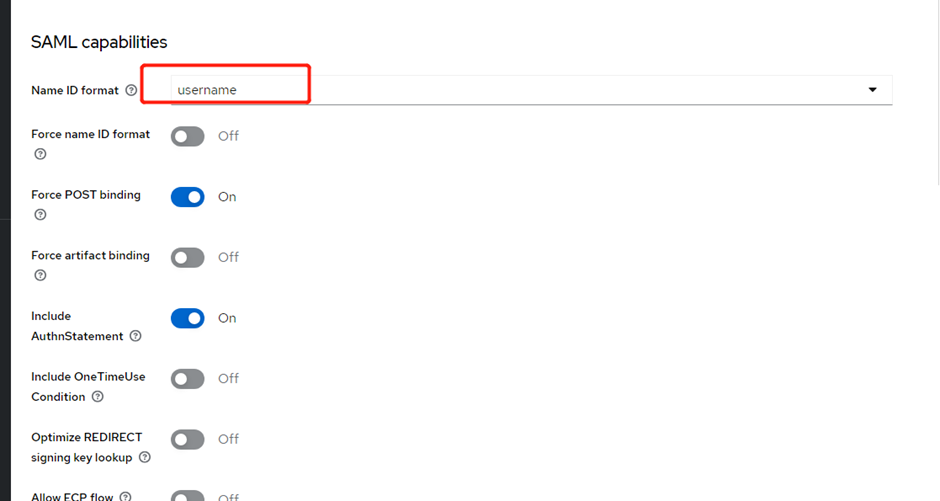
- Configure the SAML Function.
Selectusernameas the Name ID Format, keep the other parameters as default, and click Save to complete the configuration.
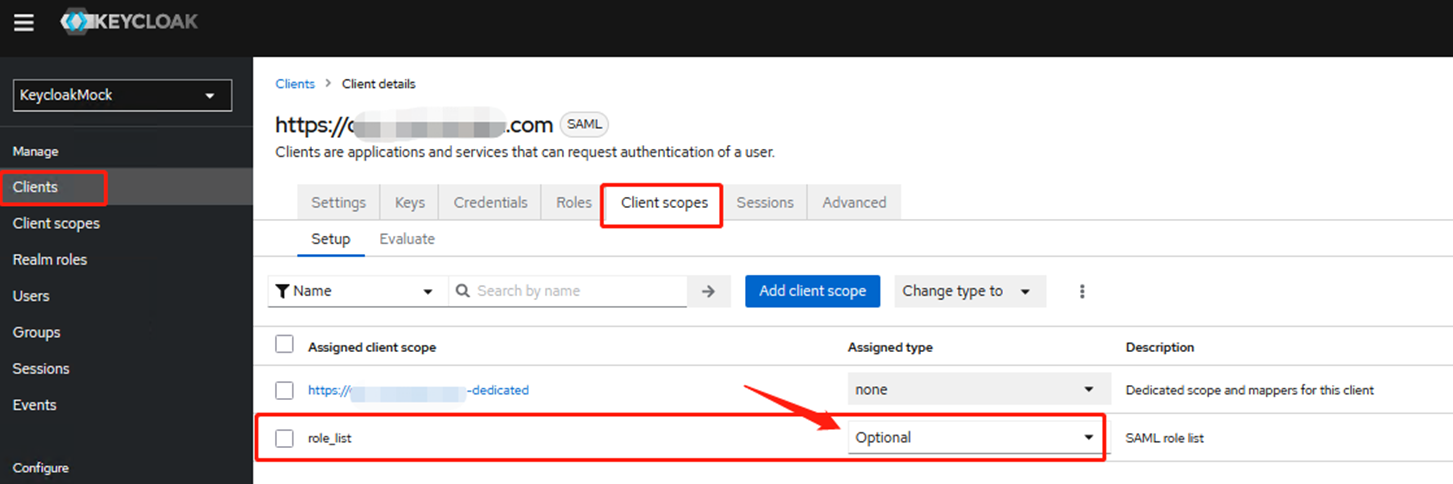
- Go to the Client scopes tab to modify the relevant configuration.
Change the Assigned type ofrole_listfromdefaulttoOptional.
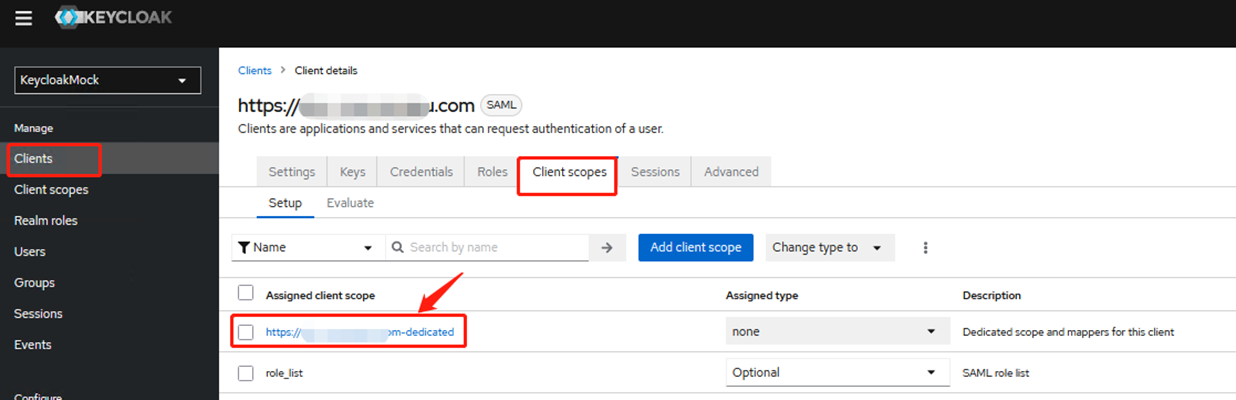
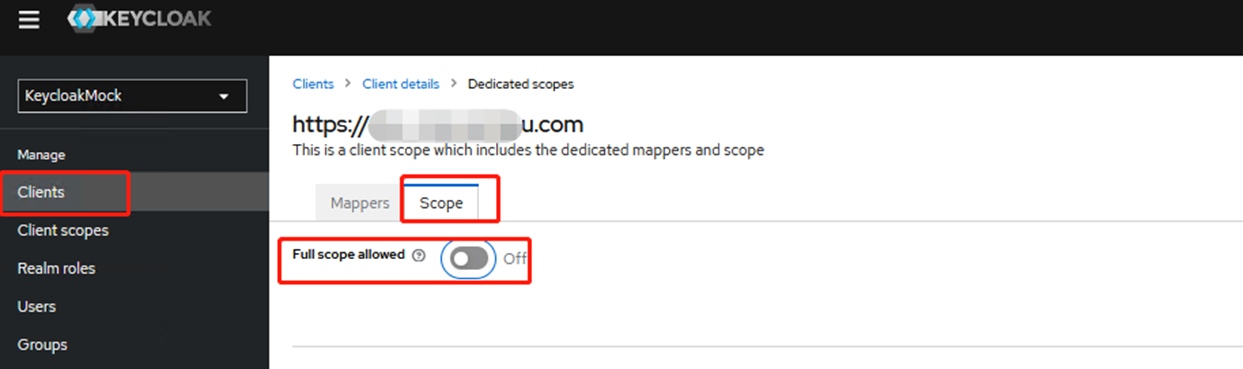
Go to the current client-specific configuration file and set Full scope allowed to Off, as shown below:
- Create a user for logging in to Keycloak.
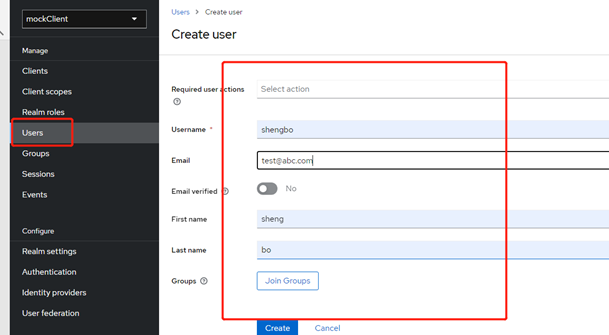
Create a user in the Users section and set a password. The Username field here must be consistent with the account name in the CDNetworks console.
Reference: Create User
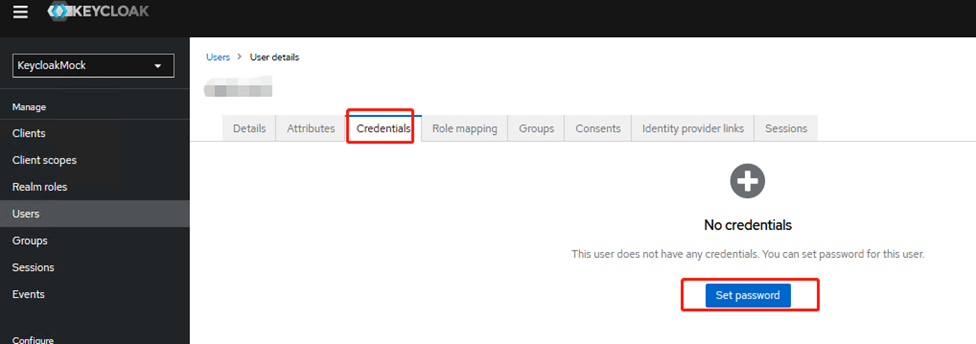
You can set the password in the Credentials tab.
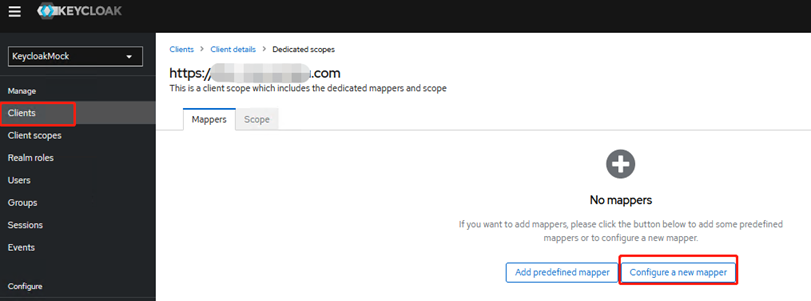
- Go to the Clients configuration page, locate the Client scopes tab, and enter the dedicated configuration file.
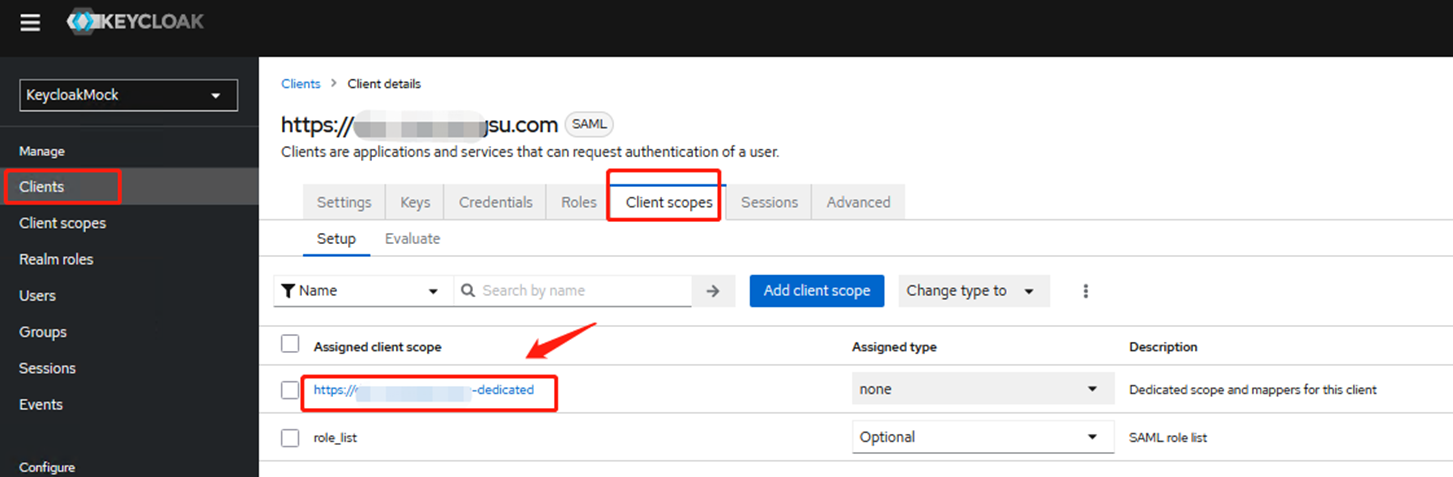
In Mappers, add two custom configurations. Click Configure new mapper, and in the pop-up window, select Hardcoded Attribute.
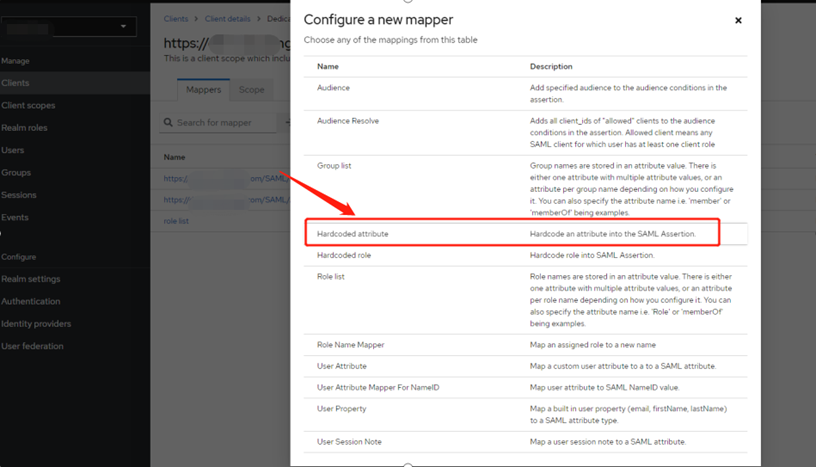
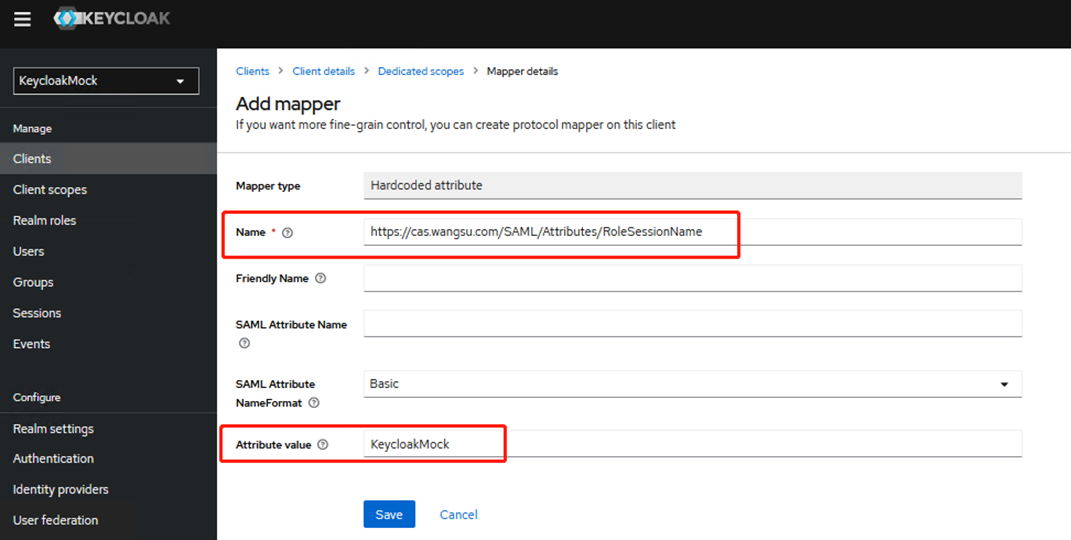
First configuration:
- Name:
https://login.cdnetworks.com/SAML/Attributes/RoleSessionName - The attribute value can be set to any value; we recommend using the Realm name (for example,
KeycloakMock).
Click Save.
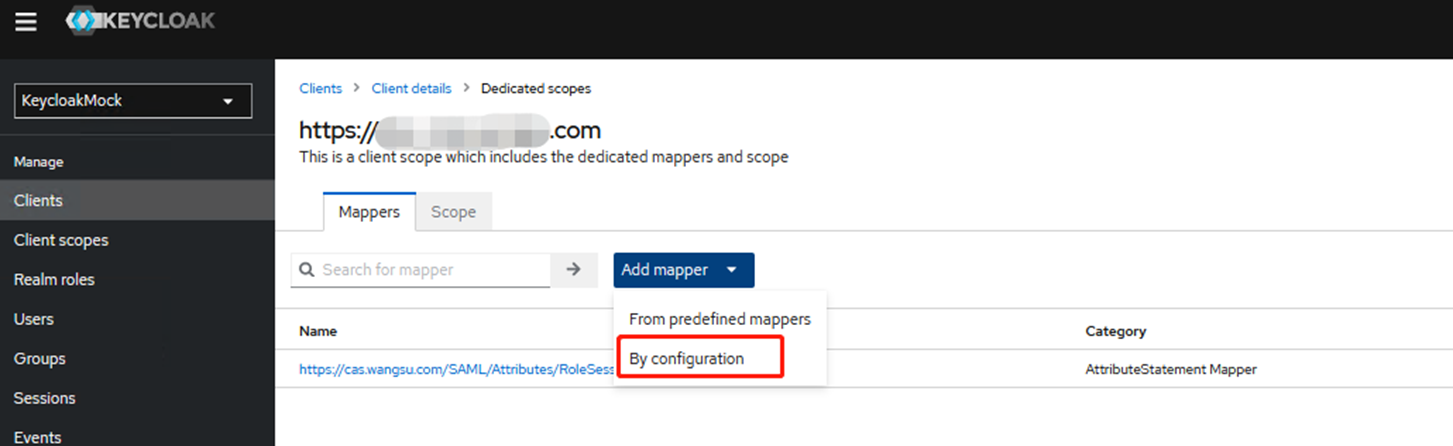
Return to the Mappers page, click Add Mapper, and select By Configuration. In the pop-up window, choose Hardcoded Attribute.
Second configuration:
- Name:
https://login.cdnetworks.com/SAML/Attributes/LoginName - Property value:
wsc:iam::web host account:login-name/current login accountwsc:iam::web host account:saml-provider/identity provider name
Example:
The main account iskeycloak, the sub-account iskeycloakMock, and the identity provider name isMock.
If all users are sub-accountskeycloakMock, configure as
wsc:iam::keycloak:login-name/keycloakMock, wsc:iam::keycloak:saml-provider/Mock
If all users are main accountskeycloak, configure as
wsc:iam::keycloak:login-name/keycloak, wsc:iam::keycloak:saml-provider/Mock
- After completing all configurations, download the new metadata file and upload it to the CDNetworks console. The steps are the same as in Step 3.
Access Test
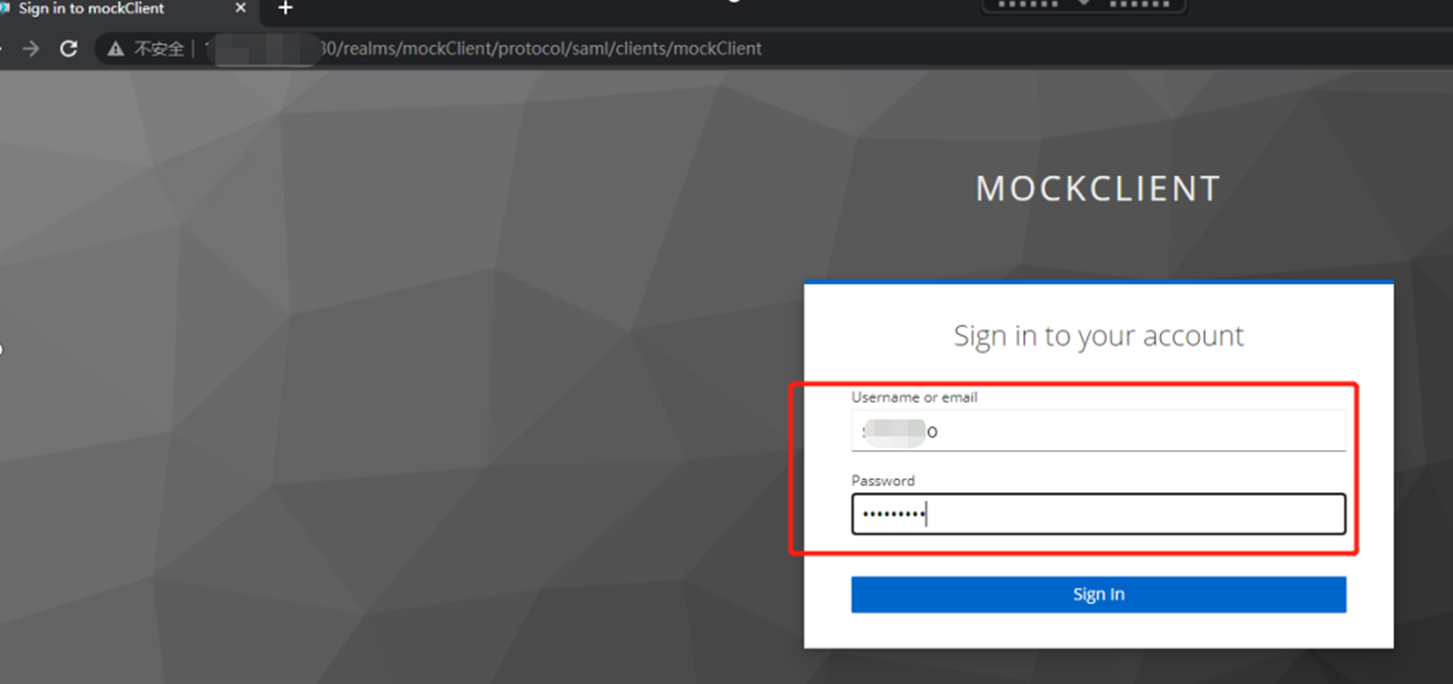
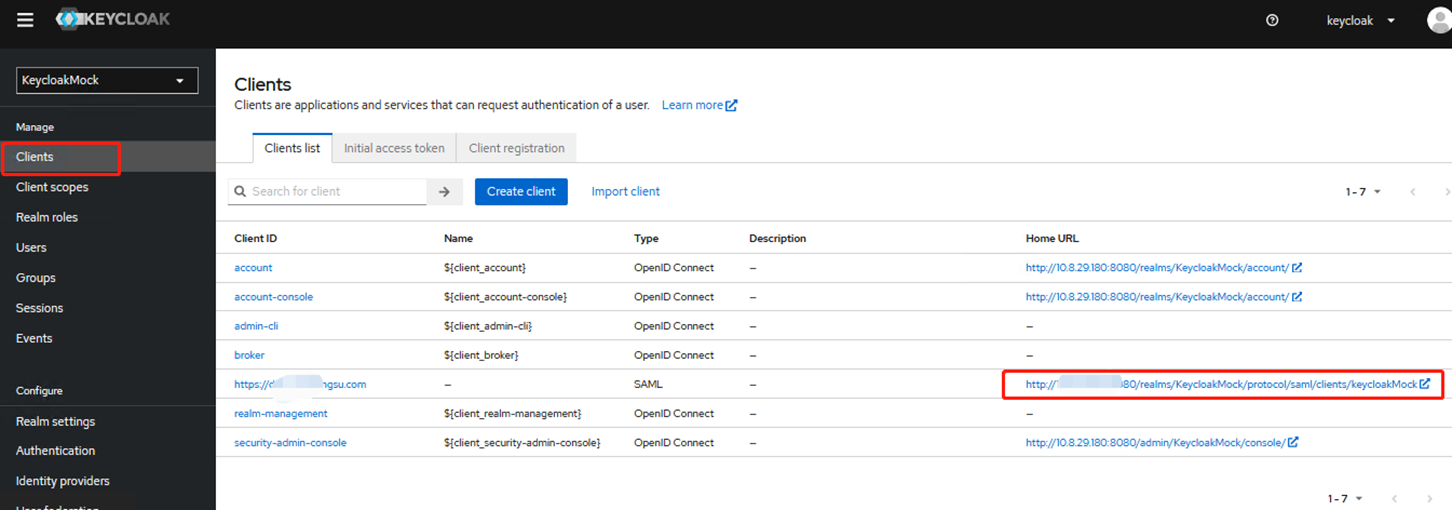
In the Clients list, locate the newly added Client ID and find the corresponding Home URL. Click Access to be redirected to the Keycloak login page.
Enter the created username and password, and check if you can successfully redirect to the CDNetworks console.