Using IAM for Permission Management of CA
最終更新日:2026-03-25 15:15:20
Scenario
Due to business needs, an enterprise purchased Content Acceleration Service from Wangsu Technology. There are multiple functional teams in the Company, and different teams are responsible for different business authorities. Now you need to configure through IAM:
- Xiaozhu, Xiaozeng, and Xiaoyou in the entire Operation & Maintenance (O&M) Department 1 need the authority of Statistics analysis;
-Xiao Huang in the Operation & Maintenance (O&M) Department 2 needs to add and disable domain, and has the object permissions of why.test44.com and api.chinanetcenter.com.
Xiaozhu, Xiaozeng, and Xiaoyou in Operation & Maintenance (O&M) Department 1 need Statistics Analysis permissions
Operations steps
The overall steps are: log in to IAM –> create a Sub-account–> create a policy definition–> assign the policy to the Sub-account
1. Log to Hotlink Protection IAM
Access Type 1: directly access the IAM address https://iam.console.wangsu.com ;
Access Type 2: Access the Management Center in the Top right -> IAM

2. Create a custom policy
The target authority is the authority required to accelerate the Usage Statistics of Content Acceleration , and it is decomposed into: the operations authority to view the Usage Statistics , and the authority of all domain.
- Click Policies –> Add Policy
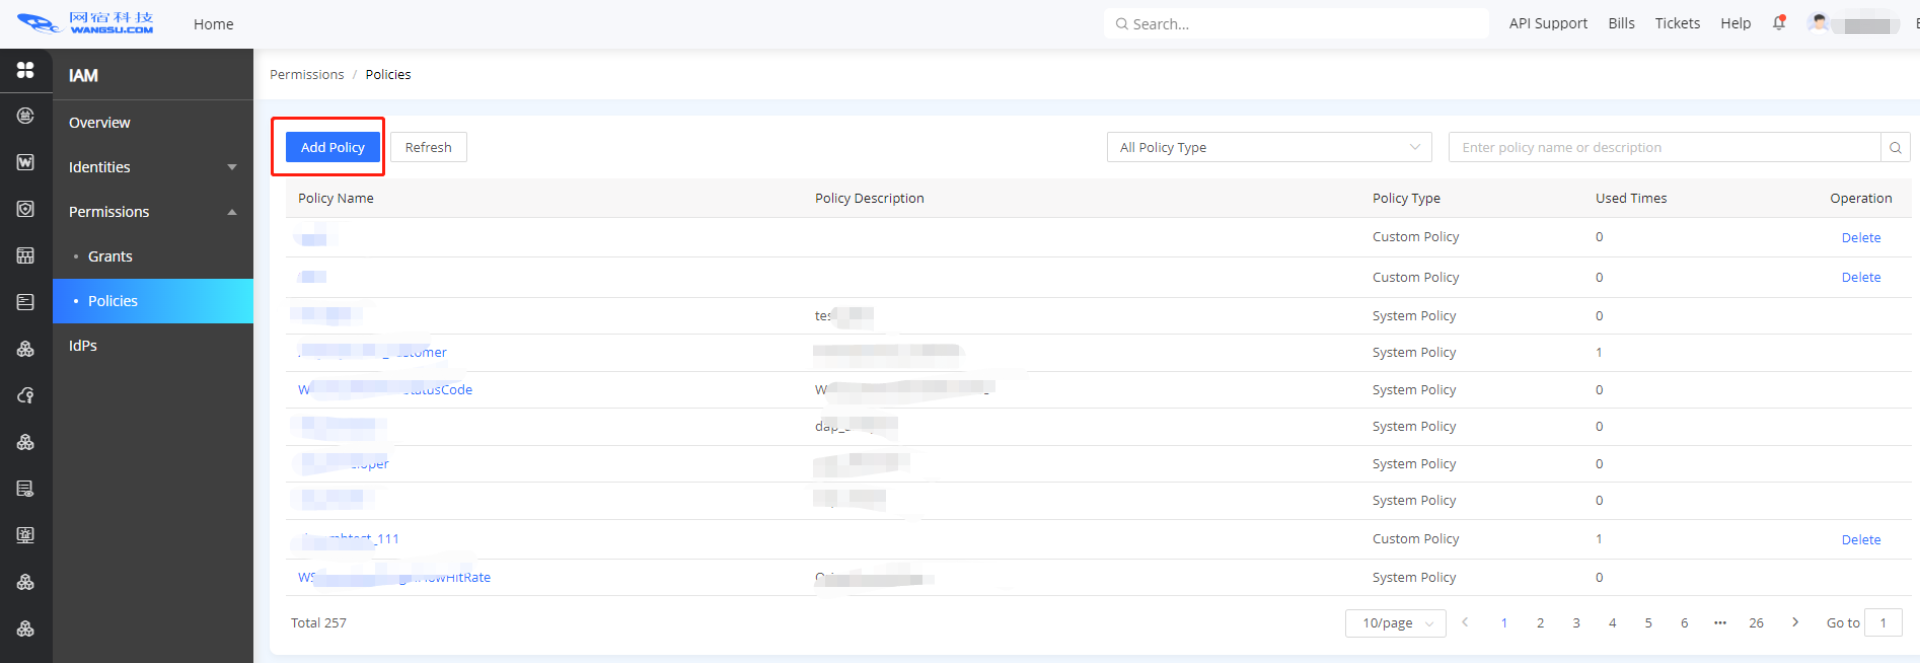
- Select the Product Service Content Acceleration to be authorized, and click Next .

- Find the relevant functions of Statistics analysis and turn on the switch. And click Next.
- Fill in the policy Name and Description, and after submitting, the policy is created successfully. At this point, a functional authority with Statistics analysis has been defined .
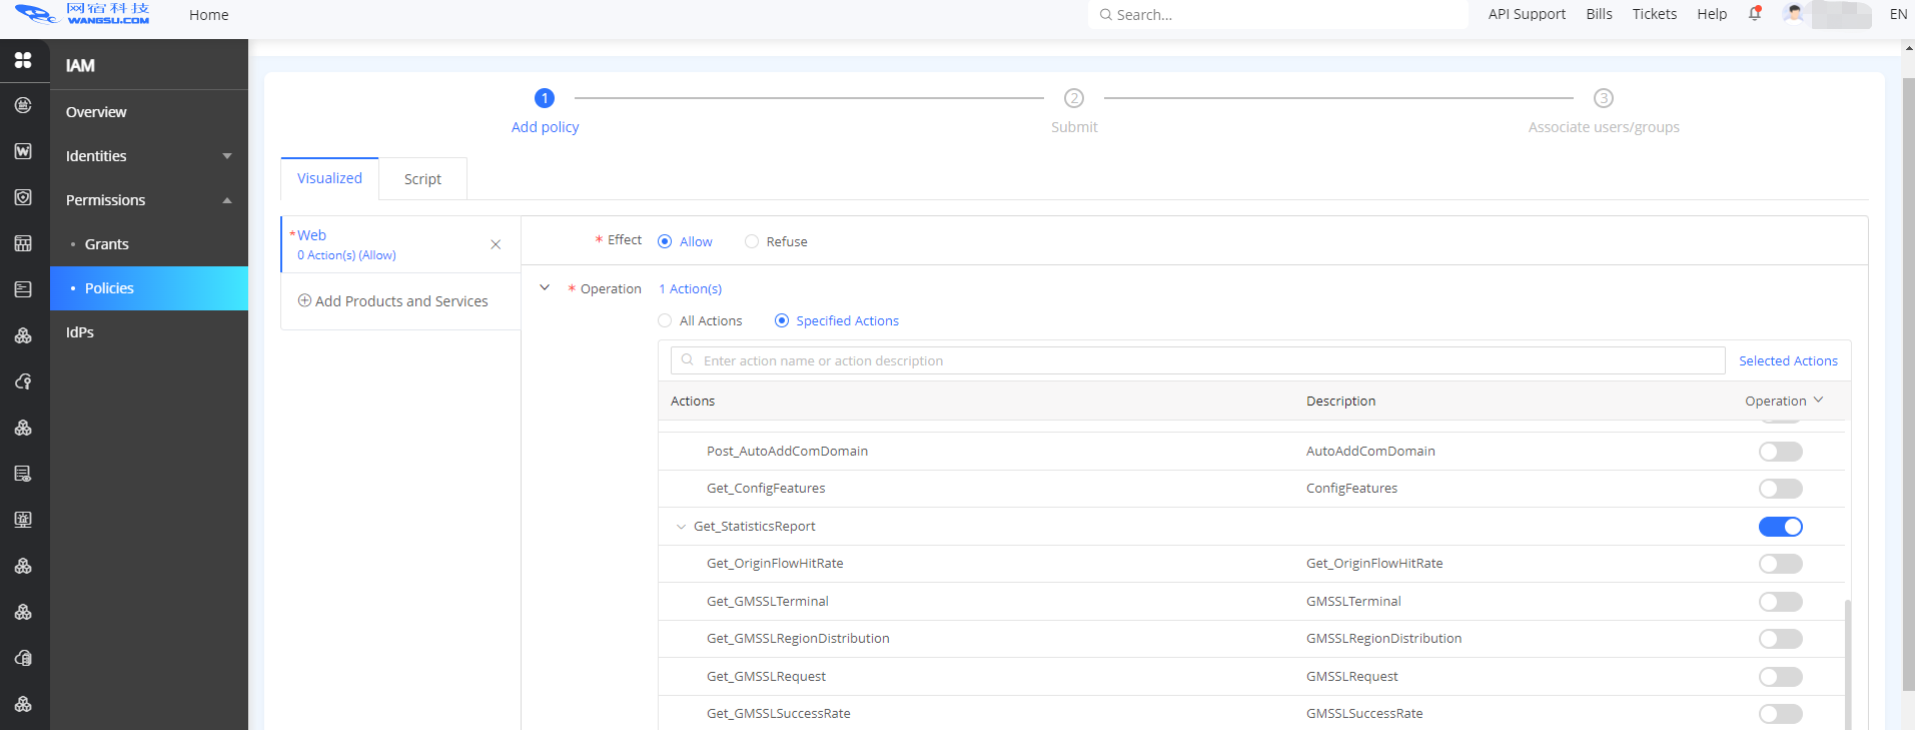
3. Create a user
- Click Users –> Add User
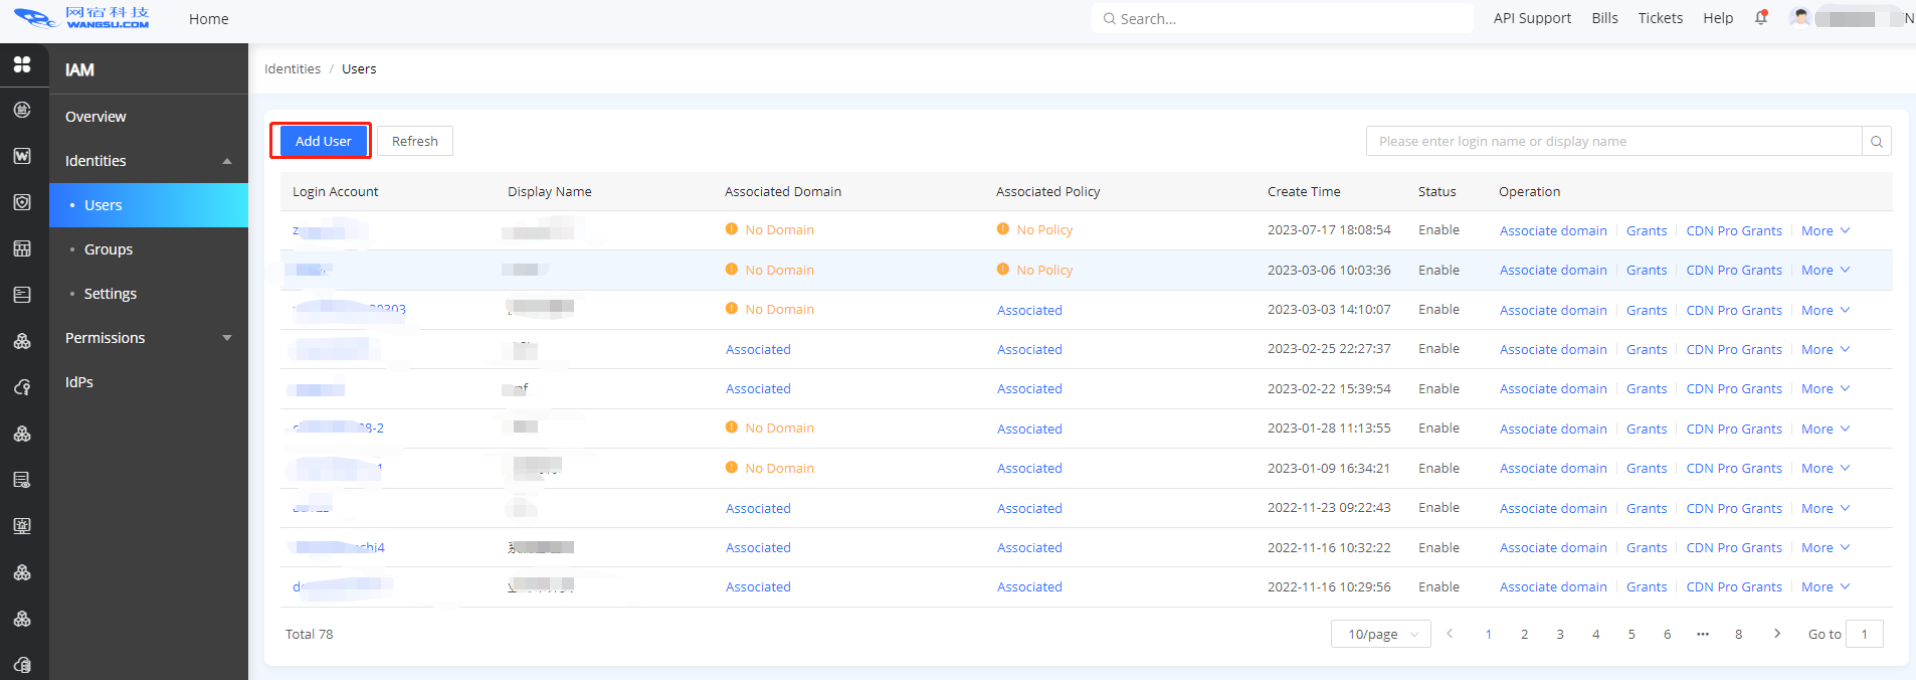
- Edit Sub Account information and submit it, then the policy is created successfully
- Select the domain to be authorized (All domain) and the authority policy to be authorized
- Click Next to authorize the function authority and the authority associated with all domain.
- Follow the above steps to create sub-account xiaozhu1, xiaozeng1, and xiaoyou1 for Xiao Zhu, Xiao Zeng, and Xiao You respectively.
To configure the operation and maintenance department 2, Xiaohuang needs to add or disable domain names, and have resource permissions for why.test44.com and api.chinanetcenter. com
Operations steps
The overall steps are: login in to IAM –> create a sub-account–> create a definition policy–> assign the policy to the sub-account
1. Login IAM
Access Type 1: Directly access the IAM address https://iam.console.wangsu.com ;
Access Type 2: Access the Management Center in the Top right → IAM.
2. Create a definition policy
The required permission is to add and disable domains in Content Acceleration, as well as resource permissions for why.test44.com and api.chinanetcenter.com, broken down into: view the operations authority of adding and Disable Domain , and all the object permissions of why.test44.com and api.chinanetcenter.com. You need to define a policy first, including the permission to view newly added and Disable Domain.
- Click Permission policy Management→Create Permission policy Management
- Select the Product Service Content Acceleration to be authorized, and click Next.
- Find the related functions of Create New Domain and Disable Domain, switch them on and Save. And click Next.
- Fill in the policy Name EditDomain and Description, after submission, the policy is created successfully. At this point, a policy with the authority to view newly added and Disable Domain has been defined .
3. Create a user
- Click User –> Create New User;
- Edit Sub Account information and submit it; at this time, the xiaohuang1 Sub-account is created;
- Select the domain why.test44.com and api.chinanetcenter.com to be authorized;
- Select the policy edit domain, and submit. Then the authorization is complete. The user account is created successfully.