使用Keycloak进行SAML SSO的示例
更新时间:2026-03-25 15:22:18
Keycloak SAML接入操作步骤
Keycloak部署安装
具体可见:安装部署流程
登录keycloak 配置应用
1.管理员或管理账号登录到keycloak平台

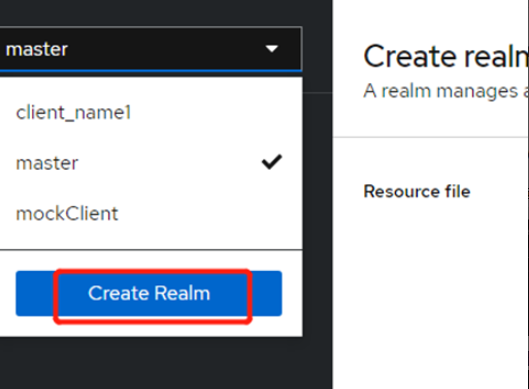
2.创建新的Realm
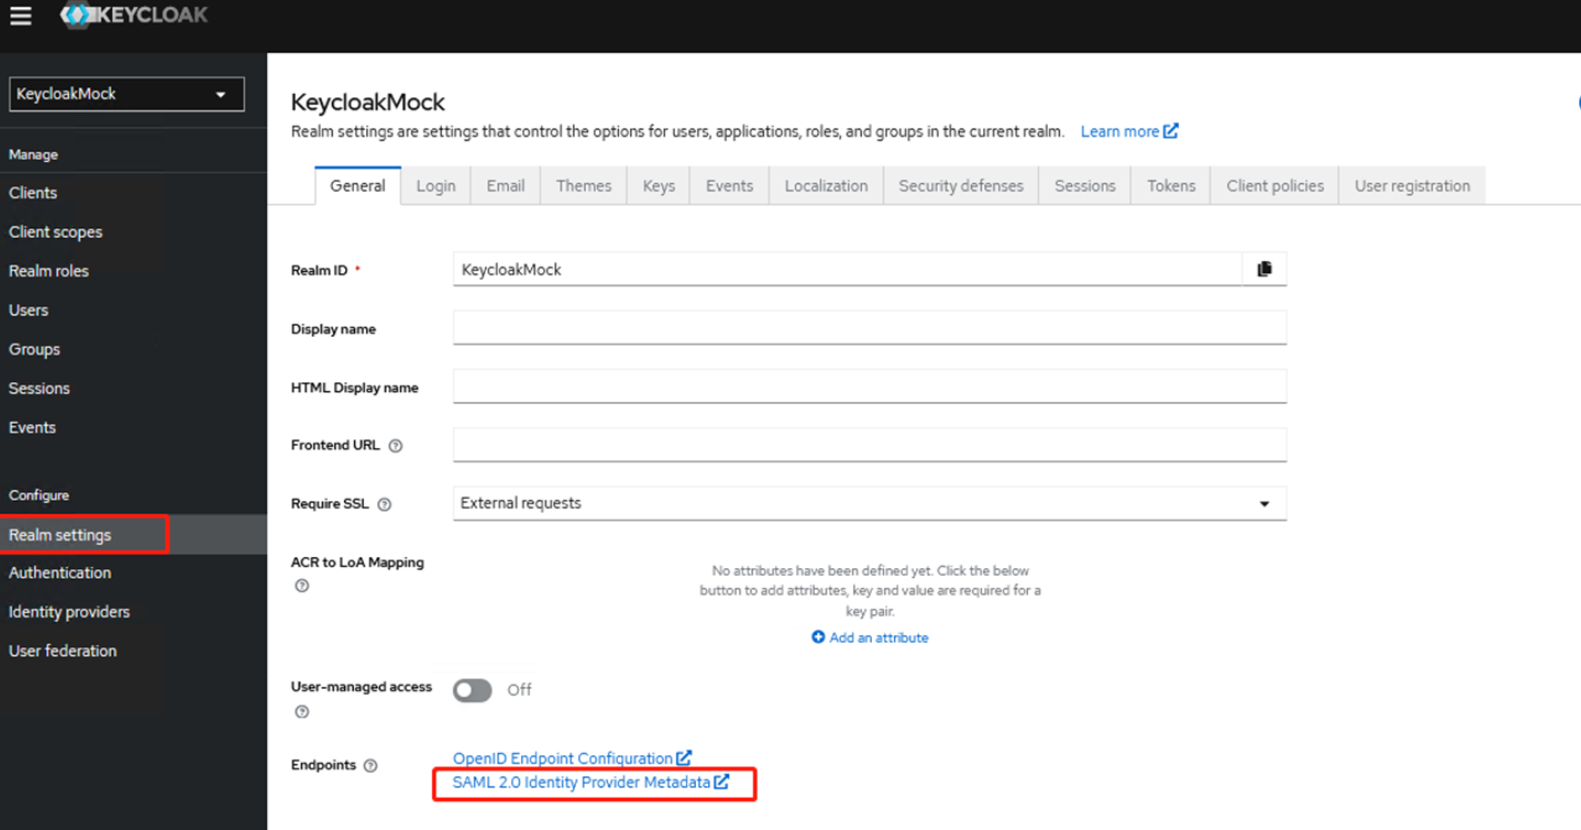
3.创建完成后,进入Realm settings,先下载一份初始元数据,点击 【SAML 2.0 Identity Provider Metadata】
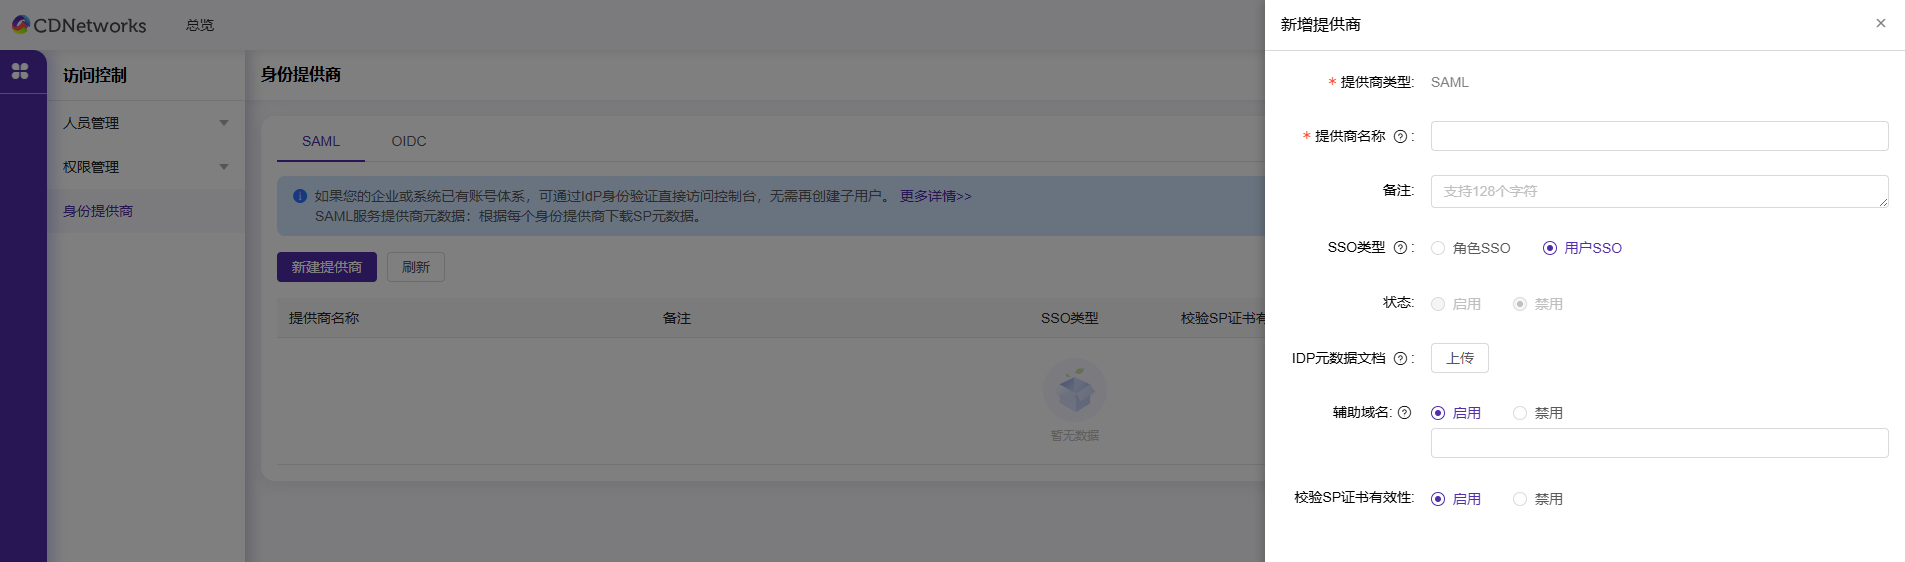
4.登录CDNetworks控制台配置服务提供商
SSO类型选择:用户SSO,并上传IdP元数据。
上传的元数据文件即 步骤3中所下载的初始文件(注意:所有配置完成后,还需要更新一次元数据文档)
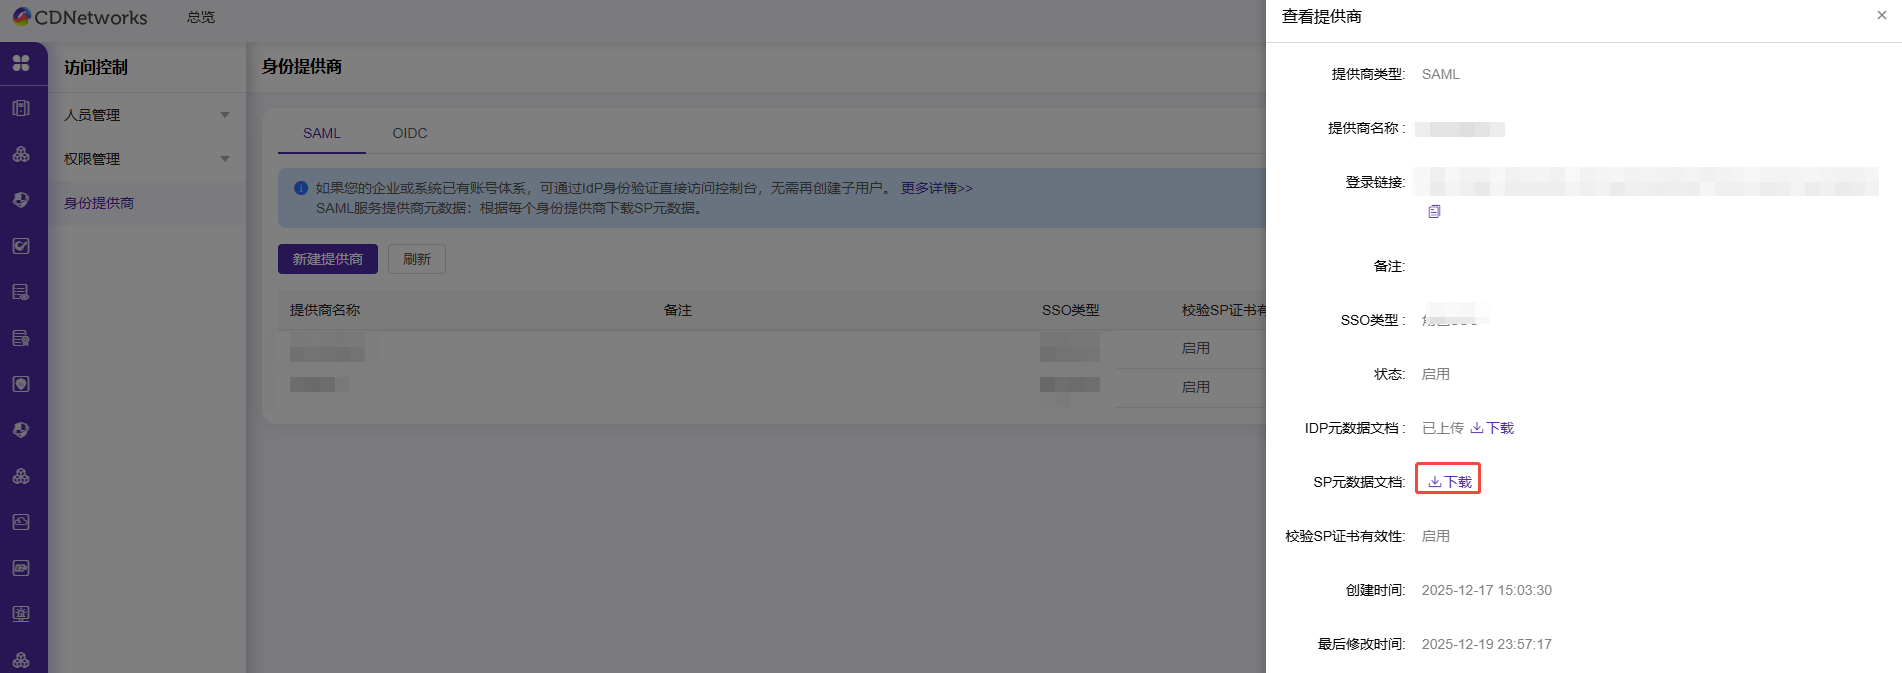
5.获取SP元数据
通过CDNetworks控制台,点击查看进入提供商查看页面,找到 SP元数据文档 进行下载
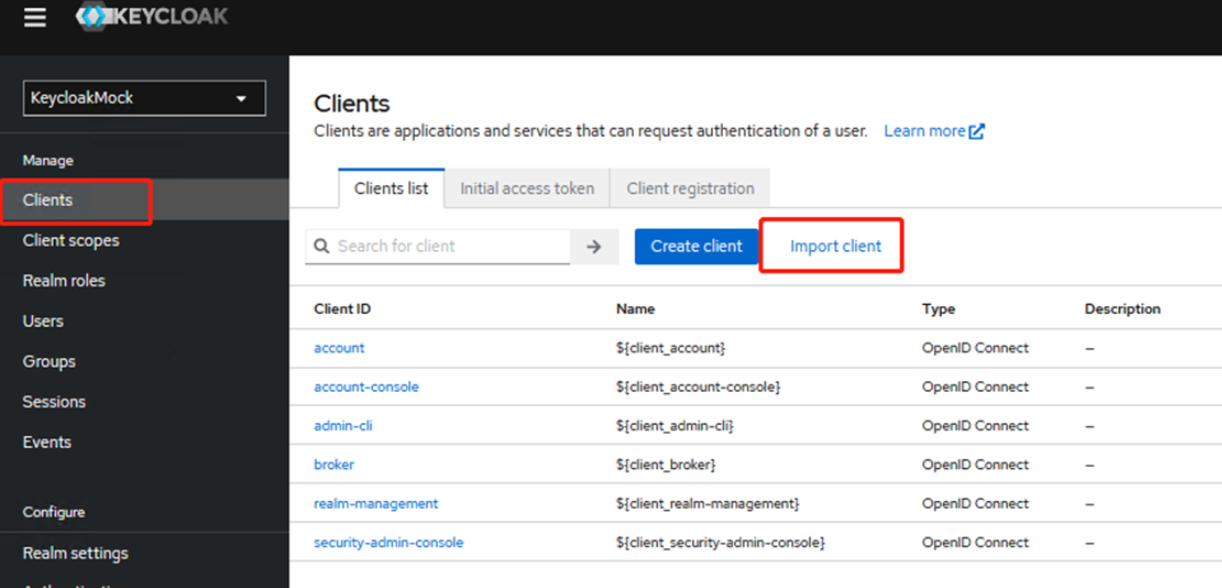
6.创建client,使用import client 可快速创建,上传 SP元数据
注意:import client要求chrome的版本需要高版本要不然会报错Object.hasOwn is not a function错误
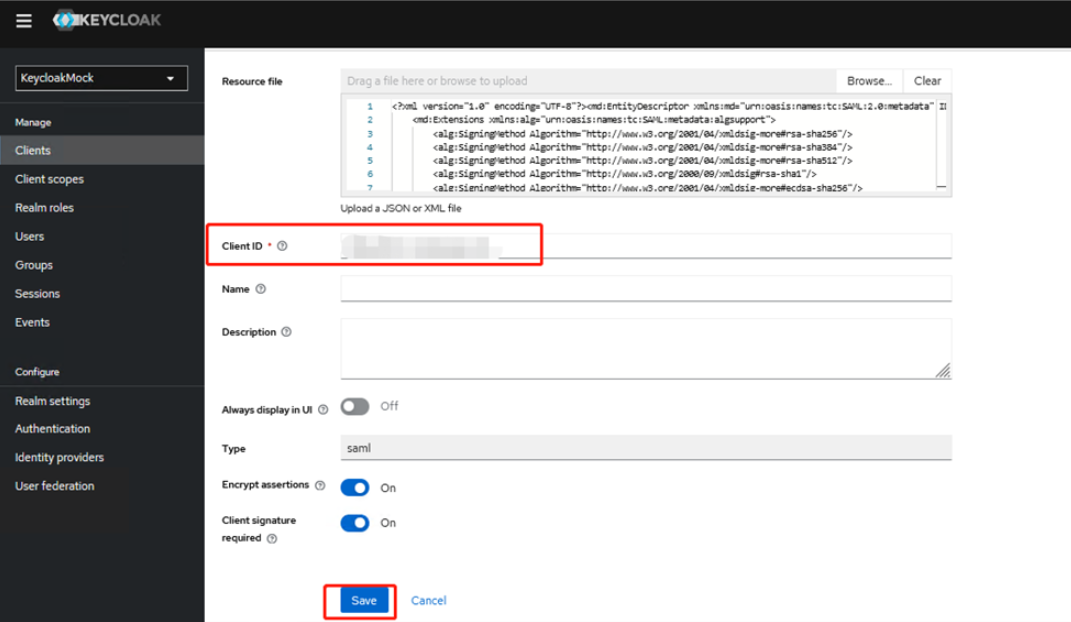
导入成功后,Client ID 会自动识别 ,然后点击 save保存配置,进入客户端配置页面。
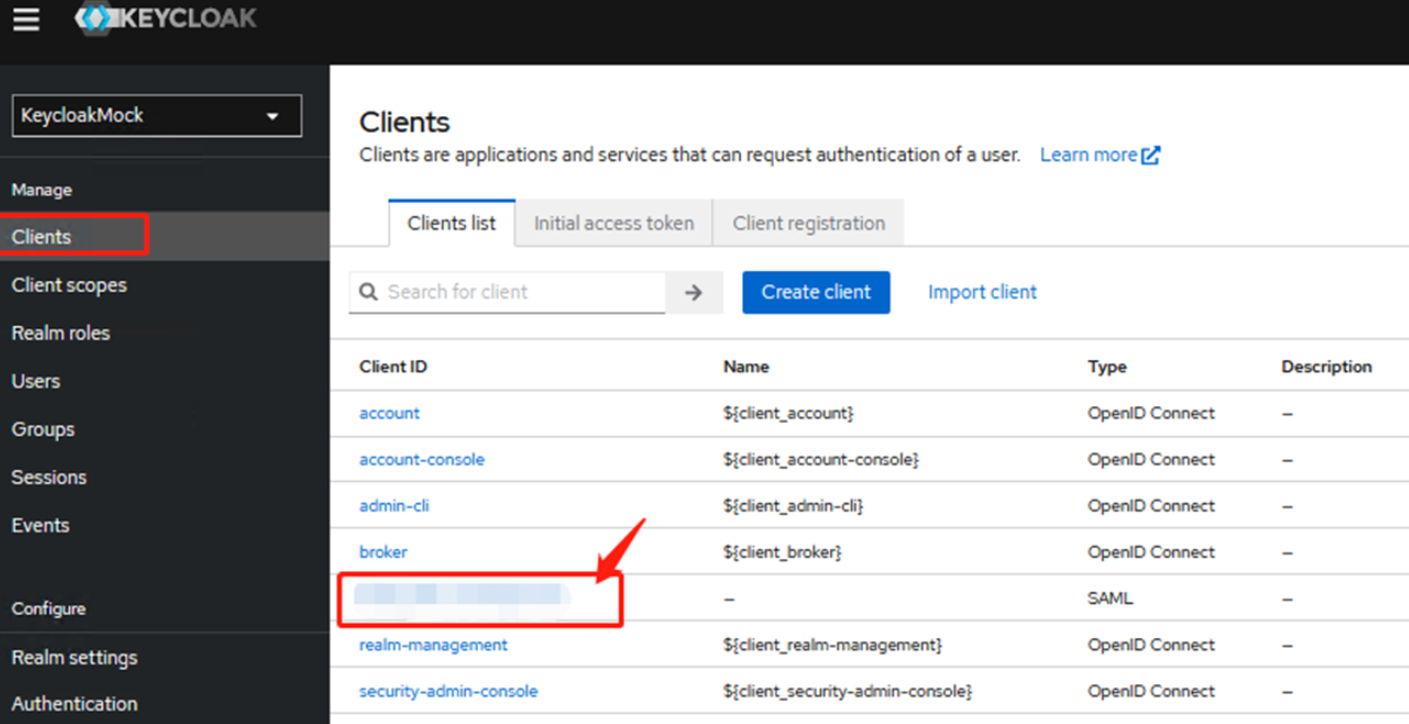
也可从clients 列表中找到对应的Client ID进入配置页面。
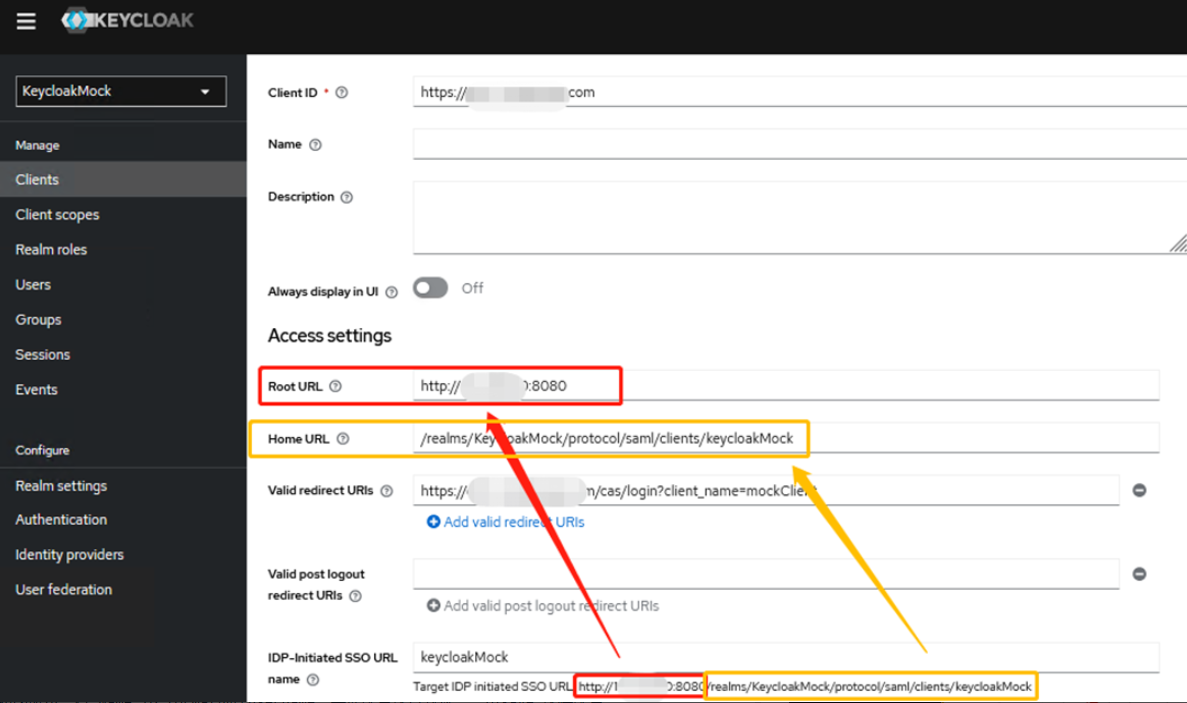
7.配置Access settings
Client ID 和 Vaild redirect URIs 在导入xml文件后会自动生成,当前页主要配置内容为
Root URL 、 Home URL 、 IDP-initiated SSO URL name
填写 IDP-initiated SSO URL name : 可直接填写 Realm 名称,此时会在正下方会出现 Target IDP initiated SSO URL 完整地址
将主域名部分填写到 Root URL , 将URI 部分填写到 Home URL,如图所示:
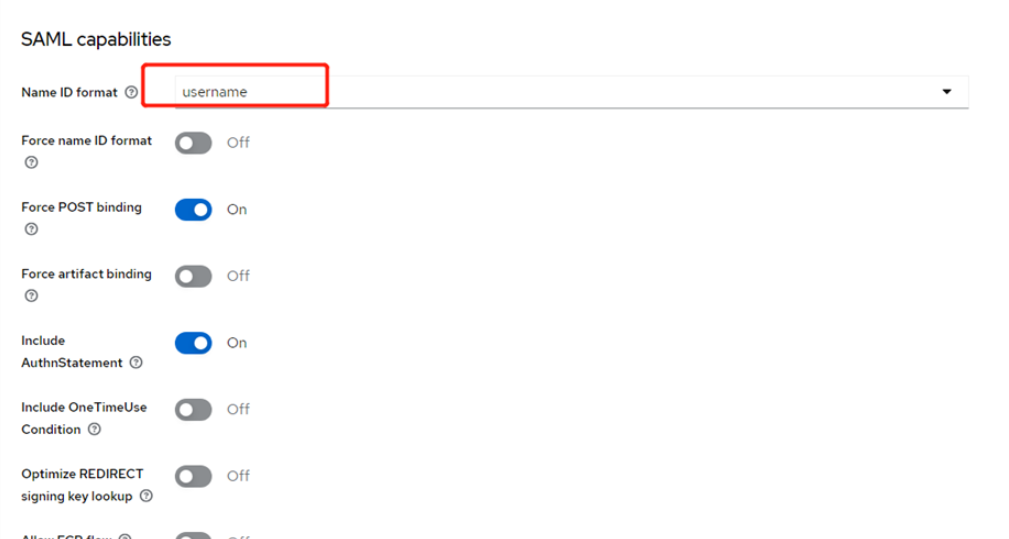
8.配置 SAML capabilities
如图所示,将 Name ID format选择username,其他配置保持默认,点击save 保存配置。
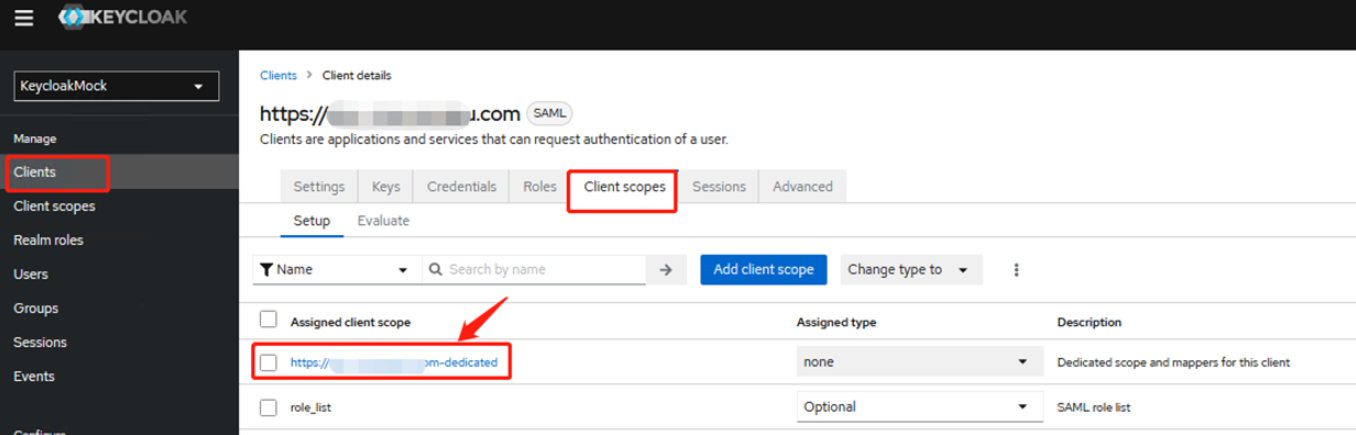
9. 进入 Client scopes页签修改配置
将role_list 的 Assigned type 从 default 修改为 Optional。

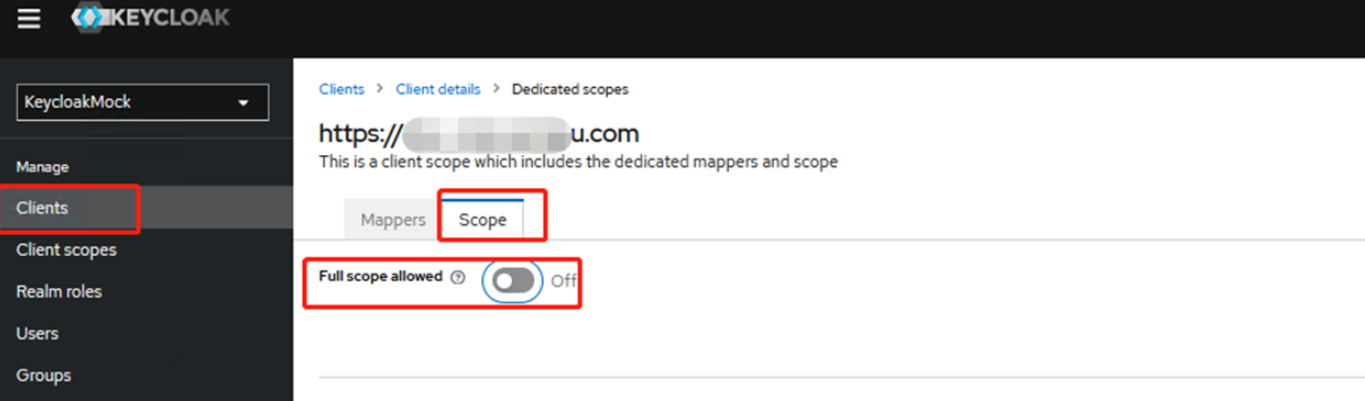
进入当前client端的 dedicated配置文件,将Full scope allowed设置off,如图所示:
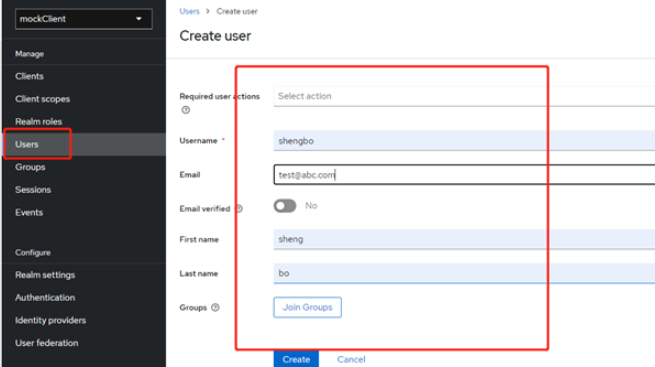
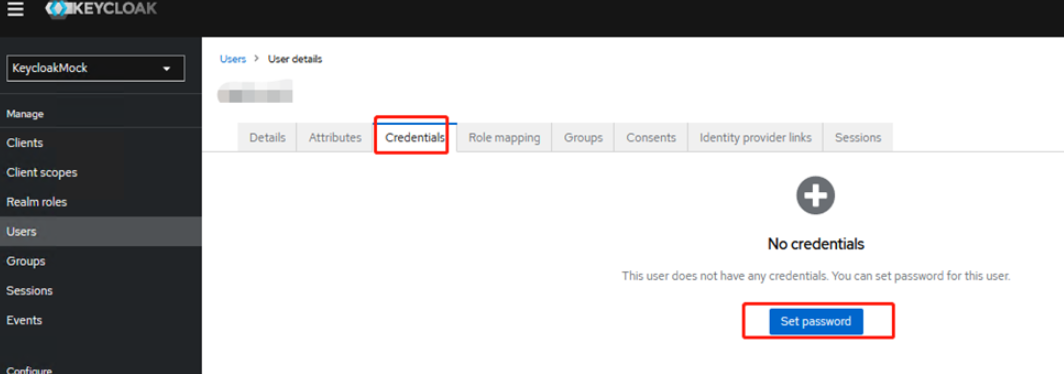
10.创建登录keycloak的用户,在Users功能中创建用户,并为其设置密码,此处创建的Username需确保在CDNetworks控制台中存在相同的账号
创建用户方法可参考文档:创建用户
在Credentials页签中,可进行密码设置
11.完成所有配置后,重新下载一份元数据文件更新到CDNetworks控制台,同 步骤3

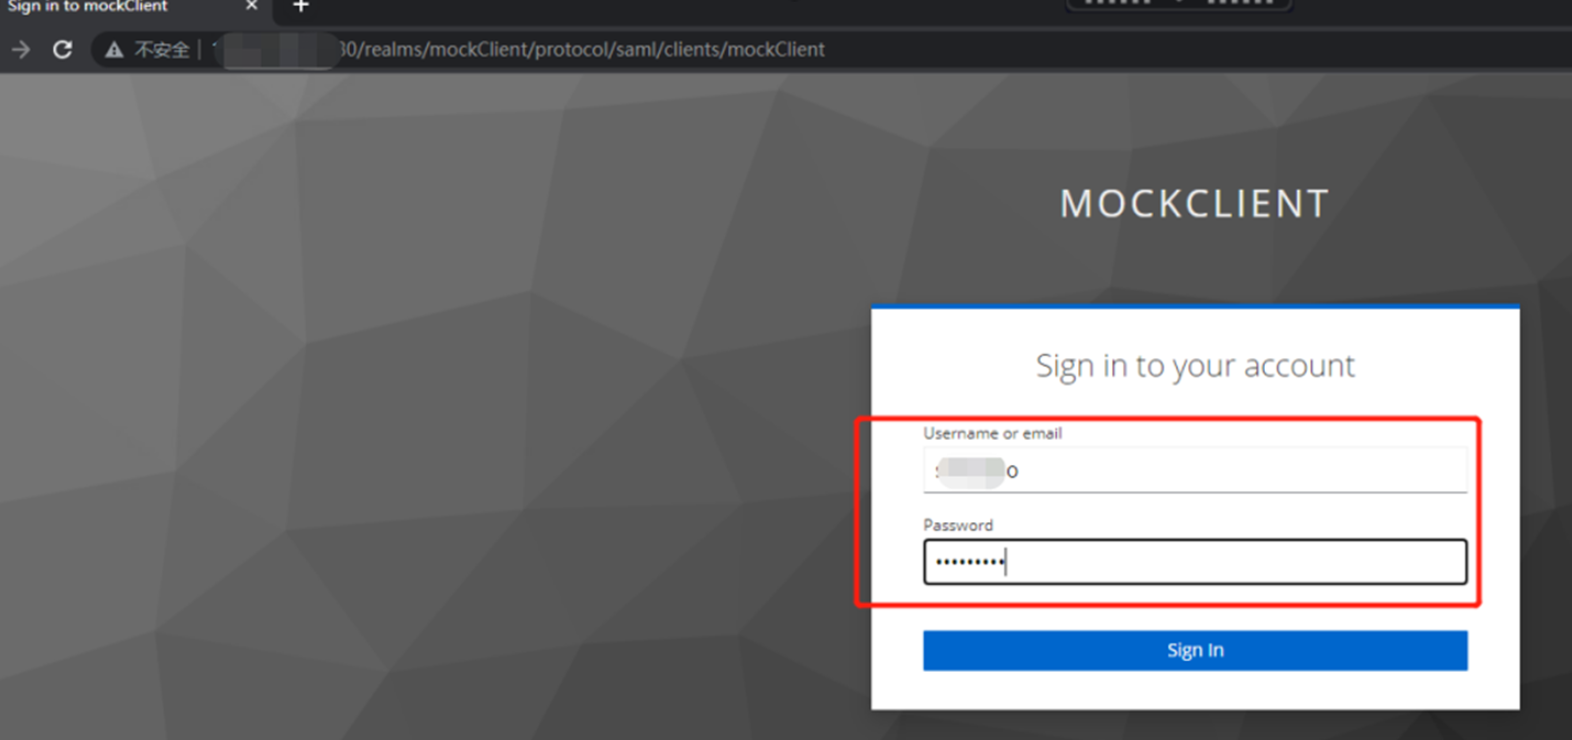
访问测试
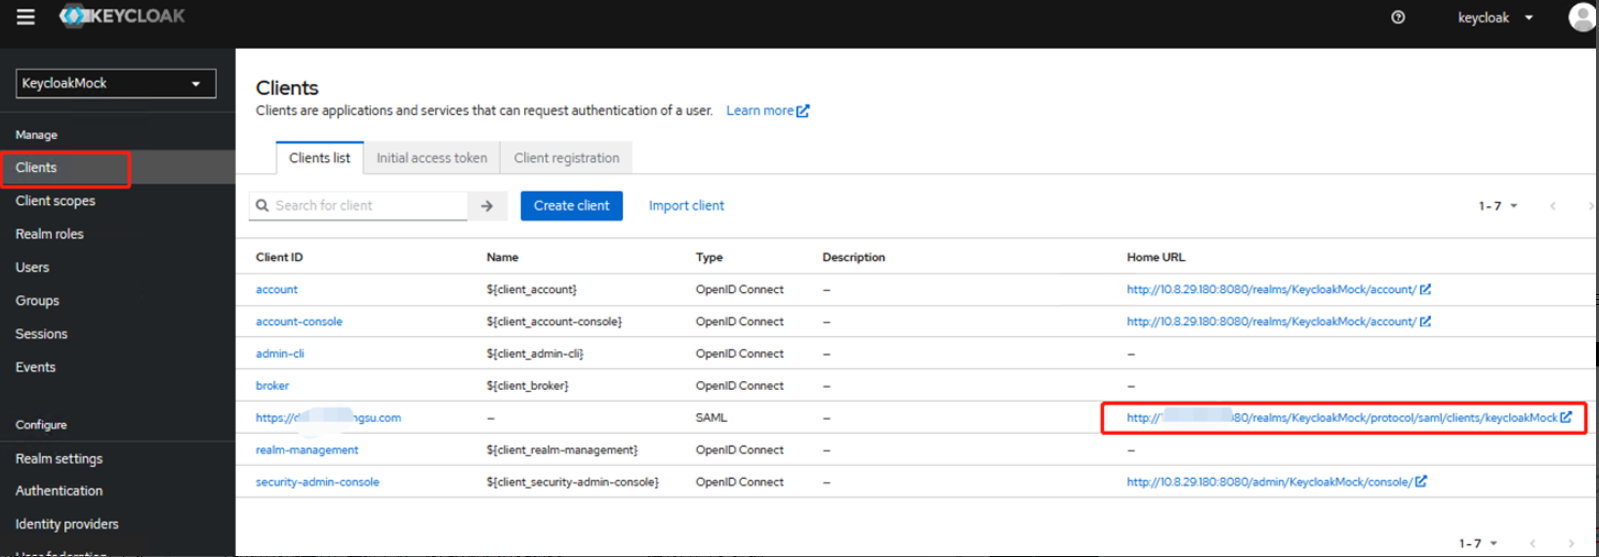
测试登录,在Clients列表中,找到新增的Client ID 对应的Home URL ,点击访问即可跳转到keycloak登录页
输入创建的user及密码后,观察是否能正常跳转到CDNetworks控制台